Editing Lights Using the Lighting Tools Parameter Widget
Once a light has been created, a light parameter widget is displayed containing GafferThree light parameters you can access and edit, without leaving the Hydra Viewer. The light parameter widget is visible while the light is selected. If multiple lights are selected, the lights are stacked in the parameter widget.
Note: To edit a light, you must have the correct GafferThree selected in the GafferThree dropdown, that is, where the light was created. Otherwise you can use per-shot overrides to edit a light in a different GafferThree node. For more information, see the Shot Level Overrides section of this topic.
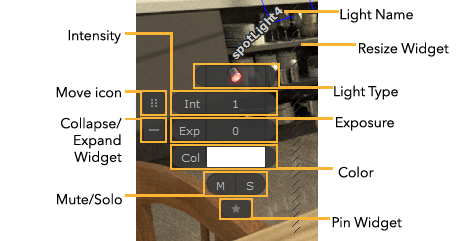
The default light widget controls and parameters are:
- Click and drag on the move icon to move the light widget around the Hydra Viewer.
- Click the expand/collapse buttons to expand/collapse the light widget.
- Int - The light intensity.
Click and drag in the value field to increase and decrease the intensity. You can also click and type in the value field to specify a value. - Exp - The light exposure.
Click and drag in the value field to increase and decrease the exposure. You can also click and type in the value field to specify a value. - Col - The light color.
Click on the color to open a color adjustment panel and choose a light color. - M - Mute light.
Click to toggle. When a light is muted it is omitted from renders. - S - Solo light.
Click to toggle. Only soloed lights are included in renders. All lights which are not solo-ed are muted and therefore omitted from renders. - Click the star button to pin a light parameter widget, preventing the light parameter widget from closing when the light is deselected.
- Click and drag the hatched column on the right of the widget to resize it.

Note: For full information about the GafferThree light parameters, see Getting to Grips with the GafferThree Node and the GafferThree reference guide.
Customizing the Light Widget in the Lighting Tools
The light parameters widget provides quick access to the Intensity, Exposure and Color parameters for your lights. You may want to customize this widget to display more parameters, specific to the light type you create. This allows you to further streamline your workflow by adding the parameters you use the most.
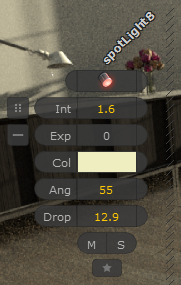
A customized light parameter widget
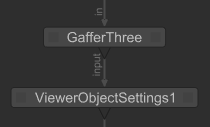
The light parameters widget can be customized using the ViewerObjectSettings node.
Note: You can also choose to hide certain lights' arrowheads, when they are not selected, using the hideHandle parameter in a ViewerObjectSettings node parameters.
For more information, see the ViewerObjectSettings reference guide.
- Create a ViewerObjectSettings node and place it in your Node Graph underneath your GafferThree node.
- Open the ViewerObjectSettings Parameters.
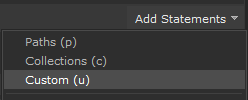
- If you want to affect just one light, click Add Statements > Paths.
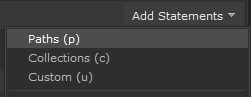
If you want this statement to affect all new and existing lights of a specific type in your scene, you can use an expression to access the attribute defining the light type. For this select Add Statements > Custom.
- For single lights, MMB drag the Scene Graph location for the light you want to be affected, into the Paths field.
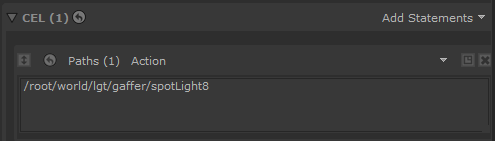
In this example, only spotLight8 is affected.
For multiple lights, type an expression for the light types you want to be affected.
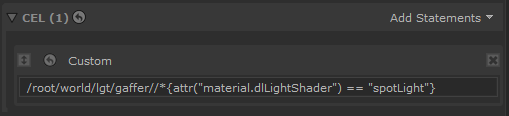
In this example, the expression targets all lights under /root/world/lgt/gaffer/ with a material.dlLightShader attribute called spotLight. Therefore, all new and existing 3Delight Spot Lights are affected.
- Navigate to the Lighting Tools section in the ViewerObjectSettings Parameters.
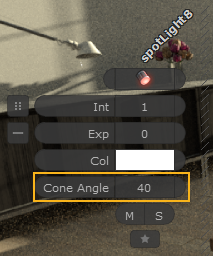
- Under parameters, in the first text field, enter the path of the parameter you would like to add to the light parameter widget.

The parameter is now accessible from the parameter widgets.
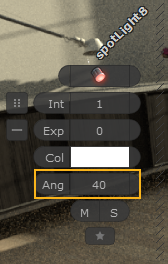
- In the second text field, enter the label you would like to appear on the light parameter widget for this parameter.
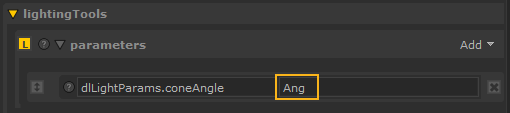
The label is updated on the light parameter widget.
Note: The label field is optional. If a label is not provided, the parameter's original label is used.
You can add as many extra parameters as needed to allow you to work efficiently when using Lighting Tools.
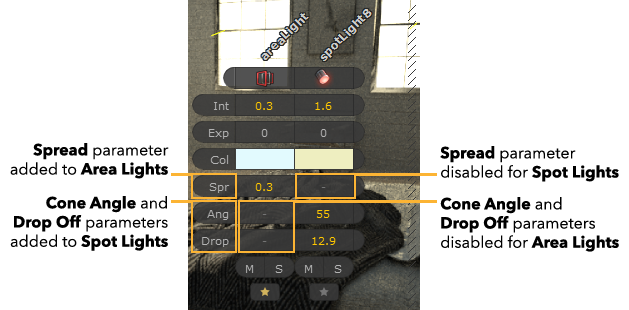
If you have two lights selected and have added extra parameters, the parameters for all the lights are visible but you can only edit the parameters for the light types that they exist in. If a parameter does not exist in a certain light type, it is disabled for that light type and marked with a dash.
Shot Level Overrides
It is common to work with multiple GafferThree nodes in one scene. This enables artists to set up lighting for the entire sequence in one GafferThree node, and make per-shot overrides in other GafferThree nodes.
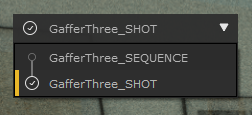
Lighting Tools makes it easy to switch between different GafferThree nodes, they are all displayed in a dropdown list in the Hydra Viewer when Lighting Tools is enabled.
Depending on which light is selected, a symbol is displayed next to the selected GafferThree.
|
|
The selected lights can be edited and all edits can be recorded in the selected GafferThree node. |
|
|
The selected lights parameters cannot be edited in the selected GafferThree node as it does not have the ability to record edits. The selected lights can be edited in an upstream GafferThree node. Transform edits can be made from the selected GafferThree node and recorded in the upstream GafferThree node. Parameter edits, such as Intensity and Exposure, can only be made in an upstream GafferThree node. |
|
|
The selected lights cannot be edited either in this GafferThree node or any upstream GafferThree node. This means the selected light has no creation or edit package, or it is inside a locked node, such as a LiveGroup. |
|
|
This symbol represents a combination of the This means one or more selected lights can be edited in the selected GafferThree node, and one or more selected lights can be edited in an upstream GafferThree node. |
|
|
This symbol represents a combination of the This means one or more selected lights can be edited in the selected GafferThree node, and one or more selected lights cannot be edited in this, or any upstream GafferThree node. |
|
|
This symbol represents a combination of the This means one or more selected lights can be edited in an upstream GafferThree node, and one or more selected lights cannot be edited in this, or any upstream GafferThree node. |
|
|
This symbol represents a combination of the This means one or more selected lights can be edited in the selected GafferThree node, one or more selected lights can be edited in an upstream GafferThree node, and one or more selected lights cannot be edited in this, or any upstream GafferThree node. This symbol implies there are more than three lights selected. |
To edit a light outside of it's original GafferThree node:
- Select the light you want to edit.

- In the GafferThree dropdown, choose the GafferThree you want your edits to be recorded in.
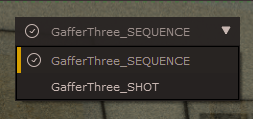
Note: The GafferThree you choose must be downstream from the original GafferThree node.
The GafferThree node is marked with a
 symbol.
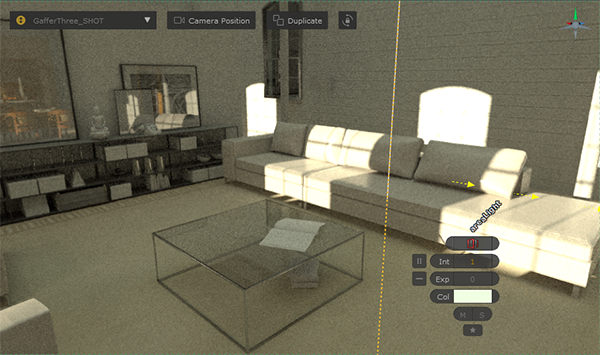
- Right-Click the light parameter widget and select Adopt for Editing.
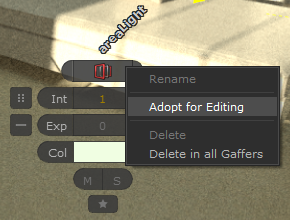
The GafferThree node is marked with a
 symbol and you can now make edits to the light through the parameter widget.
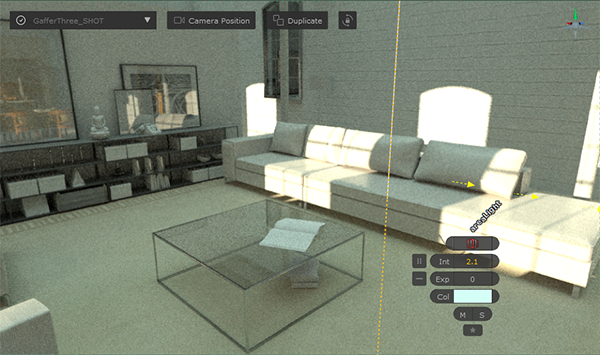
Note: These edits do not affect the light parameters in the original GafferThree node.
The GafferThree dropdown provides a breadcrumb trail of edits so it is clear what changes have been made.