Search is based on keyword.
Ex: "Procedures"
Do not search with natural language
Ex: "How do I write a new procedure?"
Contact Support
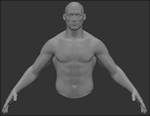
Lighting
You can change the lighting on the main mesh by clicking on the Project Controls toolbar:
|
Flat |
Basic |
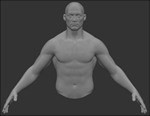
Basic with Shadows |
Full |
Full with Shadows |
|---|---|---|---|---|
|
|
|
|
|
|
|
|
|
|

Mari has five lights: four basic point lights, which appear on the drawing canvas, and one environment light.
You can set the light details in the Lights palette. Mari uses these in the Basic and Full lighting modes:
• To turn a light on or off, click on the ![]() icon in the list, or use the General > On checkbox.
icon in the list, or use the General > On checkbox.
• To change a light, click on it in the Lights list, and then set the color and strength.
• Select whether the light is fixed to the Scene or Camera.
Video: Watch the demo.
This video shows the workflow using Mari 3. Even though the Mari 4 workspace is different, the workflow remains the same. To have a look at the main UI differences, see Mari 3.3 vs 4.0.
• To move a light around, select the Transform Selected Objects tool ![]() , then click and drag the light around on the canvas, or adjust it with the transform handles.
, then click and drag the light around on the canvas, or adjust it with the transform handles.
• To move a light to the camera position, click on the ![]() icon on the Lights palette, or right-click on the light and select Move to Camera Position.
icon on the Lights palette, or right-click on the light and select Move to Camera Position.
• You can control Shadow Rendering through the option on the Lights palette.
• If you want to enable shadow processing, you need to enable the Allowed checkbox under Preferences > GPU | Shadow Maps. By default, this preference is disabled.