Search is based on keyword.
Ex: "Procedures"
Do not search with natural language
Ex: "How do I write a new procedure?"
Contact Support
Exporting Channels
To export the current channel, select a single channel to export and do one of the following:
|
Select from the Channels menu |
or right-click on the Channels palette and select |
|
Export > Export Current Channel |
Export > Export Current Channel |
|
Export Flattened> Export Current Channel Flattened |
Export Flattened> Export Current Channel Flattened |
The Export dialog box displays.
Note: The Named files tab does not display if your model contains more than 20 patches.
To export all channels in your project, do one of the following:
|
Select from the Channels menu |
or right-click in Channels palette and select |
|
Export > Export All Channels |
Export > Export All Channels |
|
Export Flattened > Export All Channels Flattened |
Export Flattened > Export All Channels Flattened |
The Export dialog box displays.
To export everything in your project, including all layers, channels, and patches, do one of the following:
|
Select from the Channels menu |
or right-click in Channels palette and select |
|
Export > Export Everything |
Export > Export Everything |
|
Export Flattened > Export Everything Flattened |
Export Flattened > Export Everything Flattened |
The Export All dialog box displays.
Note: All of the methods for exporting textures shown above follow the same instructions once they reach the Export dialog.
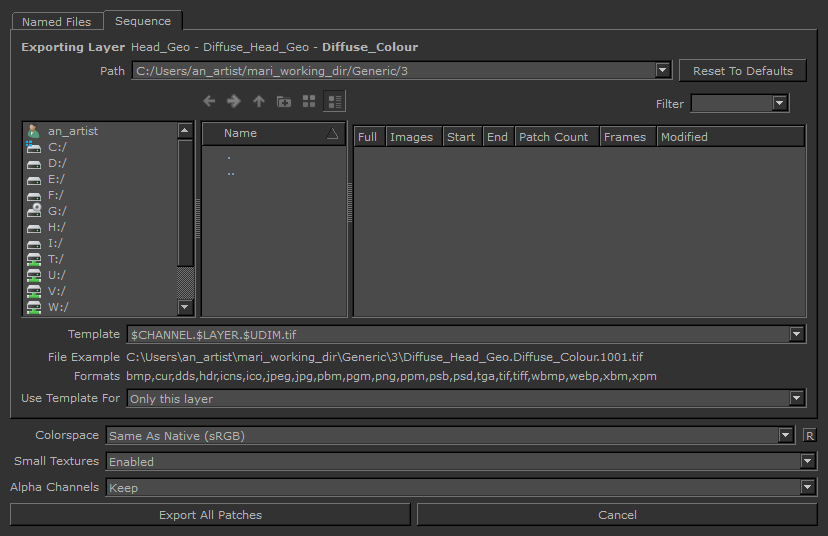
| 1. | On the Sequence tab, enter the Path where you want to store the export, or use the browse panes (the navigation panes below) to browse to it. |
Tip: Make sure you check the path and name carefully, especially if you have been swapping between assets - Mari defaults to the last place you've exported. Don't risk overwriting your textures!
| 2. | If you are looking for a specific folder or file, you can use the Filter field to specify a name or file format to search for. |
| 3. | For the Template, either use the default filename template or edit it as required. You can also specify whether to use the template for Only this layer or Everything. |
| 4. | Set the Colorspace in which you want to export the data. By default, Mari selects Automatic, which is determined by the file name, size, and type of data in the channel. |
| 5. | Decide whether Small Textures is enabled or disabled. If enabled, Mari exports any patches that you haven't painted yet, or have painted as a single color, as 8x8-pixel textures. When you start to paint on a particular patch, Mari exports it as the correct size. |
| 6. | Choose to either Keep or Remove alpha channels when exporting channels. This can help decrease the resulting file size when exporting. |
| 7. | Click Export All Patches (to export all patches in the current channel) to export with the settings you’ve selected. |
Note: The steps above assume you are exporting a sequence of patches with the udim number (1001, 1002, etc.) in the file names. For more information on how UDIM numbers are allocated to patches, please see the section on Using UDIM Values.
Note: If you'd rather assign individual files to each patch, you can do so on the Named Files tab of the Export Channel dialog. Click the buttons on the right to open a file browser and pick a file for each patch. Then, click Export All Patches to export the files. Note that by default the Named Files tab doesn't display if you have more than 20 patches in your object. To change this number, you can use the Patch Cutoff preference or set the MARI_NAMEDFILEIMPORT_SEQUENCELIMIT environment variable to a new value.
Note: As the options above only export channels one dialog at a time, to export multiple channels at once, see Export Manager Dialog.