Search is based on keyword.
Ex: "Procedures"
Do not search with natural language
Ex: "How do I write a new procedure?"
Contact Support
Navigating Inside the Node Graph
As node trees grow in complexity, you need to be able to pan to or frame a particular cluster of nodes quickly. The Node Graph offers a couple of methods for doing so.
In Mari's Node Graph, you can either navigate from left-to-right (default), also called No Port List, or top-to-bottom, also called Show Port List. You can set the navigation type in the Mari Preferences Dialog.
You can also switch the navigation of selected nodes directly in the Node Graph, either use Shift+S or right-click and select Node Graph > Edit > Toggle Port List.
Panning
Panning with the Mouse
To pan with the mouse, press the middle mouse button and drag the pointer over the Node Graph or hold Alt and drag. The node tree moves with your pointer.
Panning with the Map
If your Node Graph is larger than the visible workspace, a navigator map automatically appears in the bottom-right corner.
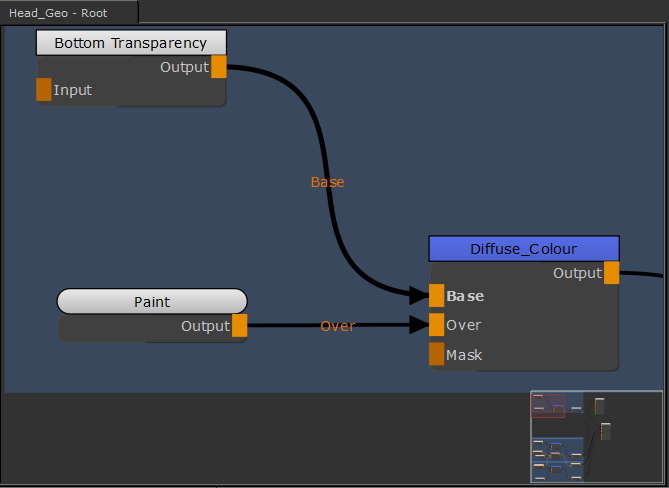
The map shows you a miniature view of the entire Node Graph and the red rectangle shows the portion of the Node Graph that you see within the workspace borders.
To pan with the map, drag the red rectangle to pan to a different view of the Node Graph.
When the whole Node Graph is contained within the window border, then the map automatically disappears.
Zooming and Fitting in the Node Graph
To zoom with the mouse, either:
• use the mouse scroll wheel, or
• hold Alt and middle-mouse drag left and right.
Note: In many Linux windows managers, the Alt key is used by default as a mouse modifier key. This can cause problems in 3D applications where Alt is used for camera navigation in 3D environments.
You can use key mapping to assign the mouse modifier to another key, such as the ![]() (Super or Meta) key, but the method changes depending on which flavor of Linux you're using. Please refer to the documentation on key mapping for your particular Linux distribution for more information.
(Super or Meta) key, but the method changes depending on which flavor of Linux you're using. Please refer to the documentation on key mapping for your particular Linux distribution for more information.
You can set whether to zoom according to the cursor's position or the center of the Node Graph. To set the zoom preference:
| 1. | In the menu bar, navigate to the Edit > Preferences > Node Graph tab. |
| 2. | In the General section, from the Zoom To dropdown menu, select either Center or Cursor. |
To center the node tree, press A with the Node Graph in focus. To center certain selected nodes, press F with the Node Graph in focus.
Note: Pressing F without selecting any nodes produces the same result as pressing A.
Searching for Nodes
Mari allows you to look for nodes that are currently used in the Node Graph. To look for a node:
| 1. | Press J. |
OR
Right-click the Node Graph and select Edit > Search Node.
The Search box pops up in the Node Graph.
| 2. | Enter the node name or part of the node name you're looking for. |
The nodes containing the letters you've entered display in the dropdown menu.
| 3. | Select the required node. |
Mari takes you directly to the selected node in the Node Graph and highlights it.
Note: You can also do a wildcard search, which is based on character pattern, using the character *.
For instance, if you're looking for nodes that contain the letters b and d in that order, enter b*d in the Search box, this displays any BRDF, Backdrop, or Object Space Linear Gradient nodes in existence, providing they have not been renamed. Any nodes that you have renamed, which contain the letters b and d in the specified order, also appear in the dropdown menu.
Cleaning up the Node Graph
Sometimes you may find that your node tree becomes disorganized as you’re creating and removing nodes. There’s a quick fix you can use to tidy up your tree:
| 1. | Right-click in the Node Graph. |
| 2. | Select Autoplace. |
The nodes in the tree are re-organized for clarity.
Tip: If you make a selection of nodes before using Autoplace, only the selected nodes are re-arranged.