Search is based on keyword.
Ex: "Procedures"
Do not search with natural language
Ex: "How do I write a new procedure?"
Contact Support
Painting Through and Clone Stamping
This lesson introduces using images to create textures in Mari. This includes “painting through” an image onto your model and “clone stamping” part of an image onto your model.
Before Starting This Lesson
This lesson assumes:
• a basic knowledge of computers and graphics applications
•
• that you know how to start Mari (see Launching on Windows, Launching on Linux, or Launching on Mac OS X)
• that you have completed Setting up a Project, Setting the View, and Painting
Resources Needed
To complete this lesson, you need access to a computer that can run Mari, and the following sample files:
• 1-Blacksmith - the Mari project file you created in Tutorial 1 and used in Tutorial 2 and Tutorial 3
• Tattoo.png - an image of a tattoo, in your Mari tutorial directory
How Long Should It Take?
Plan on spending about 25 minutes to complete this lesson.
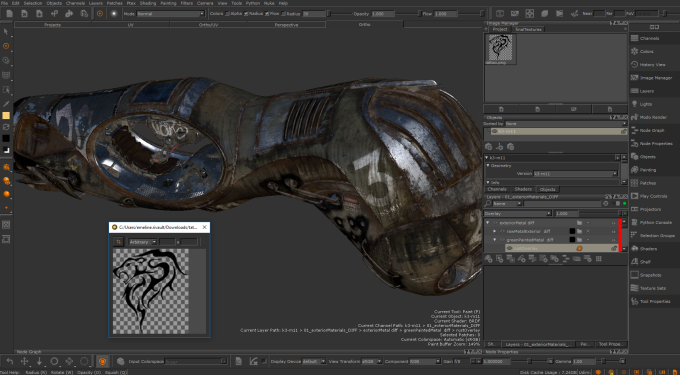
About Painting from Images in Mari
Like with other paint programs, Mari lets you superimpose image files onto the surface of an object. To manage image files, Mari includes the Image Manager palette. To paint with images you've loaded into the Image Manager palette, Mari has two main tools: Paint through and Clonestamp:
• The Paint through tool (![]() ) lets you position an image over an object, and then as you paint, copy from the image directly onto what's under the brush.
) lets you position an image over an object, and then as you paint, copy from the image directly onto what's under the brush.
• The Clonestamp tool (![]() ) lets you position an image alongside an object, with a source point on the image relative to where the brush is on the object. Then as you paint, the source point on the image moves in sync with the brush on the object, and Mari copies from the image onto the corresponding spot under the brush on the object.
) lets you position an image alongside an object, with a source point on the image relative to where the brush is on the object. Then as you paint, the source point on the image moves in sync with the brush on the object, and Mari copies from the image onto the corresponding spot under the brush on the object.
You can also clone stamp from painting already on an object, in the paint buffer, or in another channel.
Opening Your Project
| 1. | Start Mari. |
The Mari workspace displays.
| 2. | On the Projects tab, double-click on your 1-Blacksmith project to open it. |
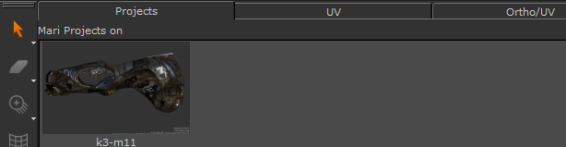
Your project opens and switches to the Ortho view.

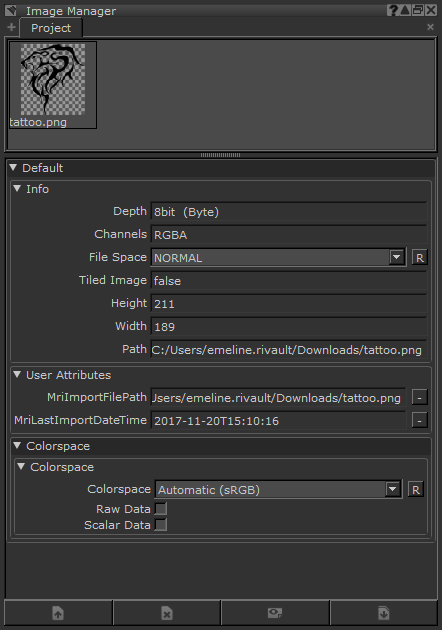
Loading an Image
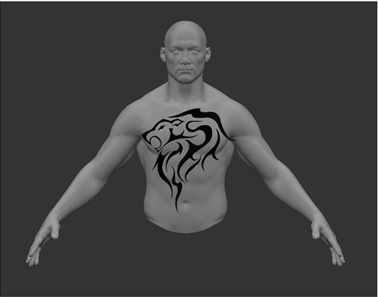
For both painting through and clone stamping, we'll use an image of a tattoo that looks like this:
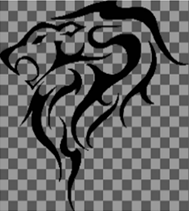
We'll start by loading that image in Mari's ImageManager palette.
| 1. | To open the ImageManager: |
• click the ImageManager tab if it is already open but hidden (as in the default Mari layout),

• from the View menu, select Palettes > ImageManager, or
• right-click in the toolbar area and select ImageManager from the dropdown menu. The ImageManager palette displays.
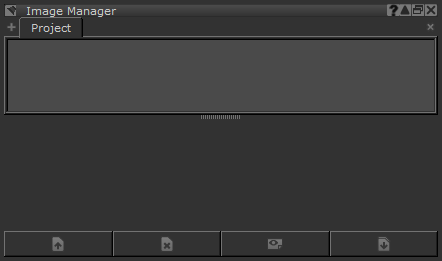
| 2. | To load an image, click |
The Openan Image dialog box displays.
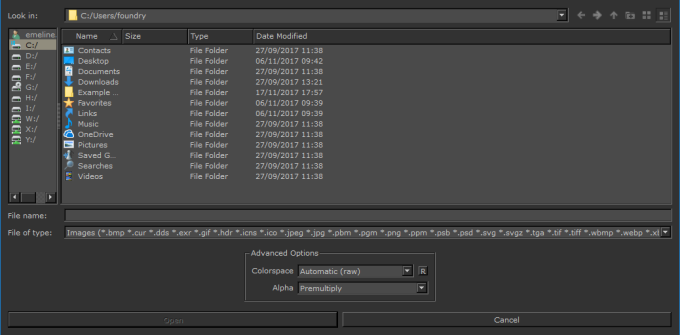
| 3. | Navigate to your tutorial folder, and select Tattoo.png. |
The Tattoo.png image displays in the ImageManager.
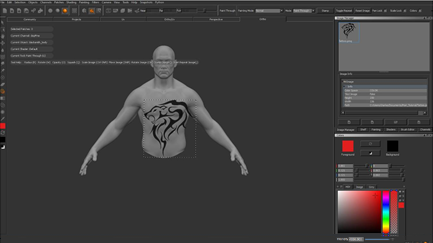
Paint Through
Painting through an image basically involves:
• selecting the PaintThrough tool,
• dragging an image onto the canvas, and
• painting.
| 1. | Select the PaintThrough tool by: |
• clicking ![]() on the toolbar, or
on the toolbar, or
• pressing U.
| 2. | Drag the image from the ImageManager and drop it onto the model. |
| 3. | Move and resize the image: |
• To resize the image, hold down Ctrl/Cmd+Shift, click and drag.
• To move the image around the canvas, hold down Shift, click and drag.
• To rotate the image, hold down Ctrl/Cmd, click and drag.
Tip: The Tool Properties palette includes many options for manipulating paint-through images.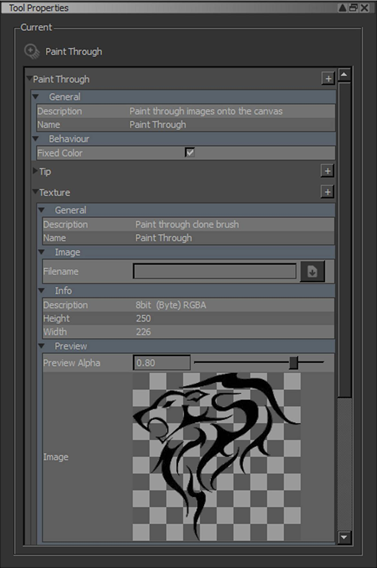
You can also double-click the image in the Image Manager, and crop a smaller portion to use for painting through and clone stamping.
Experiment: Try sizing, moving and rotating the image. See if you can get it to look like this: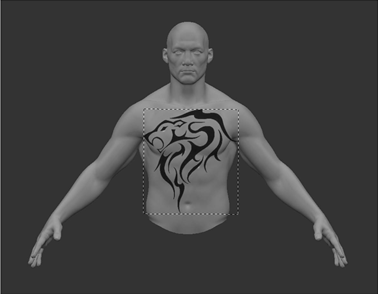
| 4. | Paint through the image onto the model (hold down the left mouse button and move, as you do in any standard paint program). |
| 5. | When you're done painting through, press P to go to the Painting tool to see just the painted-on object. |
Tip: To hide the overlying image, press the ? (question mark) key. To paint the whole image onto the model in one step, press the ' (apostrophe) key. To repeat the source image (so you can paint past the edges and have the source image repeat), press the ; (semicolon) key.
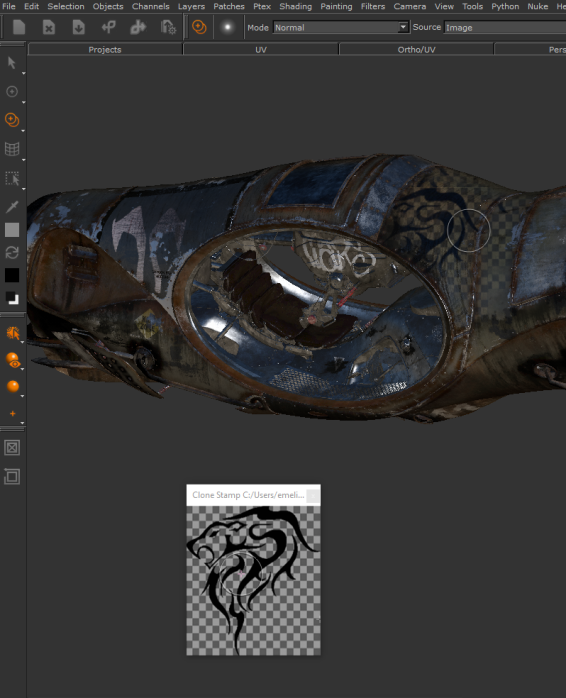
Clone Stamp
Clone stamping is like painting through, but the image does not have to sit directly on top of the model.
| 1. | Clear the painted-through textures: |
• from the Painting menu, select ClearPainting, or
• click ![]() on the toolbar.
on the toolbar.
This removes any unbaked painting on the model. In this case, the model re-displays as imported.
| 2. | In the Tools toolbar, select the CloneStamp |
| 3. | Drag the image from the ImageManager and drop it onto the canvas. |
The image displays in a separate window.
| 4. | Re-size and position the image window alongside your model. To scale the image within the window, hold down Alt, right-click, and drag. To pan the image, hold down Alt, left-click, and drag. |
| 5. | To select the source point for cloning on the image, press Ctrl/Cmd and click. |
Once you start painting, a magenta + displays the source point on the image.
| 6. | Once you've selected the source, you can paint. The cursor moves on the image in sync with the cursor on the model as it clone stamps from the image onto the model. |
Tip: You can also clone stamp from existing textures - painted on the surface of the object, in the paint buffer, or painted in another channel. To select a clone source, use the Source menu in the Project toolbar and select from the origins available.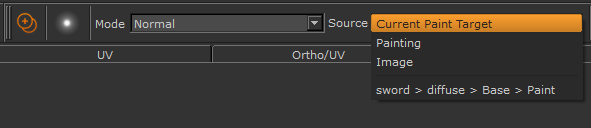
Experiment: Change the view (as covered in Setting the View), and try both painting through and clone stamping the image onto another side of the object. Do you like one method of using images to paint more than the other?
Where Do You Go from Here?
This lesson covered the two main options for painting images onto a model:
• dragging an image and positioning it on top of an object, then Paintingthrough the image onto the surface of the object, and
• dragging an image and positioning it on the canvas next to an object, then Clonestamping from a part of the image to the surface of the object.
The next tutorial, Exporting and Importing, covers procedures for saving and re-importing your work.