Search is based on keyword.
Ex: "Procedures"
Do not search with natural language
Ex: "How do I write a new procedure?"
Invert Node
Access: Nodes > Filter > Invert
|
Bump map. |
Inverted Bump map. |
The Invert node is very useful when it comes to secondary channel creation or masks for merge nodes. It flips the values of your textures. By default it flips the R, G, and B channels, but you can also enable or disable individual channels or include the alpha too.
Invert Node Node Inputs
Input: Inverts the input.
Invert Node Node Properties
|
Red, Green, Blue, Alpha Checkbox |
By enabling or disabling the checkboxes you define which color channels of the input you want to invert. By default all channels are enabled. If you want to include the Alpha or disable any of the others you can do so with these checkboxes. |
Invert Node Workflow Example
Inverting to Work with Blend Modes
The Invert node is useful when creating masks for merge nodes. Depending on the blending mode you use, you may need to use an Invert node to flip the black and white values so it works correctly.
In the example, we have the color map for a watch asset that we want to add a bit of detail to.
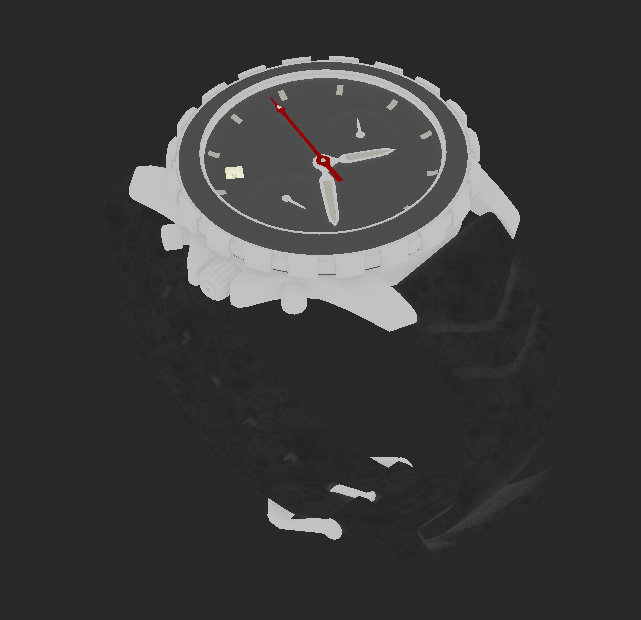
A color map for a watch asset.
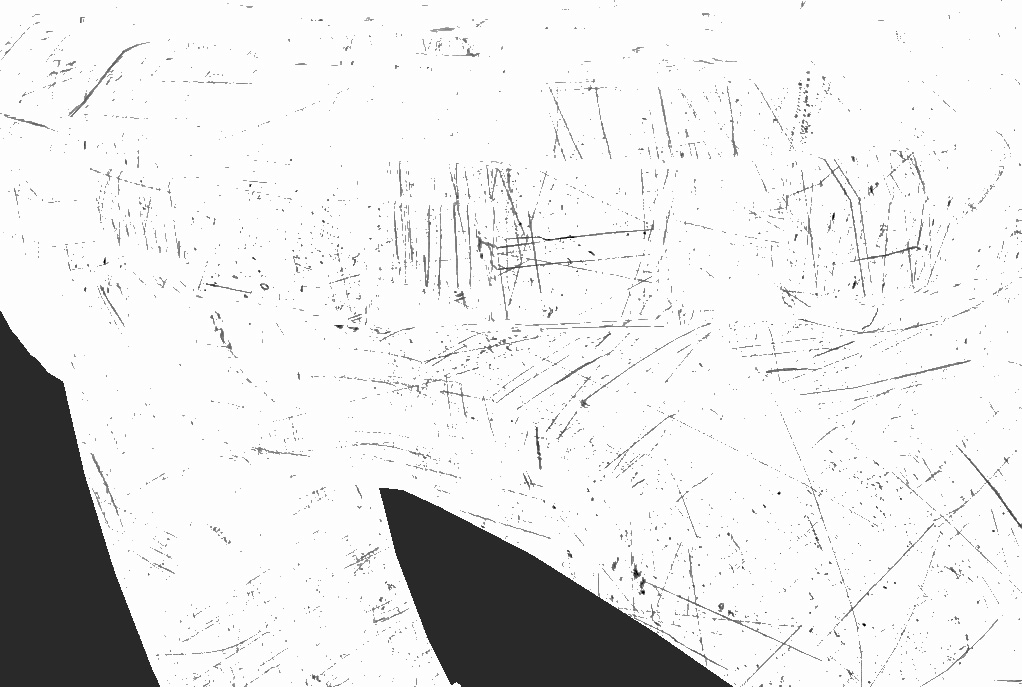
Metals often get wear and tear, some lets add some lighter scratches to the base color. This scratched texture is a great image that can be added on top of our textures so far.
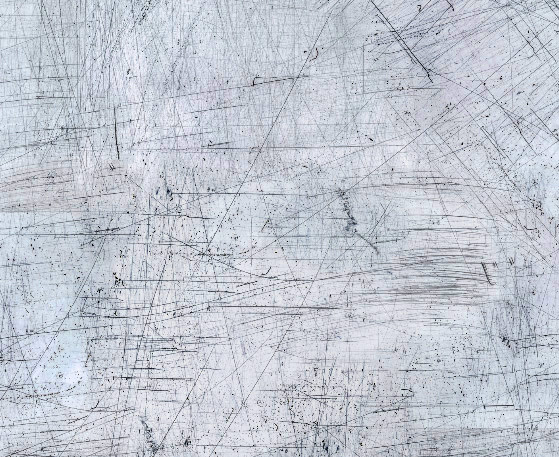
A scratched texture loaded into the image manager.
Lets get this image from our image manager onto the mesh by adding it as a Tiled node. Next, use a Levels node to make the image more contrasted, and then a HSV node to remove the unwanted saturation of the image.
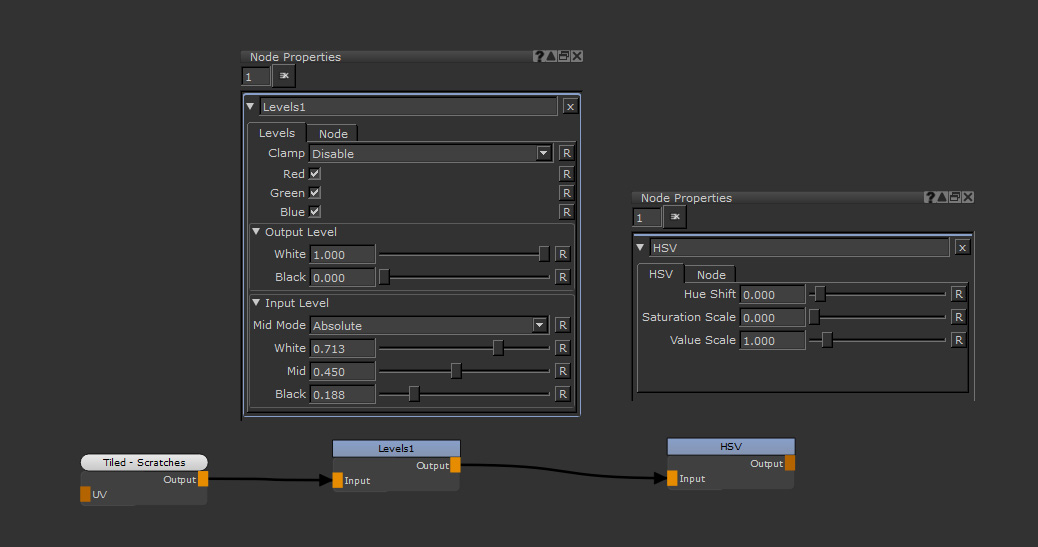
Using a Levels node and HSV node to color correct our scratches to be used as a black and white mask.
Now we have the scratches ready to be used as a mask or merged on top of our mesh.
The color corrected scratched textures on the watch mesh.
To remove the scratches from the background of this unedited texture and merge it on top of our base color, we would have to use a Multiply blend mode. This removes the lighter background and adds the darker scratches.
However, in this case we want the scratches to be lighter, not darker. We can use an Invert node to flip the dark scratches.
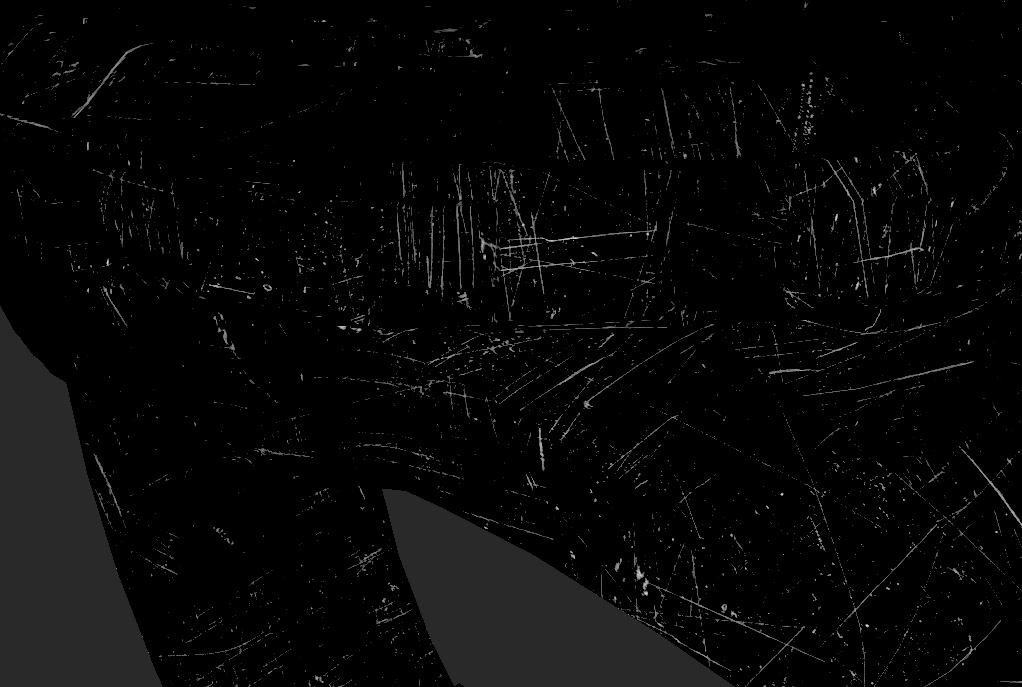
The scratches texture inverted.
From there we can use a blend mode which just adds the light scratches and removes the dark background. This is the Add blend mode.
Now that these scratches are ready to be used we can combine them in with the rest of our node tree. The Merge7 in the bottom right corner of the example is set to Add so these scratches are lightening the metal.
On top of that, the paint node called Strap Mask is being inverted so the scratches don’t affect the strap, and only affect the metal on the watch face. This is another great use of the invert node - flipping masks that you have already painted for other uses.
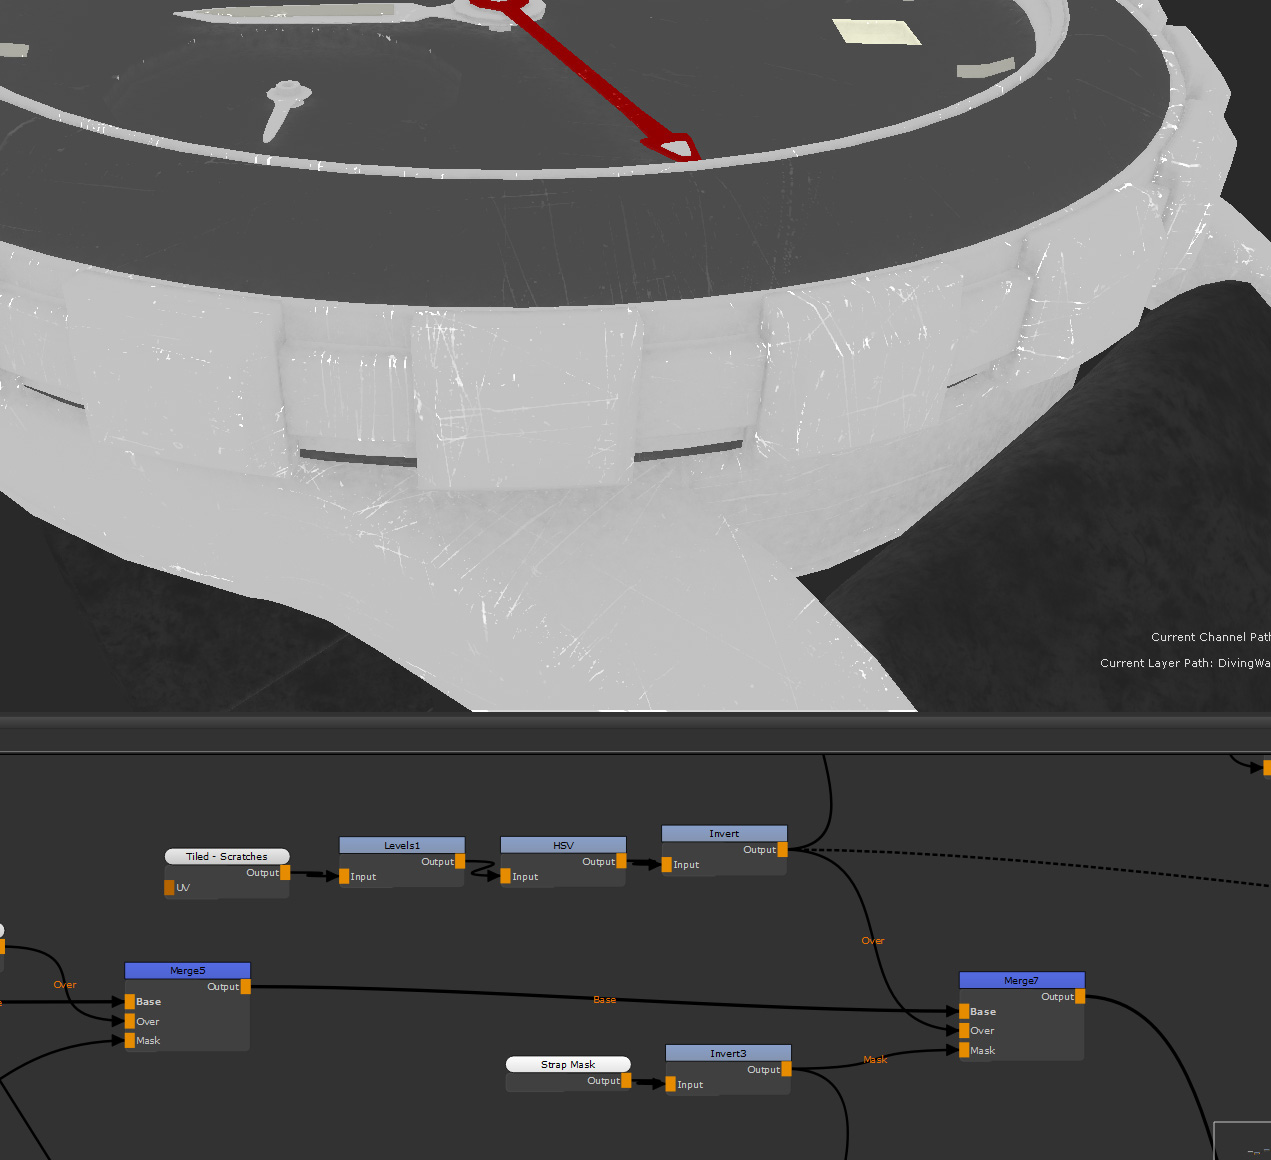
Using an Invert node to flip not only the scratches so they can be merged with the Add blend mode, but also to flip a mask
Inverting to Create a Specular Roughness Channel
Invert is especially useful when creating a Specular Roughness Map from other channels.
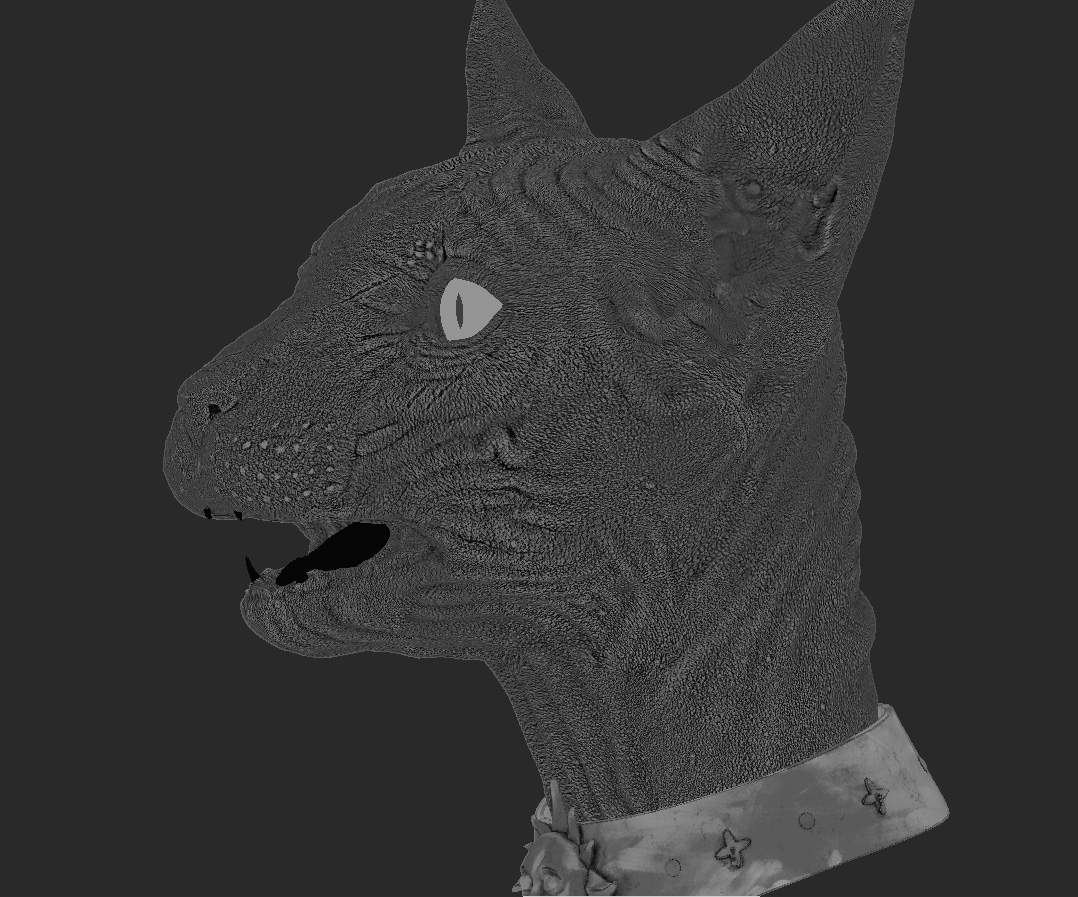
A Specular Roughness works in the opposite way to a lot of other channels. The dark values give a tighter specularity and the white values give rougher specularity. You can make a quick Specular Roughness base by inverting your Specular Channel or by de-saturating your Color map and then inverting it.
In the example is an asset which has a Color and Bump channel already textured. The Bump for the skin will be made into a Specular Roughness Channel so the details line up.
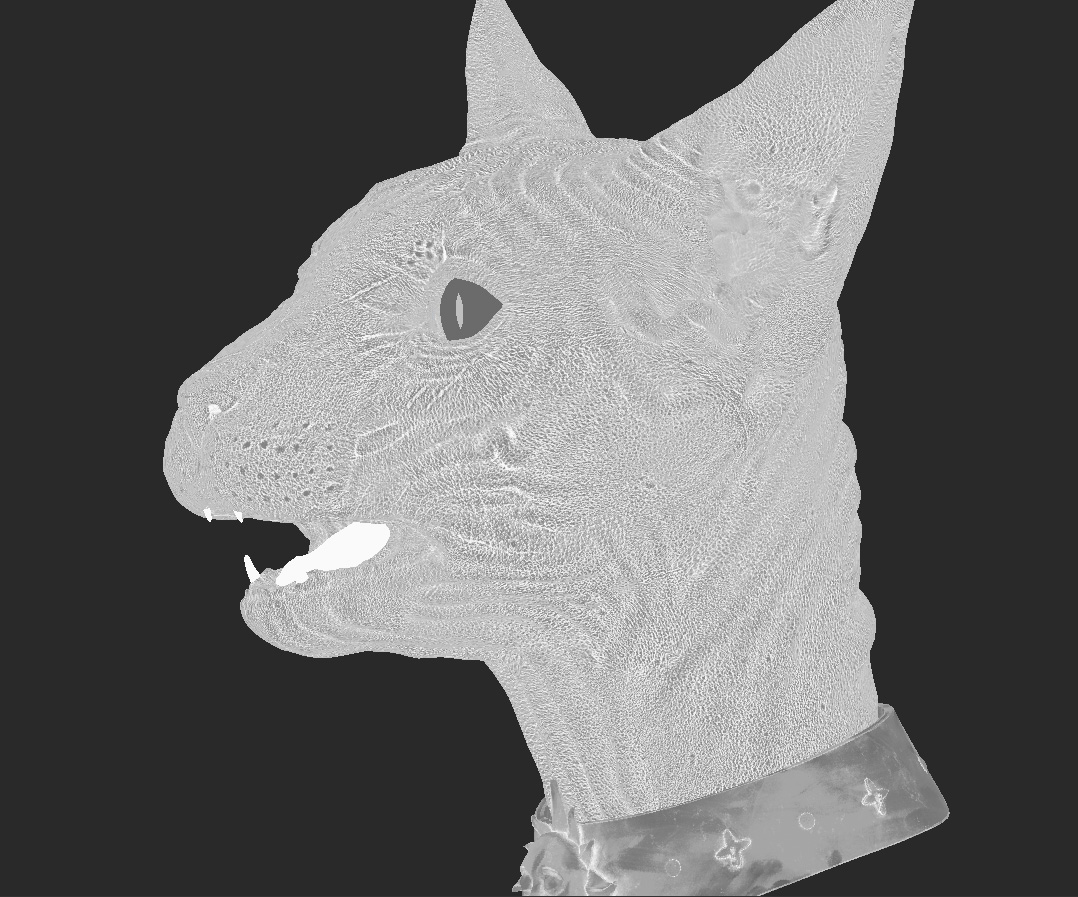
|
Bump Map. |
Inverted Bump Map with Invert node. |

The Node graph for creating this Specular Roughness.
By first inverting the Bump, we get the areas that push in to be lighter, meaning they would be more rough.
From there you can use Levels nodes to apply different grades to different parts of the mesh. Since inside the mouth, the nose and around the eyes should appear wetter, creating a mask for them and using a Levels node means you can grade them darker, making the spec tighter.
Tip: For more on this workflow see Levels Node.
Then you can add another Levels node to help add more contrast. Texturing is never just about one node, it’s often about using them in conjunction with each other. Without the Invert node this wouldn’t have the opposite values required.
Related Nodes
Sorry you didn't find this helpful
Why wasn't this helpful? (check all that apply)
Thanks for your feedback.
If you can't find what you're looking for or you have a workflow question, please try Foundry Support.
If you have any thoughts on how we can improve our learning content, please email the Documentation team using the button below.
Thanks for taking time to give us feedback.