Search is based on keyword.
Ex: "Procedures"
Do not search with natural language
Ex: "How do I write a new procedure?"
Configuring the Paint Buffer
| 1. | Start Mari and open your project. |
| 2. | Open the Painting palette, scroll down, and expand the Paint Buffer section. |
Mari displays basic properties of the paint buffer.
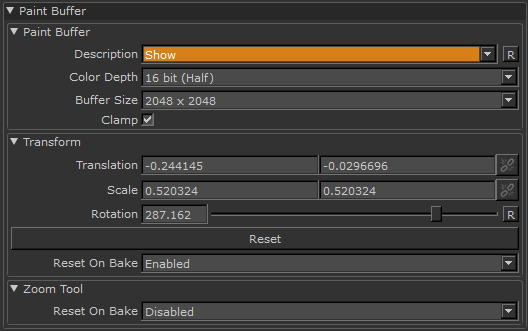
| 3. | Set paint buffer properties: |
• Color Depth - controls how many colors the paint buffer can hold. Uncheck this if you want to clone from or paint through a source that has values higher than this range.
• Buffer Size - controls the resolution of the buffer itself.
• Clamp - if checked, Mari restricts the range of the paint buffer to values between 0 and 1.
• Transform (Translation, Scale, and Rotation) - used to Moving or Transforming Paint Buffer in the buffer. But it's easier to use the Transform Paint Buffer tool.
• Reset on bake - controls whether Mari resets the buffer to its defaults after baking. If enabled, any transformations you've made to the paint buffer revert to the defaults. That is, after baking you get a new paint buffer (once again slightly larger than the visible screen). If you want to preserve your transformations after baking, change this to disabled.
Tip: You should always try to set the color depth (and, if possible, buffer size) to at least as high as the highest values for the patches on your model. Mari supports a maximum Buffer Size of 16384 x 16384. However, this setting is not available for all graphics cards. The availability of this setting is determined by the maximum texture size supported by your graphics card.
Please note that increasing the Buffer Size, even when your graphics card supports large textures, can slow Mari’s performance. If you are using patch resolutions higher than 4K, we recommend that you zoom in to the surface when painting, to keep the resolution sharp.
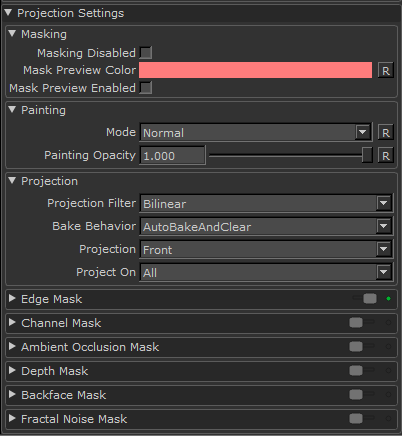
| 4. | Open the Painting palette. This controls how Mari projects paint onto the model when you bake the paint, and mask settings. |
| 5. | Try changing the value for Painting Opacity. |
This controls how opaque your paint is in the buffer. At 1.0, you see the paint exactly as you painted it. At 0.5, the paint is half transparent, and at 0 it's completely transparent.
| 6. | To set properties for baking the buffer, scroll down and expand the Projection section. |
The Projection Filter controls how Mari calculates the colors to apply to the surface when you bake the buffer down:
• Bilinear - gives a smooth projection down onto the surface.
• Nearest - gives a hard-edged projection down onto the surface.
| 7. | The Bake Behavior setting controls whether Mari bakes automatically when you change the view, and whether the buffer clears automatically once you bake. The options are: |
• AutoBakeAndClear - Mari automatically bakes and clears the buffer when you move the model.
• Manual - You have to bake manually; and when you do, the paint stays in the paint buffer until you manually clear it.
• ClearOnly - You have to bake manually; and when you do, the paint buffer clears automatically.
Tip: With Manual or ClearOnly, you can reposition the model underneath the buffer. This is useful, for example, if you realize that you need to get a better angle on a particular surface on the model.
| 8. | The Projection setting lets you set whether Mari projects only onto the Front of the model (as you're seeing it) or whether paint goes straight Through the model (appearing on the back as well as the front). |
|
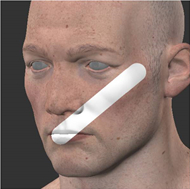
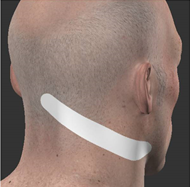
The paint stroke, painted onto the left side of the face. |
|
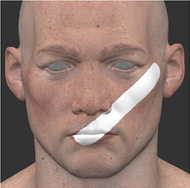
The result, projecting on the Front, rotated so you can see that it's only appearing in the front of the original view. |
|
When projecting Through, the paint stroke appears on the back as well as the front. |
| 9. | In the Project On settings, select whether to project onto only the selected areas, or all patches/objects in the project. For example, if you set Project On to Selected Only, you can only paint on the currently selected areas (whether it's an area, patch, or object, depending on your selection mode). |
This is useful when, for example, painting a face so you don't have to worry about accidentally overpainting onto the eyes.
Experiment: Paint a couple of example strokes onto your model, so you can see the effects as you work. Try:
Setting Bake Behavior to Manual or Clear Only, and then moving the model around underneath the buffer.
The paint buffer “floats” above the model until you bake it on. For example, you could move it around to get a better angle on a particular surface that you're painting on, or to paint on a different section of the model.
Using the Zoom Paint Buffer tool to zoom in on your model with the paint buffer locked and without baking the paint down.
Changing channels (through the Channels menu or palette, or using the Page Up and Page Down keys). The paint buffer stays in front of the canvas, on the new channel.
Setting Projection to Through. Paint some strokes on your model and bake them. Now rotate the model to see how the paint has “penetrated” it.
Set Project On to Selected. Using the Selection tool, select a patch on your model. Paint a stroke that goes off the edge of the selected patch, and bake it. See how the paint that goes off the selection patch disappears when you bake.
Sorry you didn't find this helpful
Why wasn't this helpful? (check all that apply)
Thanks for your feedback.
If you can't find what you're looking for or you have a workflow question, please try Foundry Support.
If you have any thoughts on how we can improve our learning content, please email the Documentation team using the button below.
Thanks for taking time to give us feedback.