Paint Node
Access: Nodes > Misc > Paint
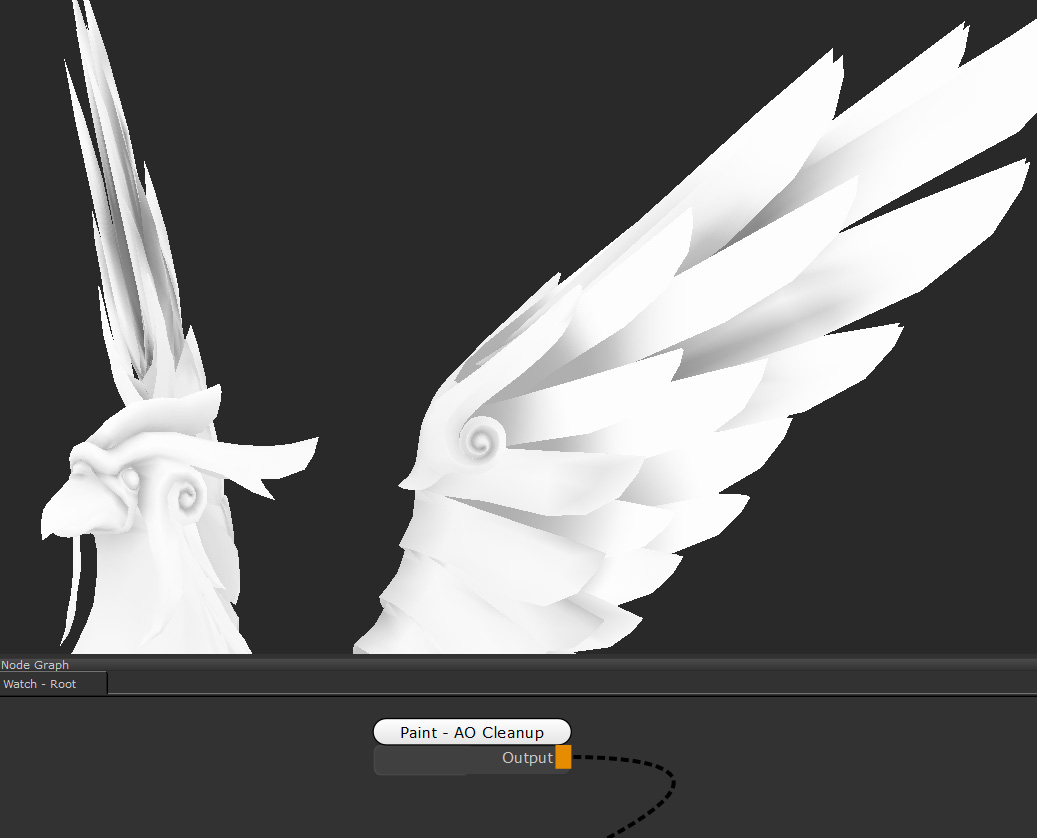
A cleaned up Ambient Occlusion map, using the Bake to Paint node feature.
The Paint node allows you to paint, import, or project your own textures into it. When creating textures, depending on your workflow, it can be one of the most commonly used nodes.
When creating textures, if you want to paint a mask in a specific area, or project some reference onto your mesh you can use the Paint node to store that data. You can then use other nodes to manipulate it and add to it.
Since Paint nodes are stored data they can vary in size and bit depth to help optimize your scene, which is a big advantage nodes have over using a layer based workflow. If you need a rough, non-detailed mask, then you can make a low resolution paint node to fill areas of your mesh. If you need high fidelity, hand-painted break-up, you can create a high resolution Paint node to store it in.
Tip: If you need to import images and textures from software other than Mari, then you need a Paint node to do so.
Paint Node Properties
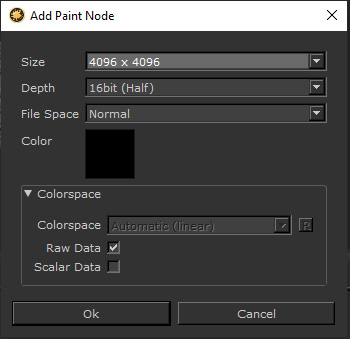
The Add Paint Node dialog.
When you first create a Paint node, you will be greeted with this UI dialog. This defines the settings for the Paint node that is created. All these settings can be changed from the Node Properties after creation. Below is a list of all the properties that can be found there.
|
Management Dropdown list |
This option decides where the node’s properties come from. The default of Self allows the user to change them. The other option Channel defines them from the channel the Bake Point is connected to. |
|
File Space Dropdown list |
This defines how values are exported. The default of Normal changes nothing. For Vector, the data is treated as vector data and remapped. Vector_Y_Flip does the same but inverts the Y component. Normal_Y_Flip changes nothing but inverts the Y component. |
|
Size Dropdown list |
Chooses the resolution of the images when exported. |
|
Depth Dropdown list |
Chooses the bit depth of the images that get exported. |
Color Data
|
Colorspace Dropdown list |
If the Raw Data checkbox is disabled then you can define color space of the color data of the channel using this property. By default, Mari selects the colorspace determined by the value set in Default Import Colorspace in the Mari Preferences dialog under the Color tab. See Mari Preferences Dialog for more information. |
|
Tip: You can limit the number of colorspaces available to artists using the Python API registerConfigUiAllowlist() function or the MARI_COLORSPACE_OCIO_UI_ALLOWLIST environment variable. See Help > SDK > Python > Documentation from Mari's UI menus or Environment Variables That Mari Recognizes for more details. |
|
|
Raw Data Checkbox |
Determines if the data is raw or is in a different color space. Disabling this will allow you to change the Colorspace dropdown, potentially resulting in a conversion when displayed and exported. |
|
Scalar Data Checkbox |
Determines if values going through the channel are Color or Scalar Data. If you enable this the view transform is changed to None. |
Paint Node Workflow Example
Importing External Images into a Paint Node
The Paint node is how you can import images into your UDIM patches, for example images that have been created in external software. In this example images that have been edited in Nuke are going to be reimported into Mari.
First you need to create a Paint node that matches up to the Size of your images and has the same Bit Depth. You can also disable the Raw Data checkbox if you would like to override the Colorspace.
The Add Paint Node dialog.
Once the node has been created you need to right click the Paint node, and select File > Import. This brings up a file browser where you can select the images you would like to import.
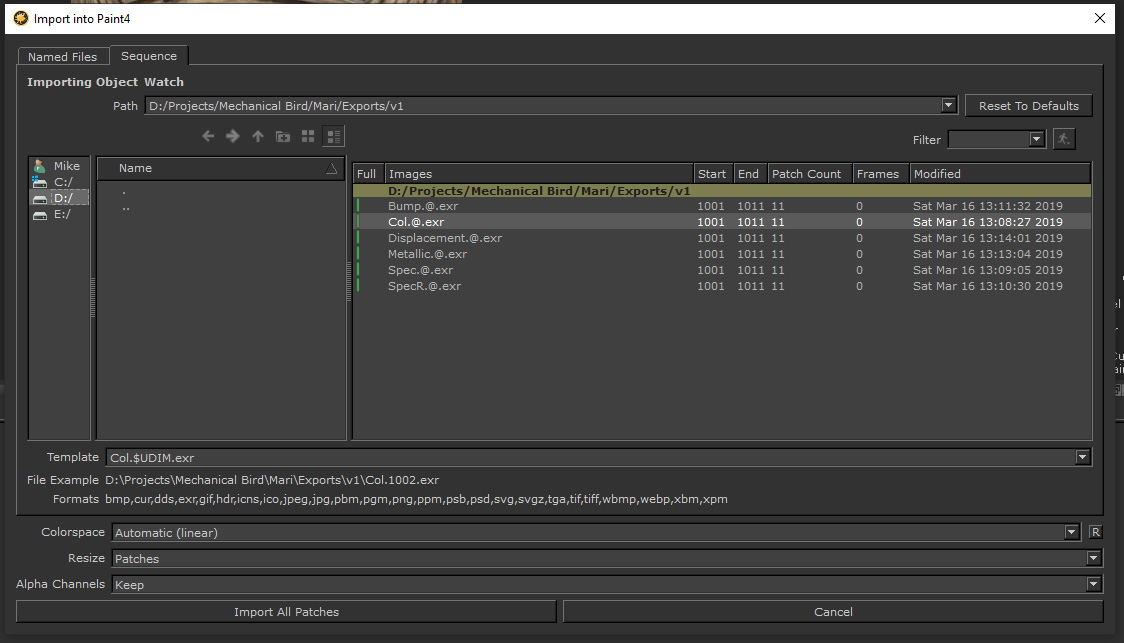
The Import into Paint node dialog.
Here you need to go to the location of the files and select the image or image sequence you wish to import.
Tip: If for some reason you are in the right folder but the files do not appear try clearing the Template.
From here you can override the Colorspace of the images to be imported. By default, Mari selects the colorspace determined by the value set in Default Import Colorspace in the Mari Preferences dialog under the Color tab. See Mari Preferences Dialog for more information.
You can determine if Mari should resize the images or patches if the import and Paint node don’t match up. You can also determine what to do with the imported image’s Alpha Channels.
When you are done with that you can click Import All Patches to process them. If you used the selection tool to select only certain patches you are also be given the option to Import Selected Patches.
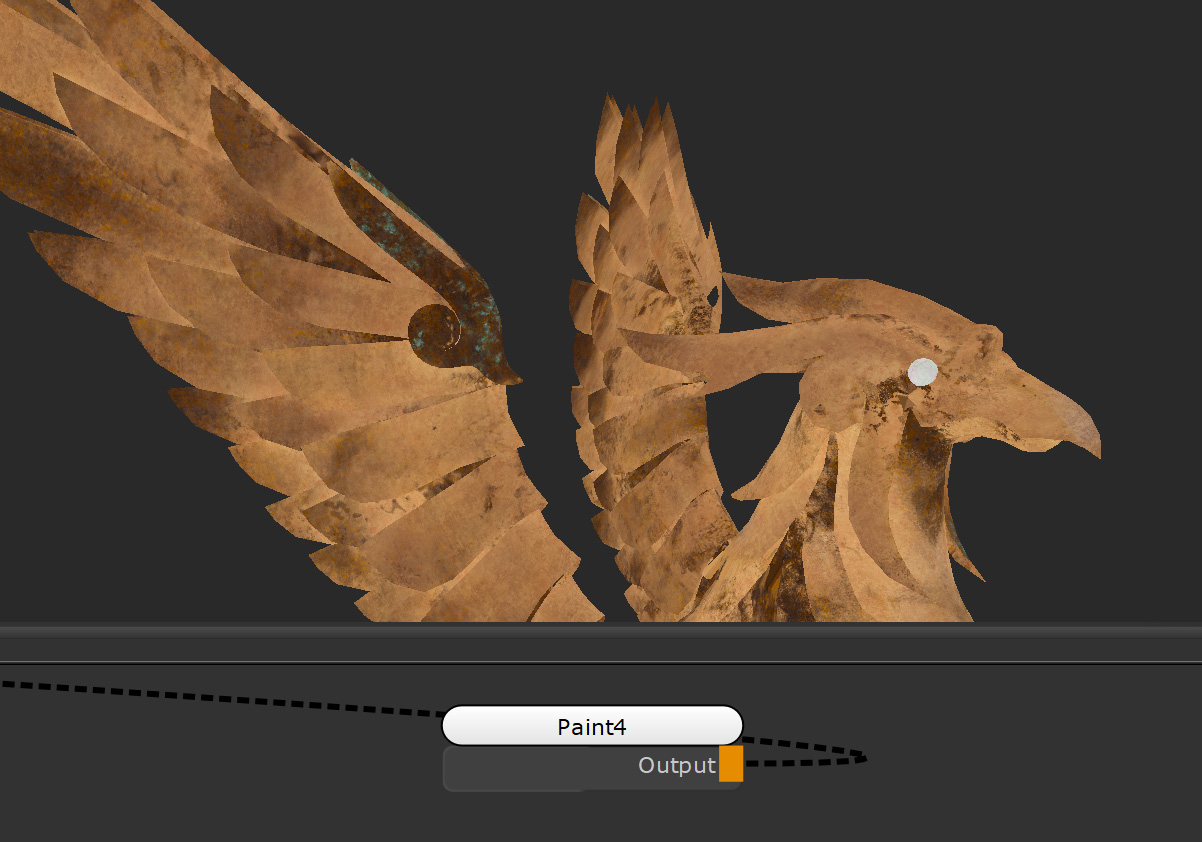
After that’s done, you have a Paint node containing your images, which you use in your texturing.
Baking AO to a Paint Node to Clean Up
Being able to bake a procedural node, such as a noise, tiled image or color to a Paint node is a handy feature of Mari and makes it possible to then paint on top of a procedural.
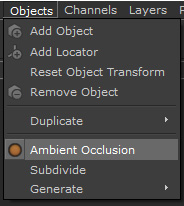
Tip: To create Ambient Occlusion on your model, first go to the Objects menu then click on the Ambient Occlusion option to start baking it for your model.
You can now see Ambient Occlusion when you create the node.
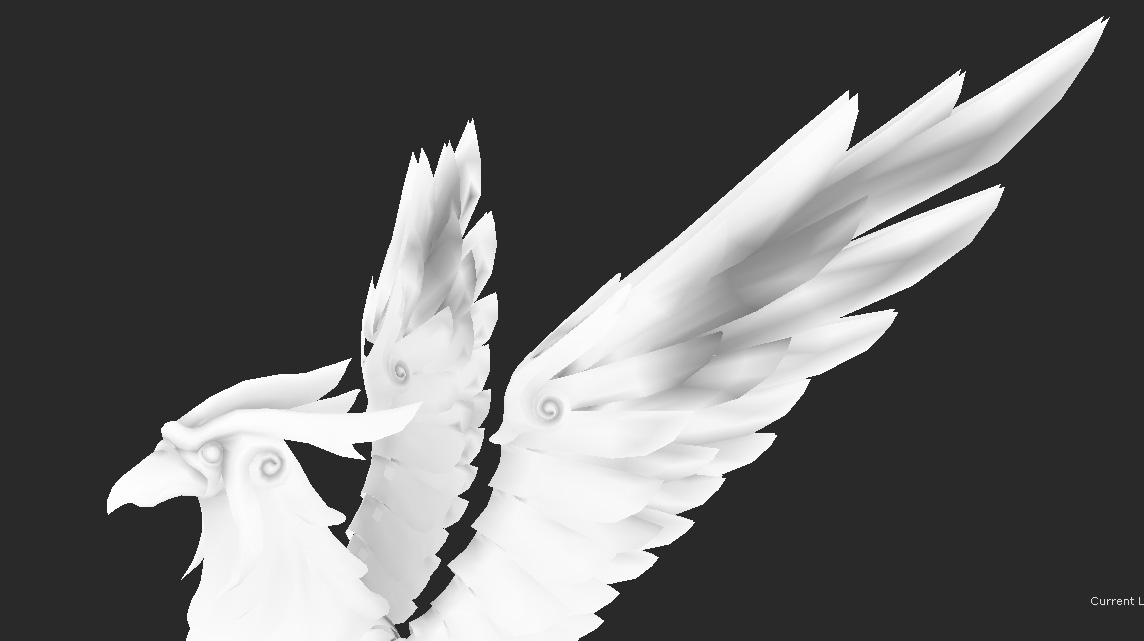
The Ambient Occlusion node gives good results but depending on the resolution of the mesh it can give blocky results as seen here on this geometry’s wings. After baking it down to a Paint node, you can use the Paint tool to clean it up and add extra Ambient Occlusion to places you feel need it.
After creating an Ambient Occlusion node, or any procedural, you can right click the node and go to Edit > Bake to Paint Node. This pops up the Add Image Set dialog so you can choose the Size and Bit Depth. After that Mari will calculate and create a separate Paint node with that information baked into.
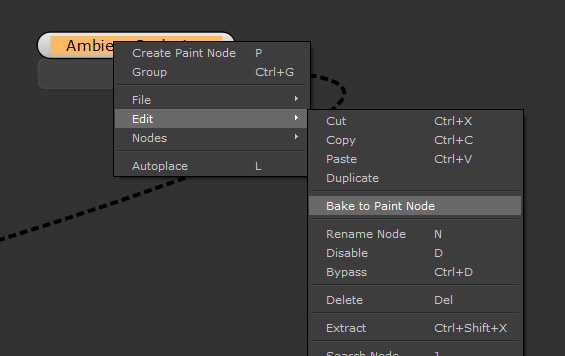
Baking to a Paint node.
From there, you can use any of the painting tools to add extra detail to it. Since this is an Ambient Occlusion, it needs black and white colours. Using the paint brush tool with the p key, you can clean up and smooth out the blocky areas of the procedural version.
Since that data is now in a baked down node, you are free to paint and clean up parts of the texture
Tip: Since baking a node to a Paint node creates a copy it’s always good to rename it afterward so you know what the Paint node is for!