Custom Procedural Node
Access: Nodes > Misc > Custom Procedural
The
|
|
|
|
|
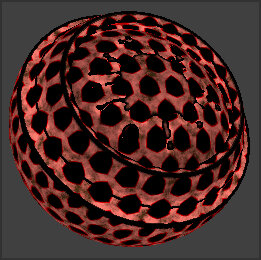
A color procedural in the Shelf. |
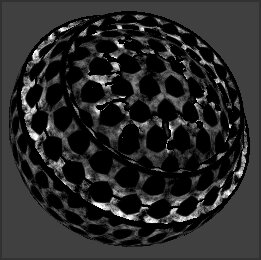
A scalar procedural in the Shelf. |
A procedural mask in the Shelf. |

The strength of the Custom Procedural node compared to other Group nodes is that it exports all the images used inside the node. This means when the procedural is shared with other artists, they have access to the images used in the textures and don't have to locate them.
There are several example custom procedurals for you to use in the Custom Procedural shelf.
Note: You must use the Node Graph to produce custom procedurals. Custom procedurals cannot be created using the Layers palette. See Adding New Custom Procedural Nodes to the Node Graph.
Tip: The Custom Procedural node can also be used to create procedurals that can be used in the layer stack to share with artists who prefer a layer based workflow. The layer stack is one of the most intuitive ways to create your textures, see Layers for more information.
Custom Procedural Node Properties
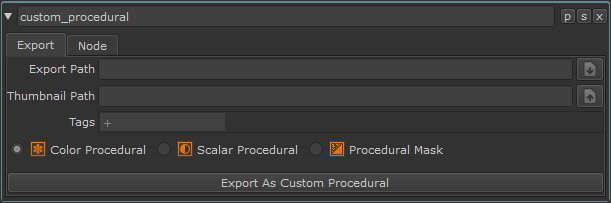
The Custom Procedural Node Properties panel.
Export
|
Export Path |
Specify a file path where the custom procedural is saved on export. |
|
Thumbnail Path |
Pick a thumbnail image from disk to use with the custom procedural. This thumbnail represents the procedural in the Shelf. If no thumbnail is chosen at export time, a thumbnail is generated automatically using the Thumbnail settings in the Preferences. See Thumbnail Tab for more information. |
|
Add metadata tags to your material if required. These tags can be used to display information about the procedural, or for filtering procedurals in the Shelf. Start typing a description into the field to display a list of existing tags or create your own and press Enter to add the tag. Once the procedural is exported and added to the Shelf. |
|
|
Export as Custom Procedural |
Exports the custom procedural to the Export Path as an .mpc file. |
The Custom Procedural node allows you to export three types of procedural for use in other projects:
|
Color procedurals are treated as color data when imported into other projects, and are color managed by Mari. This means the procedural can be used in channels which are color managed, such as diffuse, albedo, or base color channels. Select this if, for example, you want to create a tiled color map. |
|
|
Scalar procedurals are treated as scalar data (non-color data) and are not color managed by Mari when used in other projects. Select this if you want the custom procedural to be used in channels using scalar data such as specular, roughness, or normal channels. |
|
|
Procedural masks are similar to scalar procedurals, in that they are also treated as scalar data and won't be color managed by Mari. Unlike the other procedural types, procedural masks can also be applied as a layer mask in the layer stack. Select this if you want your procedural to be used as a mask in other Mari projects. |
Custom Procedural Workflow Overview
Custom procedurals are created in the Node Graph using Custom Procedural nodes. The node is a container for your own custom node network. You add a network by adding the Custom Procedural node to your Node Graph and opening the node. To learn how to add Custom Procedural nodes to your Node Graph, see Adding New Custom Procedural Nodes to the Node Graph.
You can create any texture you like inside the Custom Procedural node, since all Node Graph functions and nodes are available to you. As an example, f you would like to learn how to create an example grunge mask using geo-channels inside a Custom Procedural node, see Creating a Custom Procedural Grunge Mask with Geo-Channels.
Once you have created a custom procedural using the Custom Procedural node, you can export the procedural using the Node Properties. The procedural can then be used in other projects and by other artists when imported to the Shelf. See Exporting Custom Procedurals and Importing Custom Procedurals to the Shelf.
To use the custom procedural in other projects, add the custom procedural from the Shelf to any node graph or layer stack. See Adding Custom Procedurals to the Node Graph and Adding Custom Procedurals to the Layer Stack.
Adding New Custom Procedural Nodes to the Node Graph
| 1. | Right-click anywhere in the Node Graph and select Nodes > Misc > Custom Procedural. |
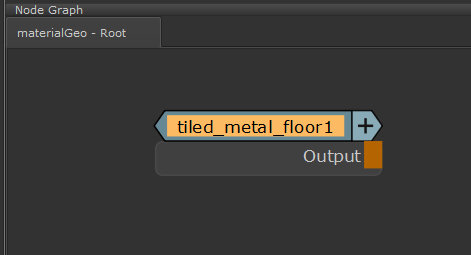
A Custom Procedural node is added to the Node Graph.
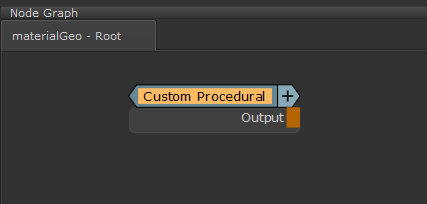
The Custom Procedural node on the Node Graph.
| 2. | With the Custom Procedural node selected, press 1. |
The node is assigned to the Viewer, so you can see the node in the viewport on your model.
| 3. | Hold Ctrl and double-click the Custom Procedural node, |
or
press Ctrl + Enter with the Custom Procedural node selected.
A new tab opens in the Node Graph and the contents of the Custom Procedural node are displayed. The custom procedural is authored in this tab.
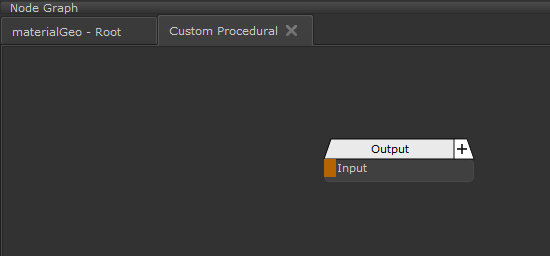
Inside the Custom Procedural node in the Node Graph.
Exporting Custom Procedurals
Once you have authored a custom procedural using the Custom Procedural node, you can export it as an .mpc file to be used in other projects through the Shelf.
To export your custom procedural:
| 1. | Double-click the Custom Procedural node containing the node network you'd like to export. |
The Node Properties open.
The Custom Procedural Node Properties.
| 2. | Next to Export Path, click the export |
| 3. | Click the choose thumbnail |
If you don't specify a Thumbnail Path, Mari creates one for you before the procedural is exported.
| 4. | If required, add metadata tags to your procedural into the Tags field. Start typing a description into the field to display a list of existing tags or create your own and press Enter to add the tag. See Tags for more information. |
Once the procedural is exported and added to the Shelf, these tags can be used to display information about the procedural, or for filtering procedurals in the Shelf.

| 5. | Select Color Procedural, Scalar Procedural, or Procedural Mask to specify a type for your procedural. |
The type determines how your procedural is color managed in the project. See Custom Procedural Node Properties for more information.
| 6. | Click Export as Custom Procedural. |
Your procedural is exported as an .mpc file to the specified Export Path.
Importing Custom Procedurals to the Shelf
Once your procedurals are exported, you can import them to the Mari Shelf for use in other projects, node graphs, and layer stacks.
To import your custom procedural:
| 1. | Click Shelf on the palette toolbar. |
This opens the Shelf.
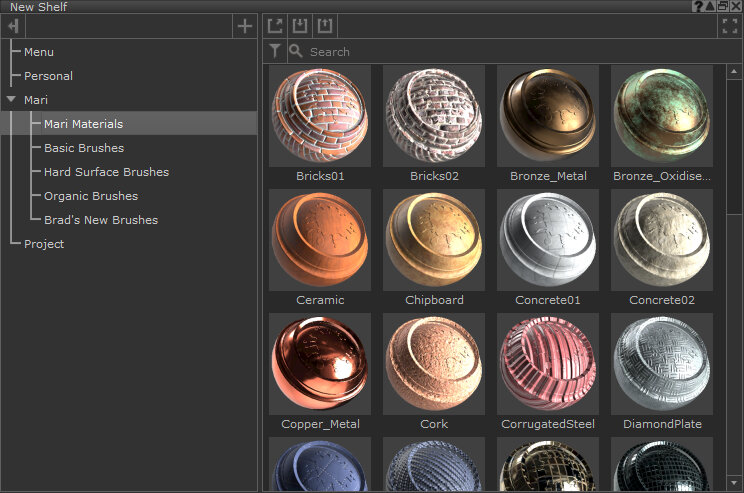
The Shelf palette.
| 2. | In the left panel of the Shelf, select a folder where you would like to add your procedural. |
| 3. | Drag the .mpc file from your file browser into the Shelf, |
or
In the right panel of the
The Import Items dialog opens.
| 4. | Select the .mpc file from the Import Items dialog and click Open. |
The procedural file is imported to the specified folder in the Shelf.
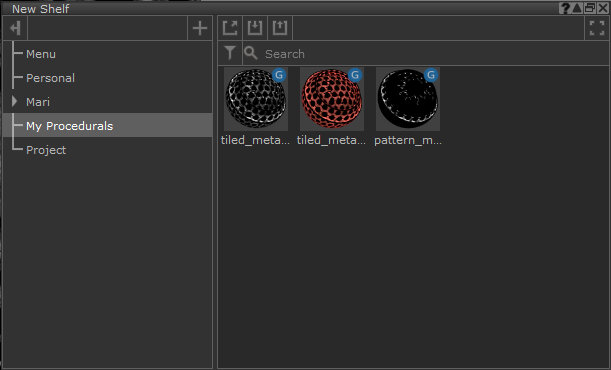
Imported procedurals in the Shelf palette.
Note: If your procedural shows a geo-channels ![]() icon on the thumbnail, it means the procedural contains geo-channel nodes.
icon on the thumbnail, it means the procedural contains geo-channel nodes.
Tip: Hover over the thumbnail in the Shelf to see more information about the procedural.
Adding Custom Procedurals to the Node Graph
Once a procedural has been added to the Shelf, you can add the procedural to your Node Graph.
| 1. | Click Shelf on the palette toolbar. |
| 2. | To find a procedural you can type a keyword into Search to filter out procedurals containing that keyword in the tags, |
or
click the folders on the left panel in the Shelf to show all the procedurals which belong to selected folders.
Imported procedurals in the Shelf.
| 3. | Hover over procedurals to see more information. |
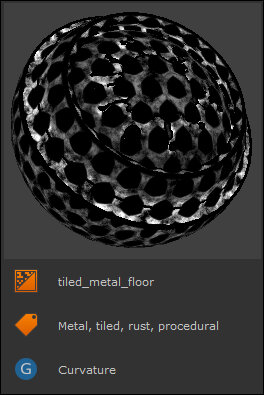
The information displayed when hovering over an item in the Shelf.
| 4. | Drag the chosen procedural from the Shelf onto your Node Graph. |
The procedural is inserted into the Node Graph.
Tip: Hold Ctrl and double-click the procedural to view the procedural's node network.
Adding Custom Procedurals to the Layer Stack
Once a procedural has been added to the Shelf, you can add the procedural to your layer stack.
| 1. | To open the Shelf, click Shelf on the palette toolbar. |
| 2. | To find a procedural you can type a keyword into Search to filter out procedurals containing that keyword in the tags, |
or
click the folders on the left panel in the Shelf to show all the procedurals which belong to selected folders.
Imported procedurals in the Shelf.
| 3. | Hover over procedurals to see more information. |
| 4. | Drag the chosen procedural from the Shelf into your layer stack, |
or
on the Layers palette, click the add procedural layer ![]() button > Custom Procedural > select the custom procedural you want to add to the layer stack.
button > Custom Procedural > select the custom procedural you want to add to the layer stack.
The custom procedural is added to the layer stack.
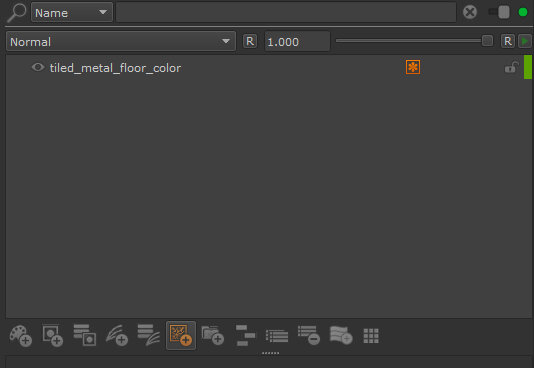
A color procedural in the layer stack.
| 5. | Click the procedural |
Custom Procedural Node Workflow Example
Creating a Custom Procedural Grunge Mask with Geo-Channels
A procedural mask is a mask that can be authored with the Custom Procedural node and then imported into projects and applied in the node graph or layer stack. It allows artists to save the time it would take to create a mask manually, and gives them the option to use a pre-generated mask instead. To learn more about masks, see Adding Layers and Masks.
You can export a procedural mask that be used by any object with geo-channels in Mari by taking advantage of Geo-Channel nodes while authoring your textures with the Custom Procedural node. The exported procedural can be used in any node graph, or added as a layer mask on any layer providing you have Geo-Channels setup for your object. See Adding Geo-Channels to Objects and Geo-Channel Node for more information.
In the following example, you can create a grunge mask that could be used to show and hide grunge on a layer or node, for example if you wanted to mask off some metallic flooring to apply a rust layer around the edges.
Tip: Use the Example Material Design Project inside the Help menu to follow the below example, as this project has geo-channels already setup for you to use.
Stage 1 - Creating a Procedural Cloud Mask
Adding Cloud nodes to your node network is a quick and useful way to create grime-like textures. The Cloud node is going to be the base of this procedural texture. To create a procedural cloud mask using a Cloud node, while inside the Custom Procedural node:
| 1. | Press Tab and type Cloud, then select the resulting Cloud node. |
A Cloud node is added to the Node Graph. The noisy cloud texture forms the basis of the grunge texture.
| 2. | Drag the Cloud node's Output to the Output node's Input. |
The Cloud node is output to the model.
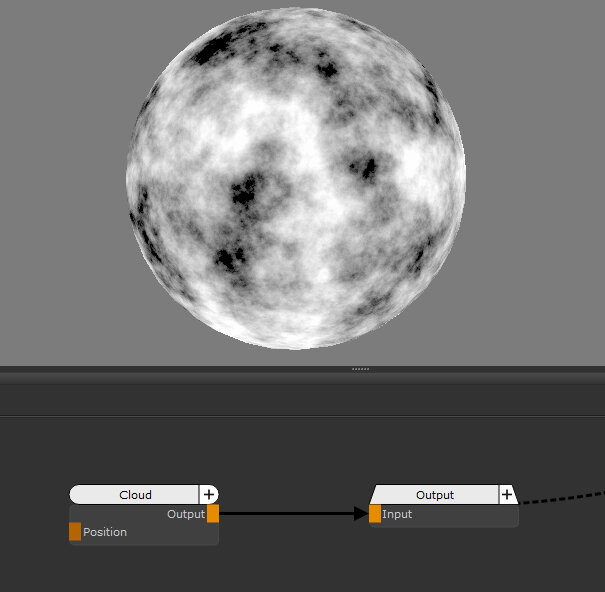
The Cloud node displayed on the model.
| 3. | Press Tab and type Color, then select the resulting Color node. |
A Color node is added to the Node Graph. This Color node is going to be merged with the Cloud node and a geo-channel mask. The Cloud node shows in any areas of the geo-channel mask that are white. The Color node shows in any areas of the geo-channel mask that are black.
| 4. | Double-click the Color node and set the Color in the Node Properties to black. |
The Color node must be set to black so the black areas in the final mask texture are transparent and show any layers or nodes below the current layer.
| 5. | Press M over the Node Graph to create a Merge node, and input the Cloud node into the Base input and the Color node into the Over input. |
The Cloud and Color nodes are merged together.
| 6. | Drag the Merge node Output to the Input of the Output node. |
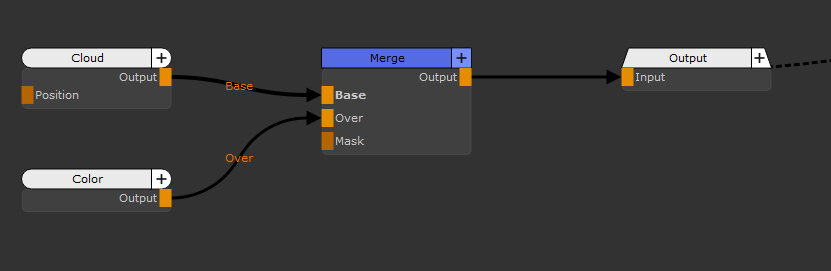
Cloud, Color, and Merge node inside the Custom Procedural node.
Stage 2 - Adding Geo-Channels to your Procedural Cloud Mask
The next stage of the workflow deals with adding geo-channels to the node network. Geo-channel nodes point the texture at geo-channels on your object. In this example workflow, the geo-channel is used to drive curvature data from the model into the texture, so the grime appears on any sharp edges of your model.
| 1. | Press Tab and type Geo-Channel and select the resulting Geo-Channel node. |
| 2. | Double-click the Geo-Channel node and pick any geo-channel to use with the node from the Channels dropdown in the Node Properties. If you're using the Example Material Design Project, select the Curvature channel. |
Note: If you need to add geo-channels to your object, see Adding Geo-Channels to Objects.
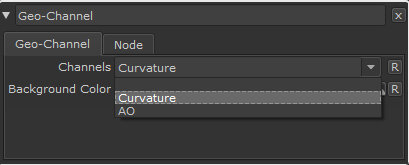
The Channels dropdown of the Geo-Channel node.
| 3. | Press Tab and type Brightness Lookup and select the resulting Brightness Lookup node. |
The Brightness Lookup node is going to be used to tighten the black and white values from the Geo-Channel node and reduce the mid-tones. This produces a mask that is restricted to the darker areas in the geo-channel.
| 4. | Double-click the Brightness Lookup node and click the curve editor |
The Curve Editor allows you to use the curve to edit the brightness of the input.
| 5. | Drag the handles in the Curve Editor to create a curve which reduces the mid-tones of the input. Use the image below as a reference. |
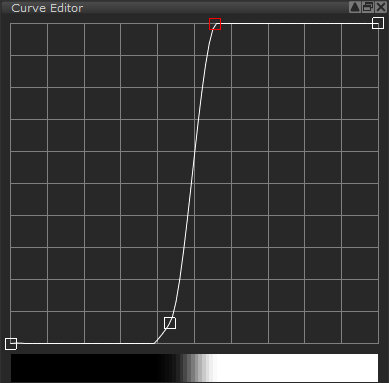
The Brightness Lookup Curve Editor.
| 6. | Drag the Output of the Geo-Channel node into the Input of the Brightness Lookup node, then drag the Output of the Brightness Lookup node into the Mask input of the Merge node. |
The Geo-Channel node is now used as a mask in the Merge node to determine where in the Merge node the Cloud node is shown, and where the Color node is shown.
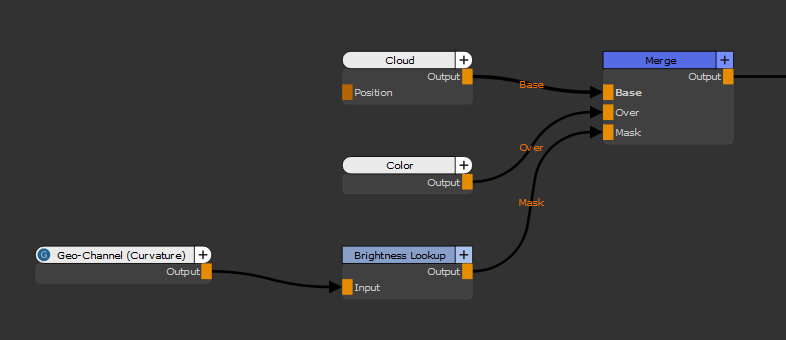
A Cloud node, Color node, and Geo-Channel node input to the Base, Over, and Mask inputs of the Merge node, to create a grunge mask.
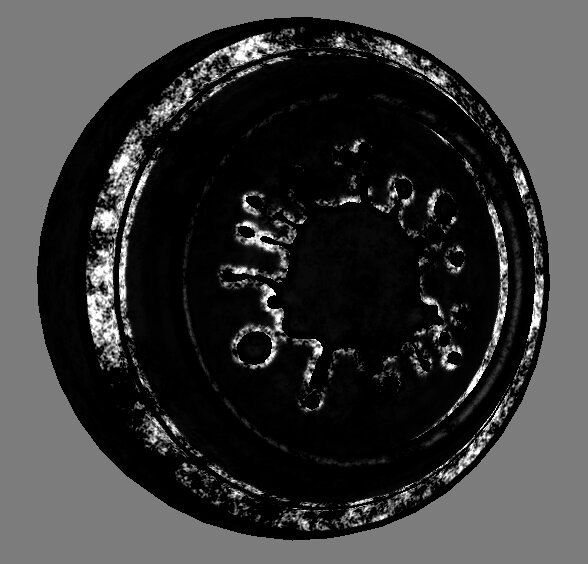
A grunge mask created with geo-channels, which can be used in other projects.