Mari 3.3 vs 4.0
Mari's UI has been redesigned for better usability. Below is a list briefly describing the changes. Click on the links for more details.
Article: Read Q100355: Transitioning between Mari 3.3 and Mari 4.0 for more information on the changes done, including a video tutorial.
• New Project dialog - The New Project dialog has been redesigned and now includes shading and lighting modes.
• The Selection, Default Shaders, Lighting, and Mirroring toolbars have been removed in 4.0. They have been added to the new Project Controls toolbar.
• All of Mari’s tools are now grouped into categories, in the Tools toolbar, to reduce the space they use in the UI.
• The Tool Properties toolbars have been redesigned. They now include a brush splat icon and fewer button labels.
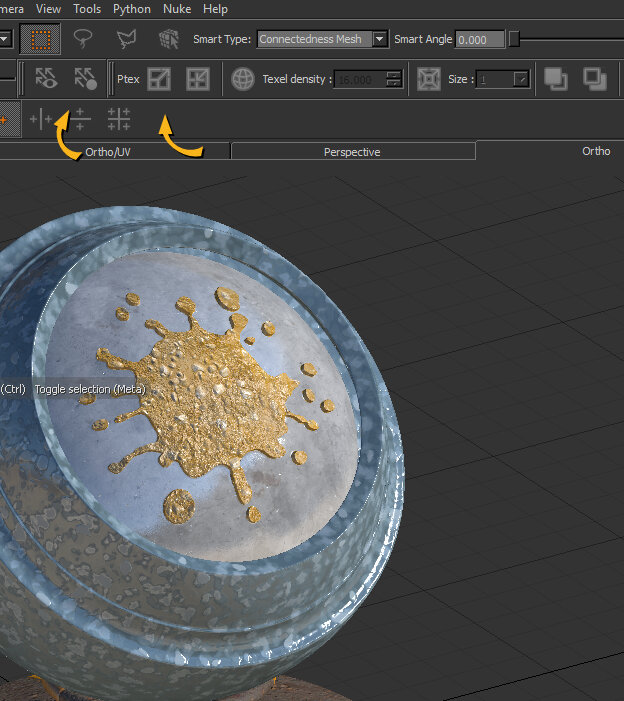
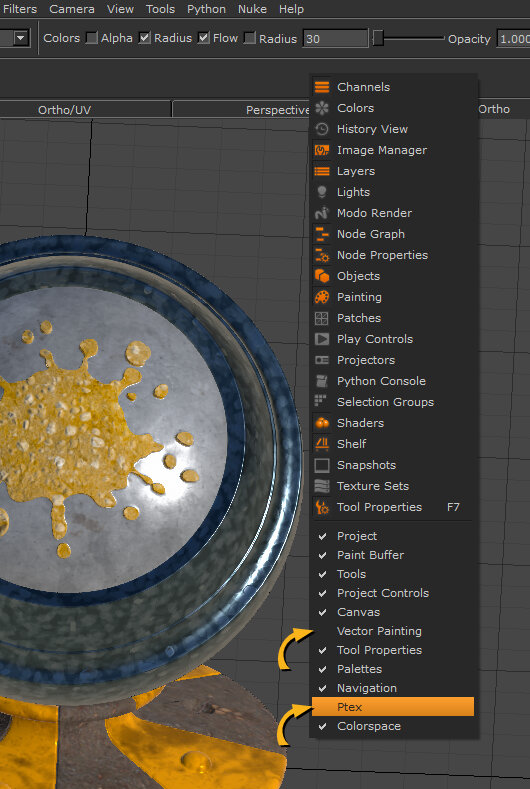
• The Ptex and Vector Painting toolbars are hidden in the default layout. They can be made visible using the toolbar right-click menu.
• The Painting toolbar has been renamed to the Paint Buffer toolbar. An additional button for resetting the translation of the paint buffer has been added to the toolbar.
• The Projection palette has been merged with the Painting palette.
• You can now access all Mari’s palettes through the new Palettes toolbar.
• The Paint Target quick palette has been extended to include the paint target when a mask is present.
• The Layers palette is now more intuitive when working with Group layers.
• The Brush Editor palette has been removed. The Brush Properties are now accessible through the Tool Properties palette. Instead of using the Brush Editor palette to save your custom brushes, you can now save them by dragging-and-dropping the brush splat from the Tool Properties toolbar of any painting tool.
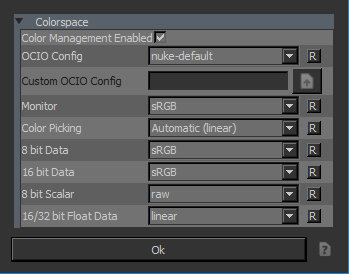
• The Colors palette is now scalable for better precision. The Pixel Analyzer palette has been merged with the Colors palette. The Color Manager (Viewer Transform) palette has been removed and you can still find the Colorspace settings in the Project Settings dialog.
• Using the Marquee Select tool, you can now drag a color to the canvas to fill the selected area of the paint buffer.
• You can now drag-and-drop colors to fill the current item selection. The fill works across all selection modes (Object, Patches, and Faces).
• The curve editor has been redesigned entirely.
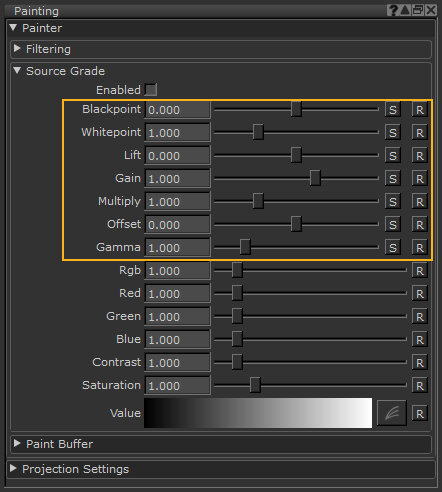
• The Source Grade feature has been extended to match the source grading controls available in the Grade Adjustment layer.
• The basic Node Graph mode has been removed and the Advanced mode is now standard. This also unlocks the full Node Graph in Mari Non-Commercial.
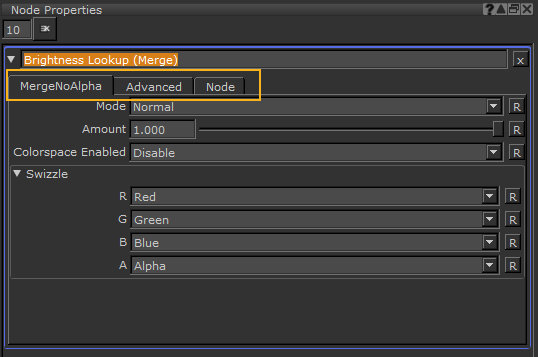
• In the Node Properties palette, property groups are now displayed in separate tabs for better usability.
• The latest features from OpenSubdiv 3.1, including scheme choice, geometry, and UV boundary interpolation methods have been added. Mari now matches renderer mesh subdivision more closely, increasing efficiency when painting.
• Some preferences in the Mari Preferences dialog have been reorganized and renamed.
• The Head-Up Display now displays in the bottom-right corner of the canvas instead of the top-left corner.
• A new Export Manager dialog for managing the batch exporting of channels and Bake Point nodes has been implemented. You can now configure and manage multiple export targets from the same source, as well as perform format conversions during export.
Note: Have a look at the new Mari 4.0 workspace. See Discover the Workspace.
Creating a Project
New Project Dialog
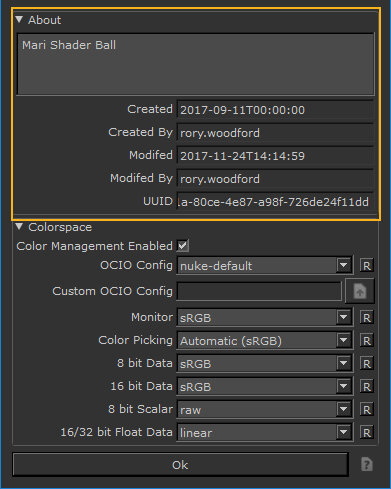
In Mari 3.3, the New Project dialog contains a lot of fields and information in a single tab only.
In Mari 4.0, the New Project dialog now contains four tabs to properly lay out the information. It also includes a new Lighting tab for you to set up the initial project lighting. When using channel presets, Mari now automatically builds a shader and connects the created channels to the corresponding shader inputs.
Project Settings Dialog
|
|
|
|
|
In Mari 3.3, the Project Settings dialog contains only Color Management information. |
|
In Mari 4.0, the Project Settings dialog now contains details about your project and a description text box. |
Controlling the Project
Mari 3.3 contains the Lighting, Selection, Paint Buffer Symmetry, and the Default Shaders toolbars.
In Mari 4.0, the Lighting, Selection, Paint Buffer Symmetry, and the Default Shaders toolbars have been added to the Project Controls toolbar.
To change the current shader in the canvas to a system shader, click and hold the second button in the new Project Controls toolbar. Mari 4.0 has also introduced the concept of a current User Shader. Selecting this option in the dropdown menu uses the last selected User Shader as the current shader in the canvas.
Additionally, Mari now saves the lighting mode used alongside certain shaders. User Shader and Current Paint Target have separate saved lighting modes, while the Current Channel, Current Layer and Current Layer & Below system shaders share a saved lighting mode. This means you have the option to always view your channel components with flat lighting, while having full lighting with shadows automatically changed when switching to a User Shader.
Using Tools
Tools Toolbar
In Mari 3.3, the Tools toolbar is spread out and depending on your screen vertical height resolution, you need to click the double arrow icon to display all the toolbar buttons.

In Mari 4.0, apart from the eye dropper and color controls, the tools have been grouped by category to make room for other toolbars. You can now find the following tool categories:
• Objects tools
• Painting tools
• Image Painting tools
• Paint Transformation tools
• Paint Buffer tools

The icon changes to the selected tool. You can also use keyboard shortcuts to switch to any tool. Click and hold any tool group button to access a menu of tools in the group. Ctrl+click a tool group button to cycle through the tools in the group.
For more information on the Tools toolbar,
Tool Properties Toolbar
In Mari 3.3, the tool's Tool Properties toolbars contain too many text labels making them too long to display on one line.
In Mari 4.0, the tool's Tool Properties toolbars have been revisited. Icons have replaced text labels, dropdowns have been replaced with checkboxes, a brush splat is used for all painting tools, and so on.
For more information on the Tool Properties toolbar,
Ptex and Vector Painting Toolbars
|
|
|
|
|
In Mari 3.0, both Ptex and Vector Painting toolbars are displayed in Mari default layout. |
|
In Mari 4.0, both Ptex and Vector Painting toolbars are hidden by default. You can access them through the toolbar's right-click menu. |
Painting in Mari
|
|
|
|
|
In Mari 3.3, the Blending modes display in a long dropdown menu taking a lot of space and making it hard to see what Blending mode to use. |
|
In Mari 4.0, Blending modes have been categorized making them easier to navigate to in the dropdown menu. |
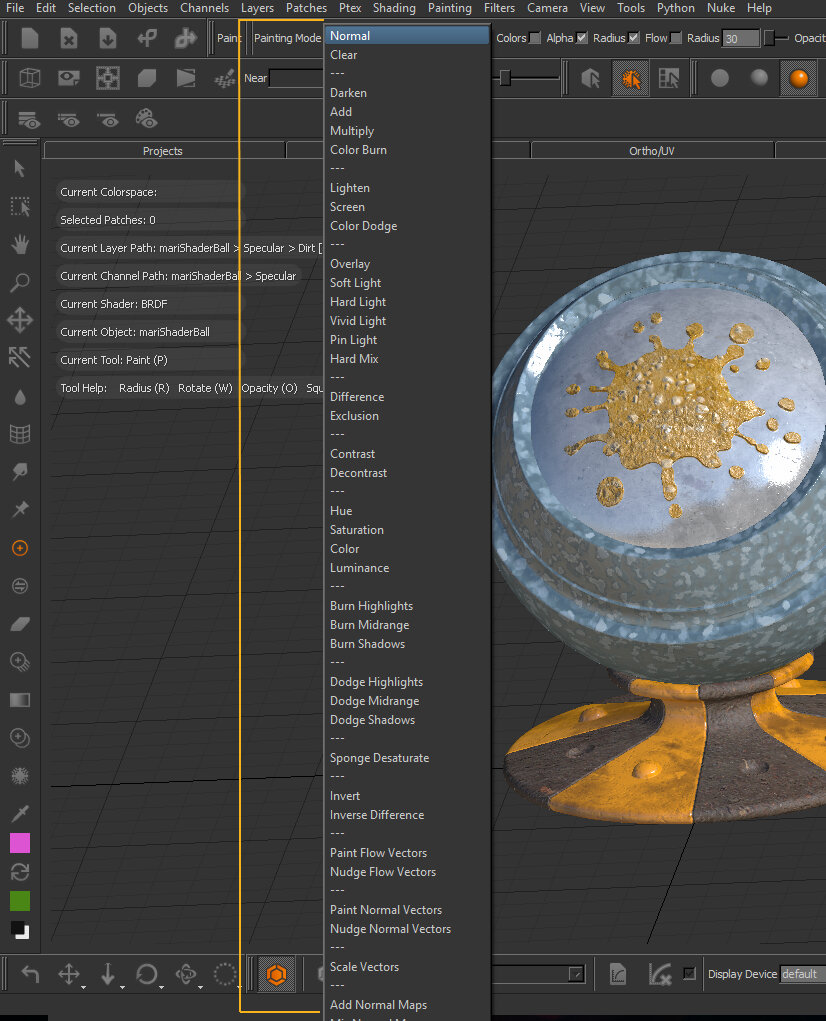
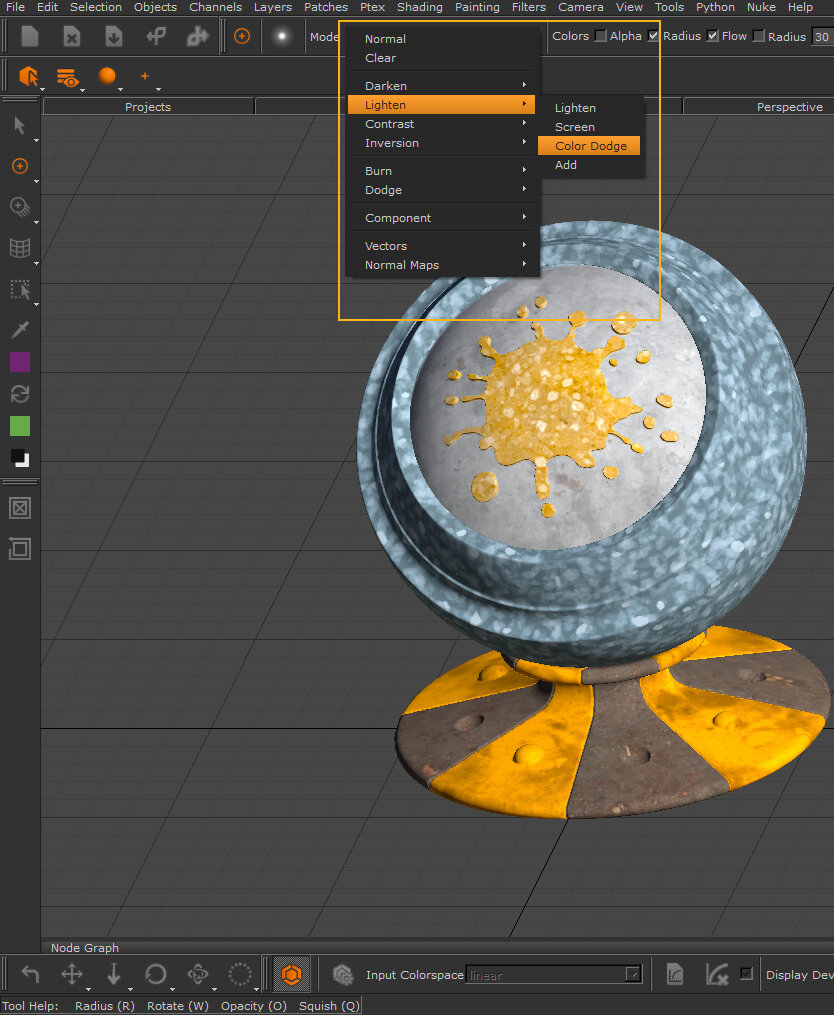
See Paint Blending Modes.
Using the Paint Buffer
|
|
|
|
|
In Mari 3.3, the Painting toolbar only contains one tool that clears unbaked paint. |
|
In Mari 4.0, the Painting toolbar has been renamed to Paint Buffer toolbar and contains another tool that resets the transformation of the paint buffer. |
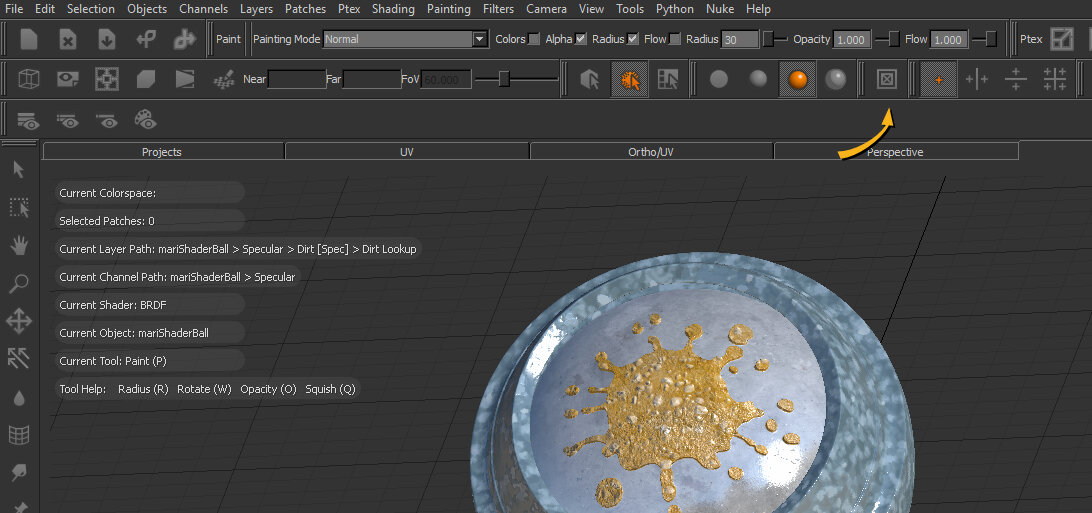
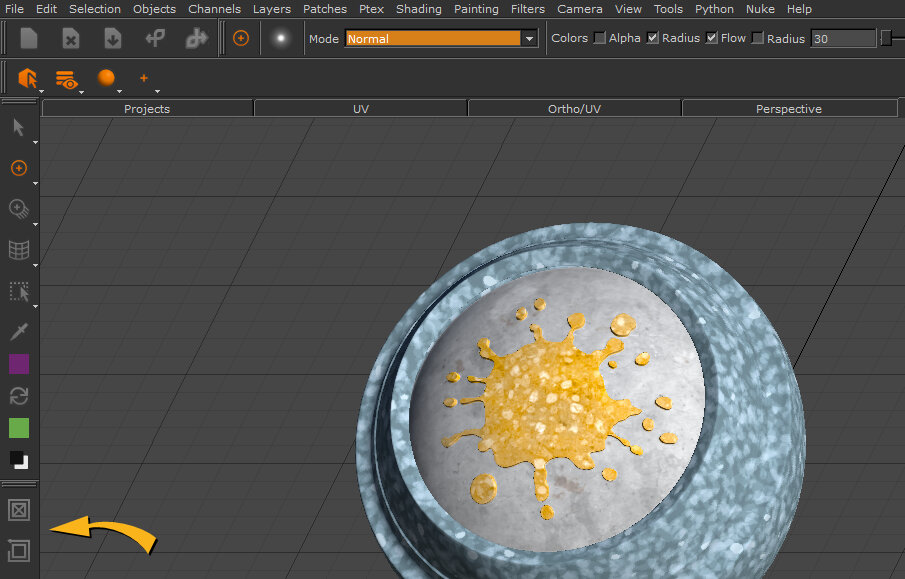
For more information on the Paint Buffer toolbar,
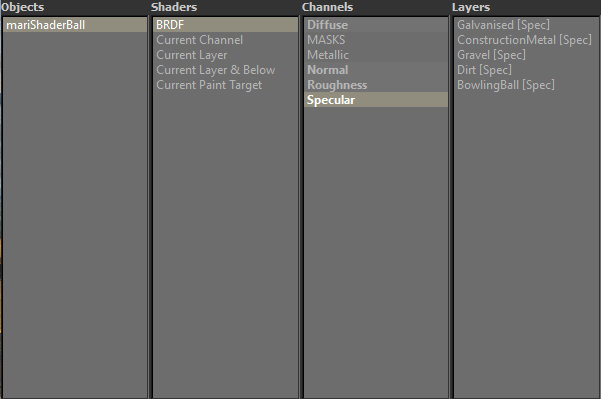
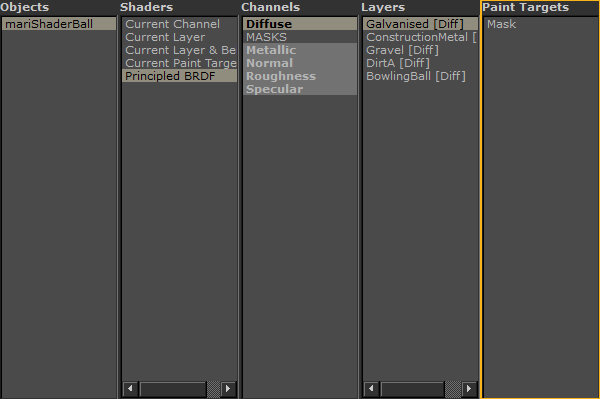
Choosing a Paint Target
|
|
|
|
|
In Mari 3.3, the Paint Target quick palette (hold the I key) allows you to select your objects, shaders, channels, and layers. |
|
In Mari 4.0, the Paint Target quick palette (hold the I key) allows you to select your objects, shaders, channels, layers, and paint targets (paintable layers or masks). |
Accessing Palettes
In Mari 3.3, you can access palettes by navigating to View > Palettes and through the toolbar's right-click menu.
In Mari 4.0, in addition to accessing the palettes using the main menu and the toolbar's right-click menu, there is now a new Palettes toolbar.
For more information, see Configuring Your Workspace.
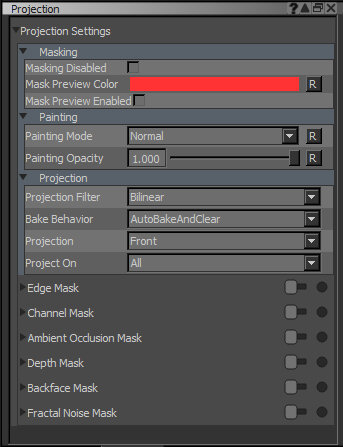
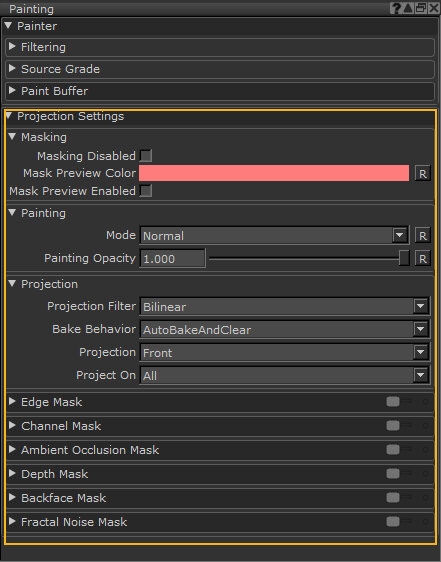
Projection Settings
|
|
|
|
|
In Mari 3.3, the projection settings are located in the Projection palette. |
|
In Mari 4.0, the projection settings are now in the Painting palette under the Projection Settings group. |
Group Layer Workflows
In Mari 3.3, grouping, ungrouping, and adding layers is not very intuitive.
In Mari 4.0, grouping, ungrouping, and adding layers can now be achieved quickly and efficiently. Creating new Group layers, with layers selected, now groups those layers inside the new Group Layer. Creating new layers when a Group Layer is selected, adds those new layers to the selected Group Layer.
For more information, see Groups, Pass-Through, and Mask Stacks and
Editing Brushes
In Mari 3.3, you can edit your brushes using the Brush Editor and the Tool Properties palettes. In the Brush Editor, the Shelves, and Presets tab, in which your brushes are stored, can also be found in the Shelf palette.
In Mari 4.0, to make it simpler the Brush Editor palette has been removed and you can find the brush properties in the Tool Properties palette. To save your custom brushes, you can drag the brush splat icon from the Tools Properties toolbar to the Shelf palette.
Working with Colors
In Mari 3.3, the Colors palette is not resizable and contains the foreground and background swatches, which are duplicates of the ones in the Tools toolbar. You can pick colors using the Colors palette, the Colors quick palette, and the Select Color dialog. The Pixel Analyzer is a separate palette.
You can find the color management settings in the Color Manager (Viewer Transform) palette as well as in the Project Settings dialog.
In Mari 4.0, the Colors palette has been entirely redesigned. You can now resize the palette and the Pixel Analyzer palette has been merged with the Colors palette. The gray and blend controls have been improved. The Colors palette, the Colors quick palette, and the Select Color dialog that are used to pick colors now share a similar design.
The Color Manager (Viewer Transform) palette has been removed (although can be displayed using an environment variable), and the color management settings can still be found in the Project Settings dialog.
For more information,
Filling Selected Objects, Faces, and Patches with Colors
In Mari 3.3, you fill the selected patches or faces using the Patches > Fill options.
In Mari 4.0, you fill the selected objects, patches, or faces using the Selection > Fill options and by dragging-and-dropping a color swatch to the selection.
Curve Editor
In Mari 3.3, the Curve Editor is very basic.
In Mari 4.0, the Curve Editor has been entirely redesigned. A curve attribute now displays as a grayscale gradient in Mari's properties panels and a separate, scalable curve editor window allows for precise editing.
Controlling Source Grading
|
|
|
|
|
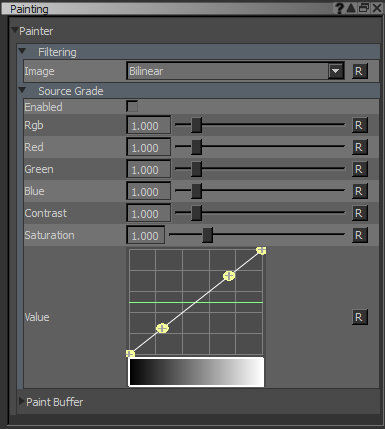
In Mari 3.3, in the Painting palette, the Source Grade section contains a limited amount of controls. |
|
In Mari 4.0, in the Painting palette, the Source Grade section now contains the same controls as the Grade Adjustment layer. |
Using the Node Graph
|
|
|
|
|
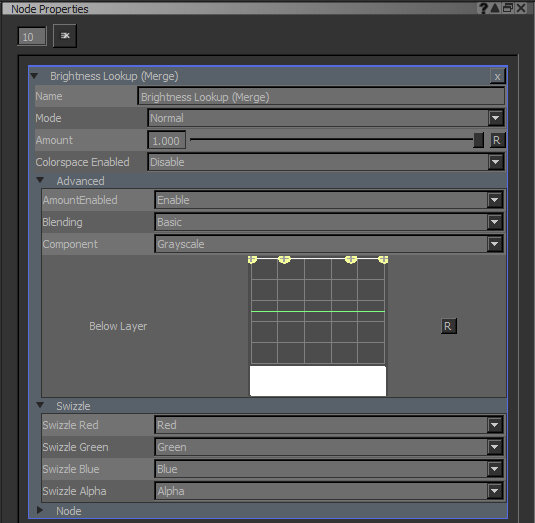
In Mari 3.3, the Node Graph contains two modes: basic and advanced. The Node Properties palette stacks a node's property groups in a single pane. |
|
In Mari 4.0, the Node Graph's basic mode has been removed and the Node Graph is now accessible in the advanced mode only. The Node Properties palette displays a node's property groups in separate tabs to make it more readable. |
For more information, see Node Graph.
Subdividing Objects
In Mari 3.3, the subdivision options are very limited.
Mari 4.0 now supports OpenSubdiv 3.1, providing you with more options to subdivide your objects.
See Subdividing Objects and
Interface
Project Preferences
|
|
|
|
|
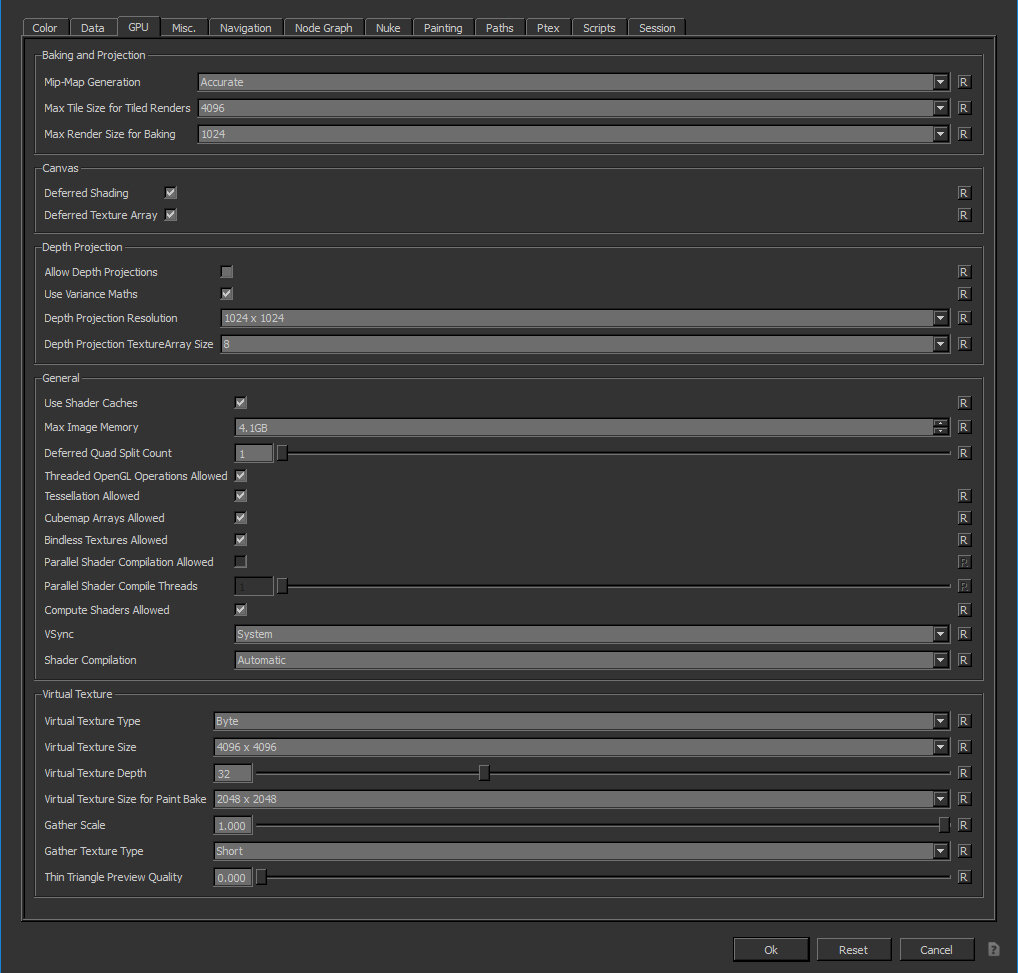
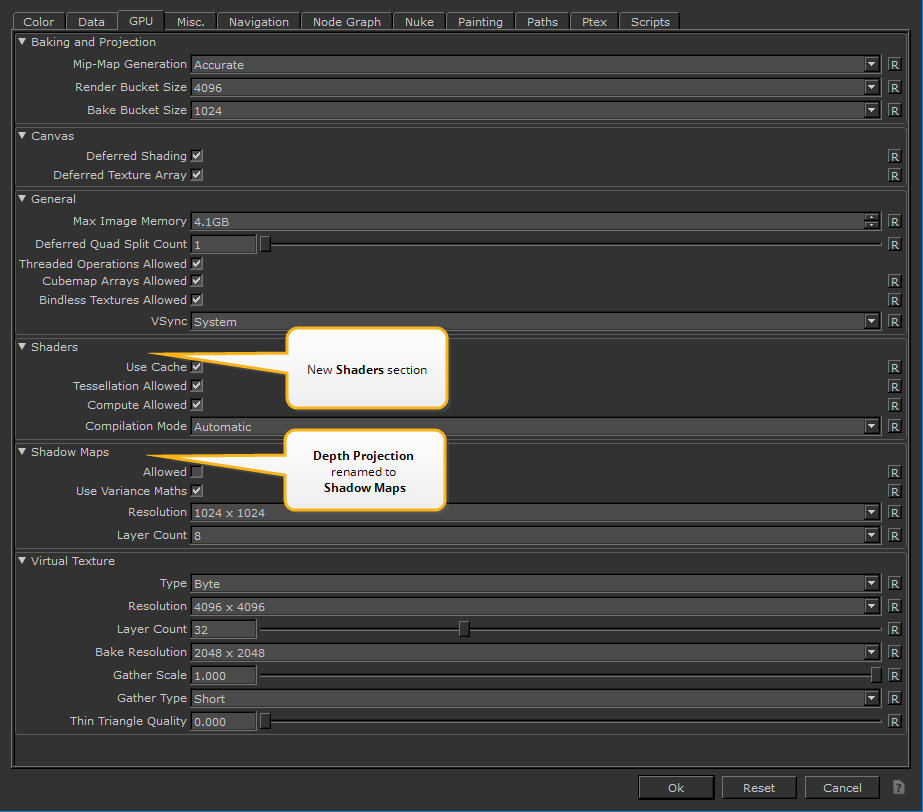
In Mari 3.3, in the Mari Preferences dialog, some preferences in the GPU tab have confusing labels. |
|
In Mari 4.0, the GPU tab has been reorganized and some preferences have been renamed. The Depth Projection section has been renamed to Shadow Maps and a Shaders section has been added to better categorize the preferences. In the Misc tab, the Slider Precision preference has been moved to the top, in the Appearance section. The Session tab has been removed. |
Head-Up Display
|
|
|
|
|
In Mari 3.3, the Head-Up Display (HUD) and the tool help are located in the top-left of the canvas, overlapping with your asset while painting. |
|
In Mari 4.0, the HUD is located in the bottom-right of the canvas and the tool help in the status bar giving you more space for your painting experience. |
Exporting Channels
In Mari 3.3, you can only export channels one dialog at a time by navigating to Channels > Export or Export Flattened.
In Mari 4.0, you can export multiple channels at once using the Export Manager. For more information,