Exporting and Importing
This lesson explains how you can export channels or layers you've painted in Mari as a set of image files, then re-import them into your project. This familiarizes you with just a few of the methods for exporting and importing.
Resources Needed
To complete this lesson, you need access to a computer that can run Mari, and the following sample files:
• 1-Blacksmith - the Mari project file you created in tutorial 1 and used in tutorial 2, tutorial 3, and tutorial 4.
How Long Should It Take?
Plan on spending about 25 minutes to complete this lesson.
About Mari Exports
Mari includes the facility to export the painting in a project to a series of image files. You might use this, for example, to modify part of your work in an external program, and then re-import those modifications into the project. Mari lets you select formats and naming conventions for the export. Each export contains the painting baked in a selected channel, one image file per patch. When you import a series of previously exported files, Mari lets you know whether it's a complete set.
Opening Your Project
| 1. | Start Mari. |
The Mari workspace displays.
| 2. | On the Projects tab, double-click on your 1-Blacksmith project to open it. |
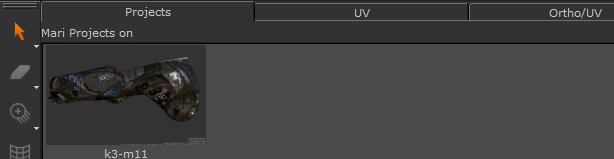
Your project opens and switches to the Ortho view.
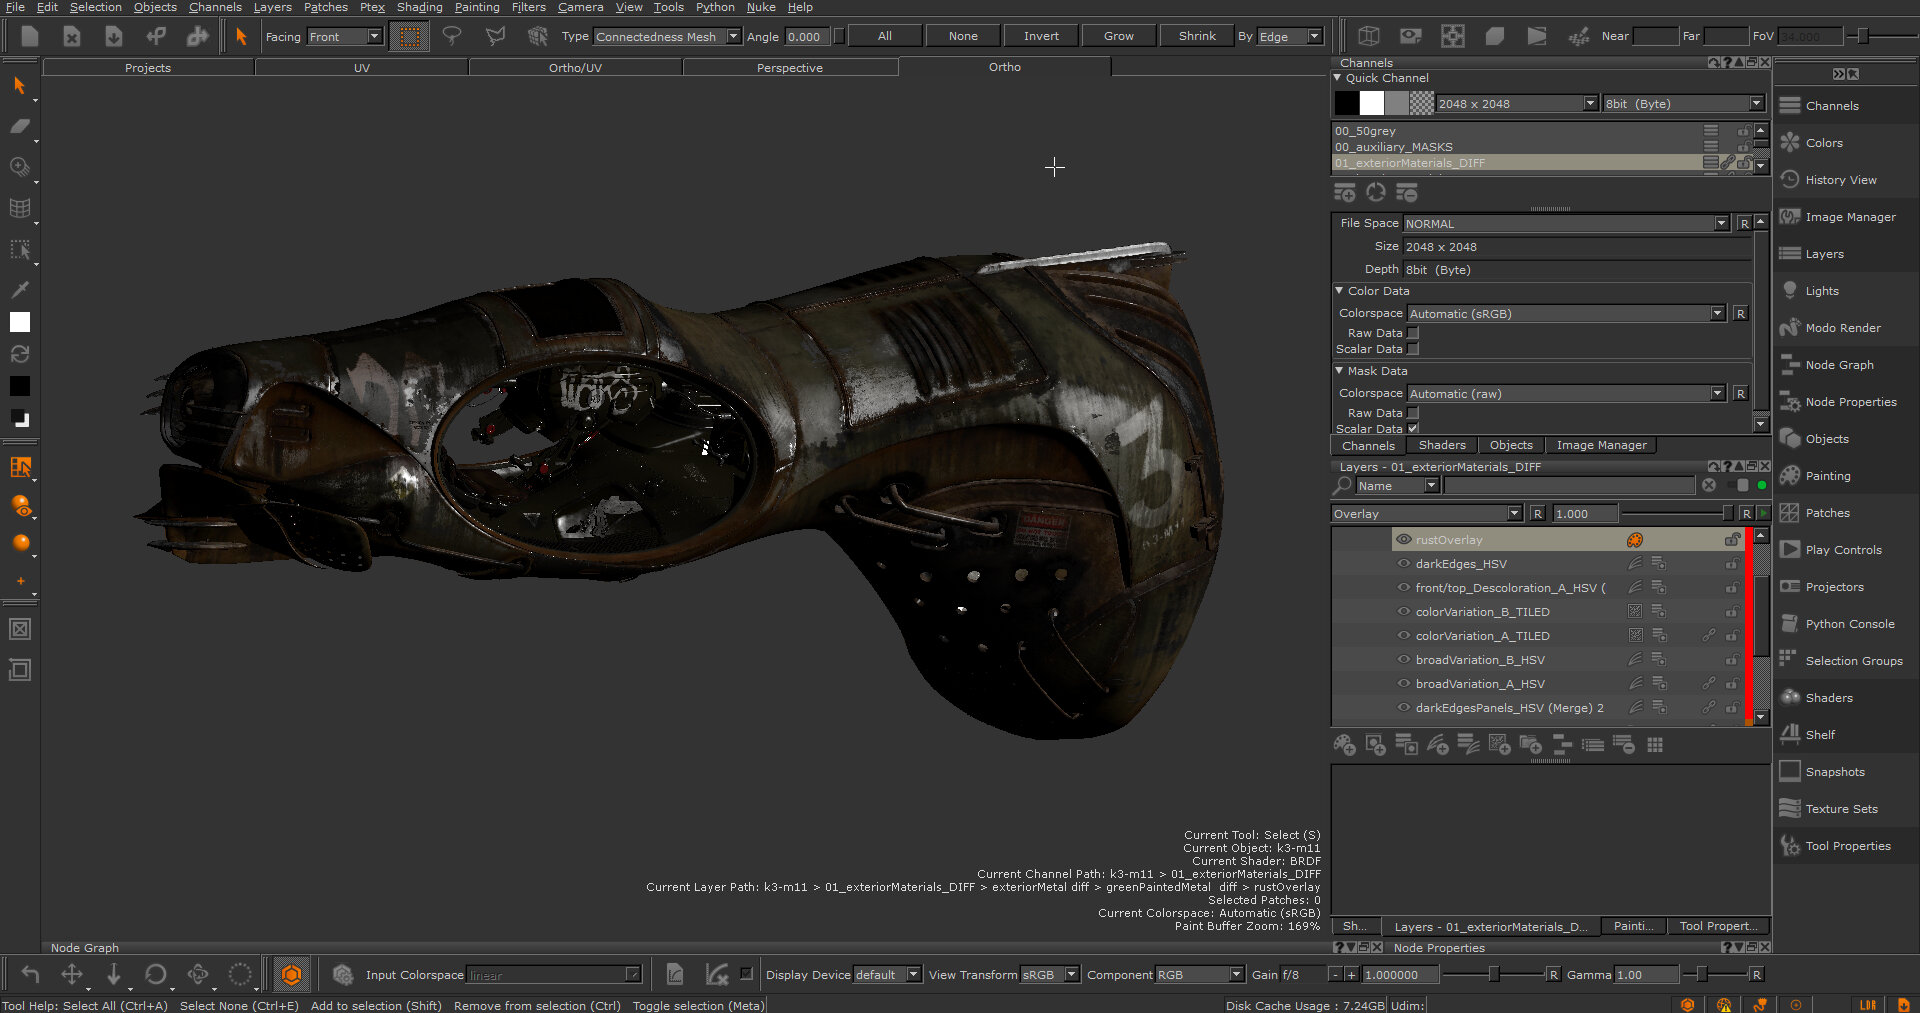
Exporting a Channel
| 1. | To export the current channel, Diffuse, from the Channels menu, select Export > Export Current Channel. |
This exports the currently-selected channel, Diffuse. To export any channel, right-click the channel you want to export in the Channels palette, and select Export > Export Current Channel from the dropdown menu.
The Export dialog box displays.
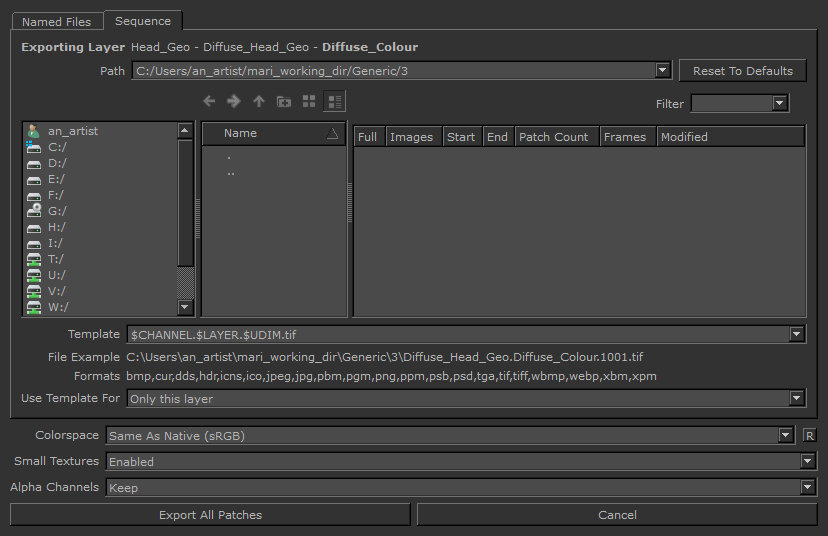
Note: The Named files tab does not display if your model contains more than 20 patches.
| 2. | If necessary, use the two left-hand navigation boxes to navigate to the folder you want to export to. |
| 3. | In the Template field, Mari names each image file in the export, one per layer and per patch, based on this template. The default is $CHANNEL.$LAYER.$UDIM.tif |
Note: Notice the File Example below it, which displays what a filename looks like with that template. In the illustration, it's: diffuse.Base.1001.tif
So each filename includes the following (with examples from the illustration):
-$CHANNEL - the name of the channel you’re exporting layers from: Diffuse.
-$LAYER - the name of the layers you’re exporting: Base.
-$UDIM - an incremental number identifying each patch in those layers: 1001 (followed by 1002, 1003, and so on).
-tif - the extension for the selected file format. You can set the format for the exported files by changing this extension. Mari supports standard image formats (such as .png, .jpg, .tga, and .dds).
Tip: The formats available to export depend on the color depth of the channel. Channels with color set to Half-Float or Float can only be exported to .psd, and .psb format. On Windows, channels with color set to Half-Float or Float also can be exported to .dds format.
| 4. | Set the Use Template For field to Only this layer in order to only use the template for the layer displayed at the top of the dialog. |
| 5. | Set the Colorspace in which you want to export the data. By default, Mari selects Automatic, which is determined by the file name, size, and type of data in the channel. For this tutorial, keep the default setting. |
| 6. | Enable Small Textures to export any patches that you haven't painted yet, or have painted as a single color, as 8x8-pixel textures at the correct size. |
| 7. | Set Alpha Channels to Keep so that alpha channels aren't removed when exporting channels. |
| 8. | Click Export All Patches. |
This exports all patches. You may be notified that the selected directory does not exist, and prompted about whether you want to create the directory.
Tip: For a complete explanation of export fields, see the Mari Reference Guide and the
Note: As the options above only export channels one dialog at a time, to export multiple channels at once,
Tip: The Export Manager Dialog also has additional file options for EXR files. See Exporting EXR Files for Render.
| 1. | To export selected layers, from the Layers menu, select Export > Export Selected Layers. This exports any selected layers in the layer stack (in this case, Base). |
The Export dialog box displays.
Note: The Named files tab does not display if your model contains more than 20 patches.
| 2. | If necessary, use the two left-hand navigation boxes to navigate to your tutorial folder. |
| 3. | In the Template field, Mari names each image file in the export, one per channel, layer and patch, based on this template. The default is $CHANNEL.$LAYER.$UDIM.tif. |
Note: Notice the File Example below it, which displays what a filename looks like with that template. In the illustration, it's: diffuse.Base.1001.tif
So each filename includes the following (with examples from the illustration):
-$CHANNEL - the name of the channel you’re exporting layers from: Diffuse.
-$LAYER - the name of the layers you’re exporting: Base.
-$UDIM - an incremental number identifying each patch in those layers: 1001 (followed by 1002, 1003, and so on).
-tif - the extension for the selected file format. You can set the format for the exported files by changing this extension. Mari supports standard image formats (such as .png, .jpg, .tga, and .dds).
Tip: The formats available to export depend on the color depth of the channel. Channels with color set to Half-Float or Float can only be exported to .psd, and .psb format. On Windows, channels with color set to Half-Float or Float also can be exported to .dds format.
| 4. | Set the Use Template For field to Only this layer in order to use the template for only the layers selected. If Only this layer is selected when attempting to export, Mari asks you for each individual layer whether you want to use the template. |
| 5. | Set the Colorspace in which you want to export the data. By default, Mari selects Automatic, which is determined by the file name, size, and type of data in the channel. For this tutorial, keep the default setting. |
| 6. | Enable Small Textures to export any patches that you haven't painted yet, or have painted as a single color, as 8x8-pixel textures at the correct size. |
| 7. | Set Alpha Channels to Keep so that alpha channels aren't removed when exporting channels. |
| 8. | Click Export All Patches. |
This exports all patches.
Tip: For a complete explanation of export fields, see the Mari Reference Guide and the
Importing a Channel
| 1. | To import a channel (for example if you've tweaked some exported image files in another application and now want them back in your texture): |
• from the Channels menu, select Import > Import into Current Channel for the currently selected channel, or
• right-click on the channel where you want to import the textures (in this case, Color) in the Channels palette, and select Import > Import into Current Channel from the dropdown menu.
The Import dialog box displays.
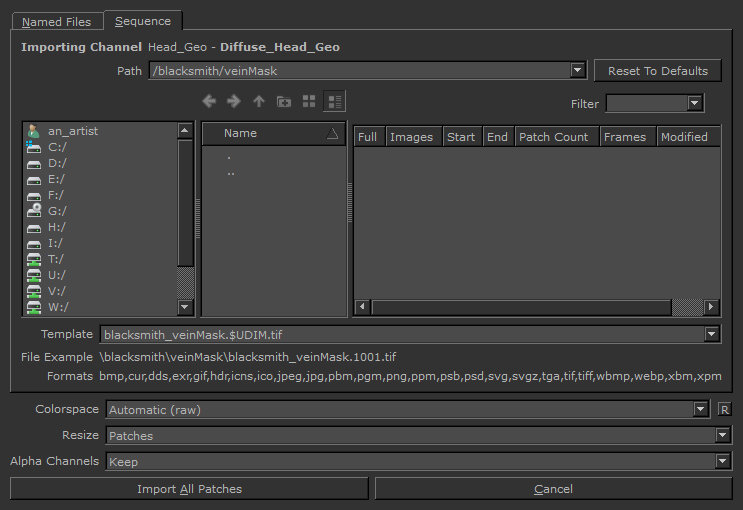
Note: The Named files tab does not display if your model contains more than 20 patches.
| 2. | Select the path for the imported images, by either: |
• typing it in the Path field at the top of the dialog,
• clicking on it in your directory bookmarks (to the left), or
• browsing to it in the middle panes.
If you are using the middle panes to browse to the directory, you can use the buttons above the view to navigate back, forward, up one directory level, create a new directory, or switch between icon-only and full-details directory views.
| 3. | Select the texture set to import. |
Mari shows all the image sets available under the selected directory, arranged by sub-directory.
For each texture set, the Import dialog box includes:
• Full - shows a green bar if the selected image sequence has a full set of images for the current model, a yellow bar if the selected image sequence has a partial set of images for the current model, or a red bar if the selected image sequence has no images for the current model.
• Images - the name of each image to import, with the UDIM number represented as @ (in this case, diffuse.@.tif) and frame number (if present) represented as #.
• Start and End - the first and last UDIM numbers in the image set (in this case, 1001 to 1055).
• Patch Count - the number of images in the set (in this case, 50).
| 4. | In the Template field, Mari names each image file in the import, one per layer and patch, based on this template. The default is $CHANNEL.$LAYER.$UDIM.tif. |
Note: Notice the File Example below the Template field, which displays what a filename looks like with that template. In the illustration, it's: diffuse.Base.@.tif
So each filename includes the following (with examples from the illustration):
-$CHANNEL - the name of the channel you’re importing: Diffuse.
-$LAYER - the name of the layers you’re importing: Base.
-$UDIM - an incremental number identifying each patch in those layers: 1001 (followed by 1002, 1003, and so on).
-tif - the extension for the selected file format. You can set the format for the exported files by changing this extension. Mari supports standard image formats (such as .tif, .exr, .png, .jpg, .tga, and .dds).
| 5. | Set the Colorspace in which you want to import the data. By default, Mari selects Automatic, which is determined by the file name, size, and type of data in the channel. For this tutorial, keep the default setting. |
| 6. | If there are size mismatches between the patch and image size, set the Resize field to resize the Images to match the patches, or to resize the Patches to match the images. |
| 7. | Set Alpha Channels to Keep so that alpha channels aren't removed when exporting channels. |
| 8. | Click the Import All Patches to import the files into your project. |
Mari imports the textures from the selected files.
Importing a Layer
| 1. | To import textures into a layer, from the Layers menu, select Import > Import into Current Layer. This imports all selected textures into the current, selected layer (in this case, Base). |
The Import dialog box displays.
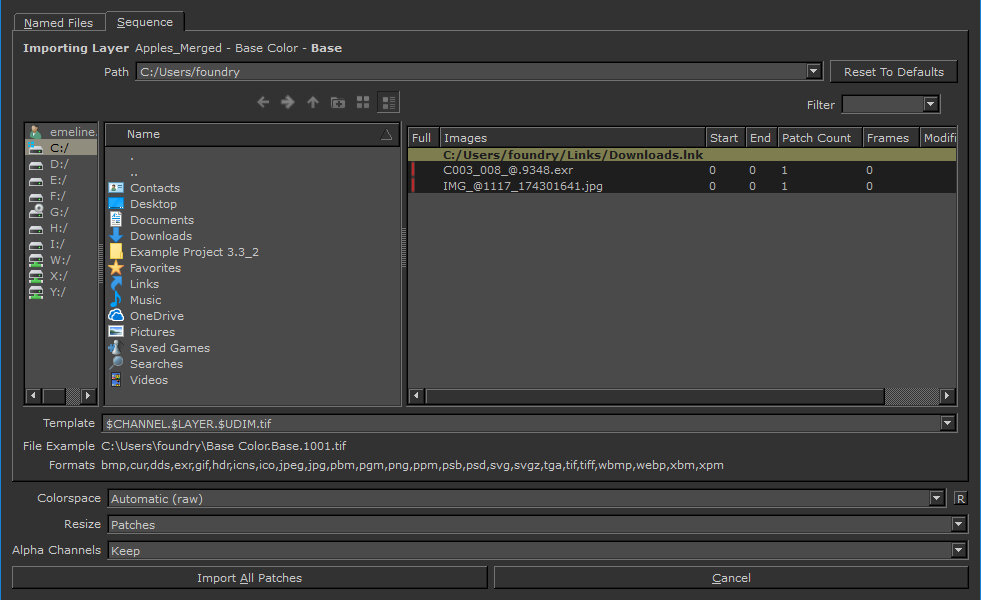
Note: The Named files tab does not display if your model contains more than 20 patches.
| 2. | Select the path for the imported images, by either: |
• typing it in the Path field at the top of the dialog,
• clicking on it in your directory bookmarks (to the left), or
• browsing to it in the middle panes.
If you are using the middle panes to browse to the directory, you can use the buttons above the view to navigate back, forward, up one directory level, create a new directory, or switch between icon-only and full-details directory views.
| 3. | Select the texture set to import. |
Mari shows all the image sets available under the selected directory, arranged by sub-directory.
For each texture set, the Import dialog box includes:
• Full - shows a green bar if the selected image sequence has a full set of images for the current model, a yellow bar if the selected image sequence has a partial set of images for the current model, or a red bar if the selected image sequence has no images for the current model.
• Images - the name of each image to import, with the UDIM number represented as @ (in this case, diffuse.@.tif) and frame number (if present) represented as #.
• Start and End - the first and last UDIM numbers in the image set (in this case, 1001 to 1055).
• Patch Count - the number of images in the set (in this case, 50).
| 4. | In the Template field, Mari names each image file in the import, one per channel, layer and patch, based on this template. The default is $CHANNEL.$LAYER.$UDIM.tif. |
Note: Notice the FileExample below the Template field, which displays what a filename looks like with that template. In the illustration, it's: diffuse.Base.@.tif
So each filename includes the following (with examples from the illustration):
-$CHANNEL - the name of the channel you’re importing: Diffuse.
-$LAYER - the name of the layers you’re importing: Base.
-$UDIM - an incremental number identifying each patch in those layers: 1001 (followed by 1002, 1003, and so on).
-tif - the extension for the selected file format. You can set the format for the exported files by changing this extension. Mari supports standard image formats (such as .tif, .exr, .png, .jpg, .tga, and .dds).
| 5. | Set the Colorspace in which you want to import the data. By default, Mari selects the colorspace determined by the value set in Default Import Colorspace in the Mari Preferences dialog under the Color tab. See Mari Preferences Dialog for more information. |
| 6. | If there are size mismatches between the patch and image size, set the Resize field to resize the Images to match the patches, or to resize the Patches to match the images. |
| 7. | Set Alpha Channels to Keep so that alpha channels aren't removed when exporting channels. |
| 8. | Click Import All Patches. |
This imports all patches.
Tip: For a complete explanation of export fields, see the Mari Reference Guide and
Where Do You Go from Here?
This lesson showed you how to:
• export a current channel or selected layer in a Mari project to a series of image files.
• import textures into a channel’s layer stack or into a selected layer, for example after having manipulated the exported textures in another program.
Congratulations! You have now completed all modules in the Mari Tutorials.