Brush Properties
For each brush, Mari specifies several properties that you can view and change.
To view the properties of a brush, select a painting tool such as Paint, Blur, Vector Paint, Paint Through, Gradient, and Clone Stamp, then select a brush in the Shelf palette, and open the Tool Properties palette. The following properties display.
|
Property |
Explanation |
Example |
|---|---|---|
| Brush Tip | ||
|
Bitmap |
||
|
Use Painting |
Click to use the painting in the paint buffer as a brush tip. Mari prompts you to save it either as an .exr or a .tif file (which file format is used depends on the support in your graphics card). Note: EXR files are 16-bit - most other bitmaps are 8-bit. |
|
|
Path |
Type the path or click the button to select an existing bitmap to use as the brush tip. |
|
|
Source |
When Type is set to Bitmap, select the color information channel from a specified bitmap image. Select from: • Red • Blue • Green • Luminance • Alpha • RGBA |
If you're using RGBA as the Source, ensure the correct color space is assigned to your bitmap image using the Bitmap Color Space controls. |
|
Invert Alpha |
When enabled, any alpha in the brush Source is inverted. |
|
|
Type |
To use an image as the brush tip, you need to set Type to Bitmap. |
|
|
Bitmap Color Space |
||
|
Colorspace |
Assigns a colorspace to the bitmap of your brush tip. |
This control works for bitmaps with Source set to RGBA. |
|
Raw Data |
Enables/disables the use of raw data in a specified bitmap. |
Disabled by default. |
|
Scalar Data |
Enables/disables the use of scalar data in a specified bitmap. |
Disabled by default. |
|
Geometry |
||
|
Vertical Shear |
How much to distort the brush tip diagonally, top to bottom (as if pulling opposite corners up and down). Range: -1.00 to 1.00, Reset: 0.00 |
|
|
Horizontal Shear |
How much to distort the brush tip diagonally, right to left (as if pulling opposite corners right and left). Range: -1.00 to 1.00, Reset: 0.00 |
|
|
Vertical Scale |
How much to distort the brush tip vertically. Range: 0.00 to 2.00, Reset: to .50 |
|
|
Horizontal Scale |
How much to distort the brush tip horizontally. Range: 0.00 to 2.00, Reset: to .50 |
|
|
Noise |
||
|
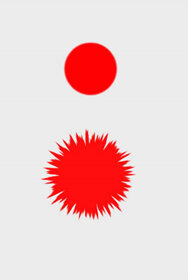
Octaves |
Number of applications of noise. Range: 1 to 8, Reset: 4 |
The same brush with the default and maximum noise:
|
|
Frequency |
How many spikes per octave. Range: 0.00 to 100.00, reset to 1.00 |
|
|
Scale |
How big the spikes are, as a proportion of the radius (1.00 = twice as big as the radius). Range: 0.00 to 1.00, Reset: 0.00 |
|
|
Segments |
Lines making up the brush outline, to which noise is applied (4=square, 360=circle). Range: 4 to 360, Reset: 360 |
|
|
Profile |
||
|
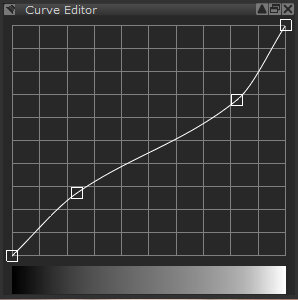
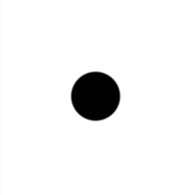
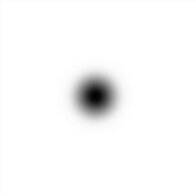
Profile |
For rendered brushes (see Brush Properties above), alpha profile of the brush tip from center to edge - determines how “hard” or “soft” it is.
In the Curve Editor, to move values along a curve, you can drag any of the points on the curve in any direction, and see the effects in the preview bar below the curve. Click to add a new point, and right-click to invert, select presets, and export and import settings. To remove a point, click on it while holding Ctrl/Cmd. |
Hard and soft brush tip profiles:
|
|
Bit Depth |
Byte (8-bit), Half (16-bit), or Float (32-bit) It is generally a good idea to use a brush with the same bit depth as the texture you're painting, to avoid stepping. Note that if you use an 8-bit bitmap, it still paints in 8-bit even if you set the bit depth to Half. |
|
| Resolution | ||
| Height Pixels | Set the height resolution of the brush tip. | |
| Width Pixels | Set the width resolution of the brush tip. | |
|
Brush Settings |
||
|
Noise |
How much noise to add to each splat, to soften the appearance and reduce banding. Lower values give a harder brush, higher values a softer brush. (You can also add noise to the brush tip itself - under the Noise section below.) Range: 0.00 to 100.00, Reset: 0 |
|
|
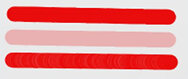
Spacing |
The space between splats, as a proportion of the width of a splat. 1.00 = side-by-side (so if the tip is a circle, it would look like a string of beads.) .02 = .02 x the width of a splat. Range: 0.02 to 5.00, Reset: 0.02 |
A stroke from the same brush with spacing set to .02, .25, .50, and 1.0:
|
|
Clear Brush Value Settings |
Click to reset all Opacity, Flow, Color, Hue, Saturation, and Value properties to their default settings. |
|
|
Clear Brush Shape Settings |
Click to reset all Position, Rotation, Radius, Steady Stroke, and Tilt properties to their default settings. |
|
|
Opacity |
||
|
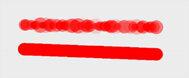
Opacity |
How transparent a stroke appears, where 1.00 is totally opaque. Range: 0.01 to 1.00, Reset: 1.00 |
A stroke from the same brush with opacity set to 1.00 and 0.50 with no jitter, and 1.00 with maximum jitter:
|
|
Pressure Blend |
When enabled, more pressure on the graphics tablet increases the opacity of the splat (as calibrated for your tablet). |
|
|
Jitter Opacity |
Whether to randomly vary the opacity (to the degree specified in Jitter Opacity Max). |
|
|
Jitter Opacity Max |
How much to randomly vary the opacity (if JitterOpacity is enabled). Range: 0.00 to 1.00, Reset: 0.00 |
|
|
Flow |
||
|
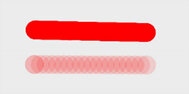
Flow |
Mimics how quickly paint is applied, by setting the maximum opacity in a splat. Range: 0.01 to 1.00, Reset: 1.00 |
A completely hard brush tip, full opacity, with spacing of 0.15 and flow at 1.00 and 0.30:
|
|
Pressure Blend |
When enabled, more pressure on the graphics tablet increases the flow of splats (as calibrated for your tablet). |
|
|
Color |
||
|
Pressure Blend |
When enabled, more pressure on the graphics tablet paints in the foreground color at the higher end of the Range specified (as calibrated for your tablet). |
|
|
Range |
Sets the range between which the background and foreground colors are blended. The minimum range is pure background color and the maximum is pure foreground color. • Jitter enabled - paint in a random blend between the minimum and maximum Range values. • Pressure Blend enabled - light pressure paints at the lower end of the Range and heavier pressure toward the high end of the Range. • Jitter and Pressure Blend enabled - light pressure paints at the lower end of the Range and heavier pressure paints in a random blend between the minimum and maximum Range. |
|
|
Random Jitter |
Sets the type of color jitter applied to splats: • No Jitter • Jitter Per Stroke • Jitter Per Tip |
See Changing Brush Color Dynamically for more information. |
|
Use Legacy Coloring |
When enabled, color jittering is controlled by the alpha channel color jittering available in versions of Mari 4, and older. |
|
|
Hue |
||
|
Pressure Blend |
When enabled, more pressure on the graphics tablet paints in the Hue at the higher end of the Range specified (as calibrated for your tablet). |
|
|
Range |
Sets the range between which the Hue is adjusted. • Jitter enabled - adjusts the Hue by a random amount between the minimum and maximum Range values. • Pressure Blend enabled - light pressure adjusts the Hue by the amount at the lower end of the Range and heavier pressure by the amount at the high end of the Range. • Jitter and Pressure Blend enabled - light pressure adjusts the Hue by the amount at the lower end of the Range and heavier pressure adjust the hue by a random amount between the minimum and maximum Range. |
|
|
Random Jitter |
Sets the type of hue jitter applied to splats: • No Jitter • Jitter Per Stroke • Jitter Per Tip |
See Changing Brush Color Dynamically for more information. |
|
Saturation |
||
|
Pressure Blend |
When enabled, more pressure on the graphics tablet paints with the Saturation at the higher end of the Range specified (as calibrated for your tablet). |
|
|
Range |
Sets the range between which the Saturation is adjusted. • Jitter enabled - adjusts the Saturation by a random amount between the minimum and maximum Range values. • Pressure Blend enabled - light pressure adjusts the Saturation by the amount at the lower end of the Range and heavier pressure by the amount at the high end of the Range. • Jitter and Pressure Blend enabled - light pressure adjusts the Saturation by the amount at the lower end of the Range and heavier pressure adjust the saturation by a random amount between the minimum and maximum Range. |
|
|
Random Jitter |
Sets the type of Saturation jitter applied to splats: • No Jitter • Jitter Per Stroke • Jitter Per Tip |
See Changing Brush Color Dynamically for more information. |
|
Value |
||
|
Pressure Blend |
When enabled, more pressure on the graphics tablet paints with the Value at the higher end of the Range specified (as calibrated for your tablet). |
|
|
Range |
Sets the range between which the Value is adjusted. • Jitter enabled - adjusts the Value by a random amount between the minimum and maximum Range values. • Pressure Blend enabled - light pressure adjusts the Value by the amount at the lower end of the Range and heavier pressure by the amount at the high end of the Range. • Jitter and Pressure Blend enabled - light pressure adjusts the Value by the amount at the lower end of the Range and heavier pressure adjust the saturation by a random amount between the minimum and maximum Range. |
|
|
Random Jitter |
Sets the type of Value jitter applied to splats: • No Jitter • Jitter Per Stroke • Jitter Per Tip |
See Changing Brush Color Dynamically for more information. |
|
Position |
||
|
Jitter Position |
Whether to randomly vary displacement from the line of the brush stroke (to the degree specified in Jitter Position Max). |
|
|
Jitter Position Max |
How many pixels at most to randomly vary displacement from the line of the brush stroke (if JitterPosition is enabled). Range: 0 to 1000, Reset: 20 |
|
|
Rotation |
||
|
Rotation |
The degree to which the brush rotates to match the direction you're painting (if Align to Stroke is enabled). Range: 0.00 to 360.00, Reset: 0.00 |
|
|
Align to Stroke |
Whether the brush tip rotates along with the direction you're painting. (With calligraphy, for example, the tip does not align.) |
|
|
Jitter Rotation |
Whether to randomly vary the rotation. |
|
|
Jitter Rotation Max |
How many degrees at most to randomly vary the rotation (if Jitter Rotation is enabled). Range: 1 to 360, Reset: 360 |
|
|
Radius |
||
|
Radius |
How many pixels at most the radius of splat can be (if JitterRadius and/or RadiusPressure are enabled). Range: 1 to 1200, Reset: 100 |
A stroke with and without radius jitter, where the jitter is equal to the whole radius of the brush:
|
|
Squish |
How much to flatten the radius. If the brush tip is a circle, 1.0 is a circle, .5 is an oval half as tall as it is wide. Range: 0.05 to 1.00, Reset: 1.00 |
|
|
Pressure Blend |
When enabled, more pressure on the graphics tablet affects the radius of the splat (as calibrated for your tablet). |
|
|
Jitter Radius |
Whether to randomly vary the radius (to the degree specified for the Radius and InnerRadius). |
|
|
Inner Radius |
How few pixels the radius of a splat can be (if JitterRadius and/or Radius Pressure are enabled). Range: 1 to 1200, Reset: 1 |
|
|
Steady Stroke |
||
|
Mode |
Whether to use the Off, Distance, or Smoothing mode. Reset: Distance |
|
|
Delay |
Defines how much delay is used for the brush stroke. In Distance mode, the Delay uses the specified amount of screen pixels, keeping a fixed distance, to define the brush stroke. In Smoothing mode, the Delay uses the moving average of the cursor movement to define the brush stroke. Note: When you move the mouse very fast, Mari gets fewer samples, so the delay looks longer. Range: 0 to 200. Reset: 0.00 |
|
|
Tail |
Whether to use the No Tail or Meet options for the finishing strokes. • Meet - The brush stroke catches up to the cursor's position when releasing the mouse or pen. • No Tail - The brush stroke stops as soon as the mouse or pen is released, with no catch-up. Reset: No Tail |
|
|
Tilt |
||
| Y Stretch | Stretches the brush splat vertically (Y direction) based on tablet pen tilt. | |
| X Stretch | Stretches the brush splat horizontally (X direction) based on tablet pen tilt. | |
|
Scratch pad - shows a squiggle painted with the selected brush. You can also paint directly in the scratch pad (the default squiggle disappears while you enter a stroke). |
||

Note: The texture properties vary from one painting tool to the other and some tools do not have texture properties. Only the tools containing texture properties are listed below.
|
Property |
Explanation |
Example |
|---|---|---|
|
Texture |
||
|
|
||
|
Blur |
Specifies the blur value. |
|
|
|
||
|
Description |
Displays the tool function. |
|
|
Name |
Displays the tool name. |
|
|
Image |
||
|
Filename |
Sets the filepath of the image file to project as a texture. |
|
|
Info |
||
|
Description |
Displays the colorspace information of the image used to project as a texture. |
|
|
Height |
Displays the image height. |
|
|
Width |
Displays the image width. |
|
|
Preview |
||
|
Preview Alpha |
Specifies the transparency of the image previewed over the canvas. |
Range: 0.10 to 1.00 |
|
Image |
Displays a preview of the image. |
|
|
Transform |
||
|
Image Scale |
Sets the scale of the image on the x and y axes. This scales the image relative to the image's size. |
|
|
Pan Lock |
Locks the image position relative to the model. If you pan the model, the image that you're painting through pans too. |
|
|
Scale Lock |
Locks the image size relative to the model. If you zoom the model in or out, the image that you're painting through zooms in or out too. |
|
|
Reset Size |
Resets to: • ToOriginalSize • RelativeToPaintBuffer |
|
|
Auto Reset |
Sets the Auto Reset option to: • Reset • DoNotReset |
|
|
Reset |
Resets any transformations applied to the image using the Image Scale, Rotation, Scale or Translation options. This Reset option is dependent on what you set in the Reset Size and Auto Reset options. |
|
|
Rotation |
Sets the rotation of the image used by the Paint Through tool. |
|
|
Scale |
Sets the scale of the image on the x and y axes. This scales the image relative to the canvas size. |
|
|
Translation |
Sets the translated xy position of the image used by the Paint Through tool. |
|
|
|
||
|
Type |
Selects between Linear or Radial gradient. |
|
|
Out Point |
Specifies how far through the gradient the final color reaches. |
0.00 to 1.00, higher values imply the end color is reached later. |
|
In Point |
Specifies how far through the gradient the start color lasts for (before it starts graduating into the end color). |
0.00 to 1.00, higher values imply the start color finishes later. |
|
End |
Sets the final color for the gradient (color that the gradient ends up as). |
|
|
Start |
Sets the first color for the gradient (color the gradient starts out as). |
|
|
Preview |
|
|
|
Preview Alpha |
Selects the alpha value displayed by the preview of the gradient floating over the main canvas. |
Range: 0.10 to 1.00 |
|
Image |
Displays a preview version of the gradient. |
|
|
Transform |
|
|
|
Pan Lock |
Locks the image position relative to the model. If you pan the model, the gradient that you're painting pans too. |
|
|
Scale Lock |
Locks the image size relative to the model. If you zoom the model in or out, the gradient that you're painting zooms in or out too. |
|
|
Reset Size |
Resets to: • ToOriginalSize • RelativeToPaintBuffer |
|
|
Auto Reset |
Sets the Auto Reset option to: • Reset • DoNotReset |
|
|
Reset |
Resets any transformations applied to the image using the Image Scale, Rotation, Scale or Translation options. This Reset option is dependent on what you set in the Reset Size and Auto Reset options. |
|
|
Rotation |
Sets the rotation of the image used by the Gradient tool's preview. |
|
|
Scale |
Sets the scale of the image used by the Gradient tool's preview. |
|
|
Translation |
Sets the translated xy position of the image used by the Gradient tool's preview. |
|
|
|
||
|
Description |
Displays the tool function. |
|
|
Name |
Displays the tool name. |
|
|
Image |
|
|
|
Relative |
When enabled, clones from an offset point relative to the source point. When disabled, clones from the source point position. |
|
|
Clone From |
Sets values (0 to 1) to clone from the image on the x and y axes. |
|
|
Filename |
Sets the filepath of the image file used for clone stamping. |
|
|
Info |
|
|
|
Description |
Displays the bit depth and the image channels of the image used for clone stamping. |
|
|
Height |
Displays the image height. |
|
|
Width |
Displays the image width. |
|
|
Preview |
|
|
|
Onscreen Preview |
When enabled, displays the image on the canvas. |
|
|
Preview Alpha |
Specifies the level of transparency of the image preview displayed over the canvas. |
Range: 0.100 to 1.000 |
|
Image |
Displays a preview of the image used for clone stamping. |
|
|
Transform |
|
|
|
Image Scale |
Sets the scale of the image on the x and y axes. This scales the image relative to the image's size. The button locks the current Image Scale values so that any changes to scale are applied proportionately to both axes. |
|
|
Pan Lock |
Locks the image position relative to the model. If you pan the model, the image that you're painting pans too. |
|
|
Scale Lock |
Locks the image size relative to the model. If you zoom the model in or out, the image that you're painting zooms in or out too. |
|
|
Reset Size |
Resets to: • ToOriginalSize • RelativeToPaintBuffer |
|
|
Auto Reset |
Sets the Auto Reset option to: • Reset • DoNotReset |
|
|
Reset |
Resets any transformations applied to the image using the Image Scale, Rotation, Scale or Translation options. This Reset option is dependent on what you set in the Reset Size and Auto Reset options. |
|
|
Rotation |
Sets the rotation of the image used by the Clone Stamp tool's preview. |
|
|
Scale |
Sets the scale of the image on the x and y axes. This scales the image relative to the canvas size. |
|
|
Translation |
Sets the translated xy position of the image used by the Clone Stamp tool's preview. |
|
|
Scratch pad - shows a squiggle painted with the selected brush. You can also paint directly in the scratch pad (the default squiggle disappears while you enter a stroke). |
||