Copying and Pasting Paint
When you need to copy and paste paint in your Mari project, you must copy from a source patch, and paste onto a target patch.
You can copy and paste both single or multiple patches and in both cases, you can copy between channels. When copying multiple patches, you can copy to other objects in your project.
Copying and Pasting Single Patches
Mari's quick copy function lets you copy a single patch and then copy it back onto the same object (on any channel). You can paste the copied patch back onto multiple target patches.
- Select your source patch from the Patches palette.
This only works with single patches. You cannot copy multiple patches at once. - From the Patches menu, select QuickCopy.
- Select your destination patch(es) from the Patches palette.
This can be on the same layer or a different layer on the same object. - From the Patches menu, select QuickPaste.
If you selected multiple patches, you may see a warning. If you choose to go ahead, the source patch is pasted across each of the target patches.
Mari pastes a copy of the source patch onto the destination.
Depending on how different the shapes of the two patches are, you can probably expect to see some blank areas or artifacts at the edges of the patch.
Tip: You can also find these options on the right-click dropdown menu on the canvas.
Video: Watch this quick demo on how to copy and paste between patches.
This video shows the workflow using Mari 3. Even though the Mari 4 workspace is different, the workflow remains the same. To have a look at the main UI differences, see Mari 3.3 vs 4.0.
Copying and Pasting Multiple Patches
Mari's Copy Multiple Textures function lets you copy entire patches between places in your project. You can copy patches:
- between objects,
- between layers on the same object, or
- between patches on the same layer.
You can only copy textures on a patch-to-patch basis – you cannot copy one patch onto more than one other patch at once.
You can also use an offset. This is added to the source patch number to determine where to paste the texture to. For example, if you copied the texture on patch 1001 with an offset of 20, the texture would copy to patch 1021.
So, for example, if your model has a consistent numbering scheme, you can use this to paste from one side of the model to another. As you do this, Mari reverses the textures.
Here, we paint a couple of black stripes on the face, and then select patch 1002:
|
|
|
|
Black stripes painted. |
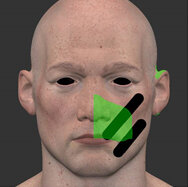
Patch 1002 selected. |

If we copy patch 1002 back onto the same channel, with an offset of 20, the paint copies to patch 1022 (the corresponding patch on the other side of the model's face). Mari reverses the texture as it pastes.

To copy and paste multiple patches:
- From the Patches menu, select CopyTextures.
The CopyMultipleTextures dialog box displays:
- Set the details of where to take the textures from:
• SourceObject and SourceLayer set the location of the source patches.
• Set the SelectBy field to the patch numbering scheme you want to use to select the patches to copy.
• In the SourceRange field, enter the numbers for the patches to copy. You can separate patch numbers with commas, or use a hyphen to indicate a range. For example, this:
1001, 1003, 1005-1007
selects patches 1001, 1003, 1005, 1006, and 1007.
- Set the details of where to copy the textures to in the Target Object and TargetLayer fields.
Both these fields can be the same as the source versions. - If required, set an Offset. This is added to the patch numbers when copying them. For example:
• With an offset of 0, patch 1001 is copied to patch 1001 in the target layer.
• With an offset of 20, patch 1001 is copied to patch 1021 in the target layer (which can be the same as the source layer).
- Click OK to copy the textures.
Mari copies the textures to the designated object, layer, and patches.