Setting the Perspective Camera Details
For the perspective you can set the near and far clipping planes. Anything closer than the near clipping plane or farther than the far plane is not displayed.
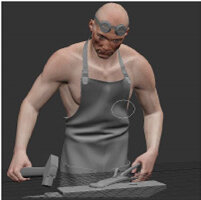
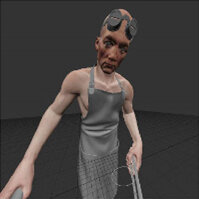
You can also set the field of view. This controls the amount of distortion applied to generate the perspective.
|
|
| Field of view set to 20 | Field of view set to 120 |
Tip: You can also have black bars appear in the Canvas to indicate the aspect ratio of the perspective
camera. Select View > DisplayProperties and set Camera Mask Opacity to anything other than 0.
To set the perspective camera details:
| 1. | Click on the Perspective tab to switch to the perspective camera. |
| 2. | If it's not already visible, open the Canvas toolbar. |

To open the toolbar, right-click in the toolbars area at the top of the screen and select Canvas from the dropdown menu.
| 3. | Enter values for the Near and Far clipping planes. |
Mari only displays parts of the scene that fall between these two planes. Anything closer than the Near plane, or further than the Far plane, is not shown.
| 4. | Set the value for the field of vision in the FoV field. This controls how much Mari distorts the view when applying perspective. At 0, the perspective camera gives exactly the same view as the Ortho camera. As the value increases, the distortion increases. |
Tip: You can also change view mode by clicking the Ortho![]() , Perspective
, Perspective ![]() , and UV
, and UV ![]() buttons, or pressing F10, F11, and F12 respectively.
buttons, or pressing F10, F11, and F12 respectively.