Exporting a Flattened USD Preview of Your Asset's Look
The USD Export feature enables you to generate flattened preview looks from a USD Preview Surface, Arnold Standard Surface, PxrSurface or Principled BRDF Shader in Mari, so that they may be used in other programs that support the USD format, such as Katana.
Note: The USD Export tab has changed between Mari 5.0 and Mari 6.0, and the legacy USD Export has been hidden for the updated USD Look Exporter. The legacy tab can still be accessed by using the environment variable MARI_USD_LEGACY_EXPORT_TAB. For more information on environment variables in Mari, see Environment Variables That Mari Recognizes.
|
|
|
The USD Look Export tab as it appears in the Export Manager. |
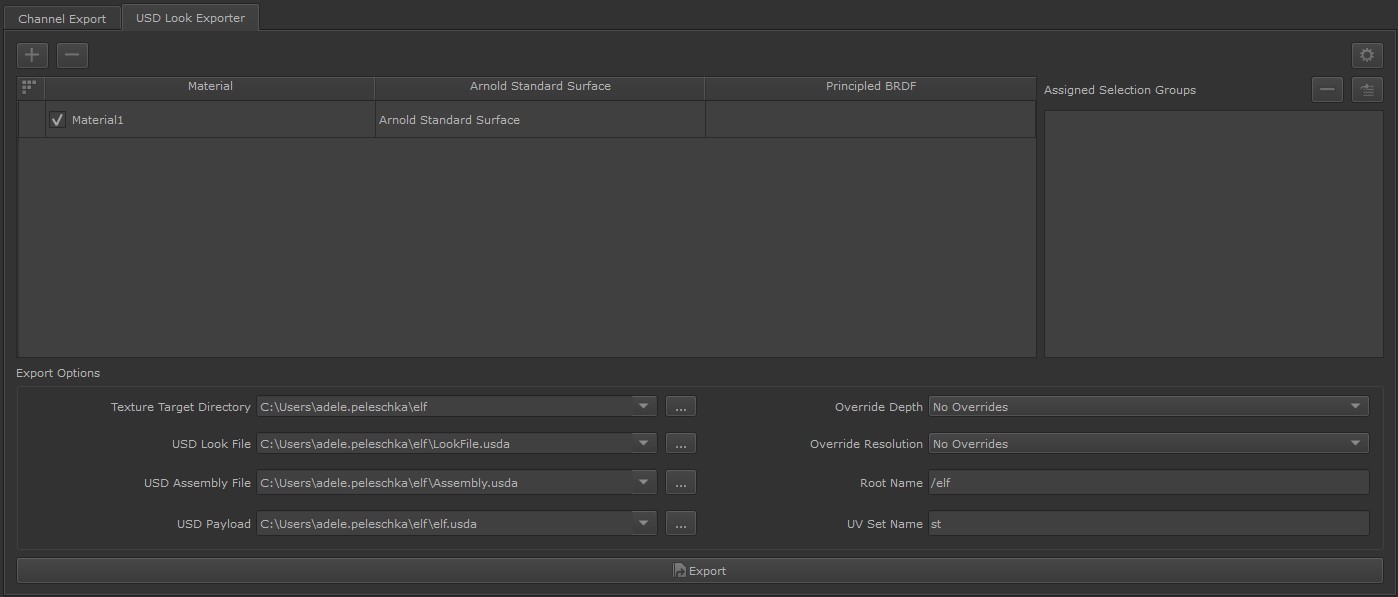
USD Export Types
The USD export options for Mari are as follows:
-
USD Look File - This export contains the ‘look’ of an asset, for example any materials, assignments or shading networks associated with your object will be exported.
-
USD Assembly File - This export bundles the ‘look’ of an asset with the geometry it is associated with.
Note: To export USD Assembly files, you must specify an associated USD payload file.
Exporting USD Preview Looks
To export a USD Preview Surface in Mari:
-
Open the Export Manager through Channels > Export Manager or the
 icon in the project toolbar.
 -
Open the USD Look Export tab.
-
In the USD Look Exporter, click the plus
 button at the top of the window.
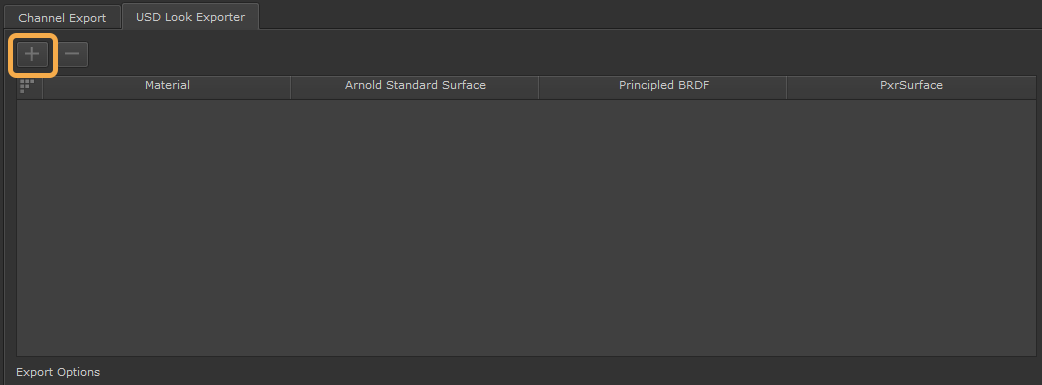
-
Double click the box under the shader that corresponds to the shader type that you are exporting, and select your shader from the drop down.
-
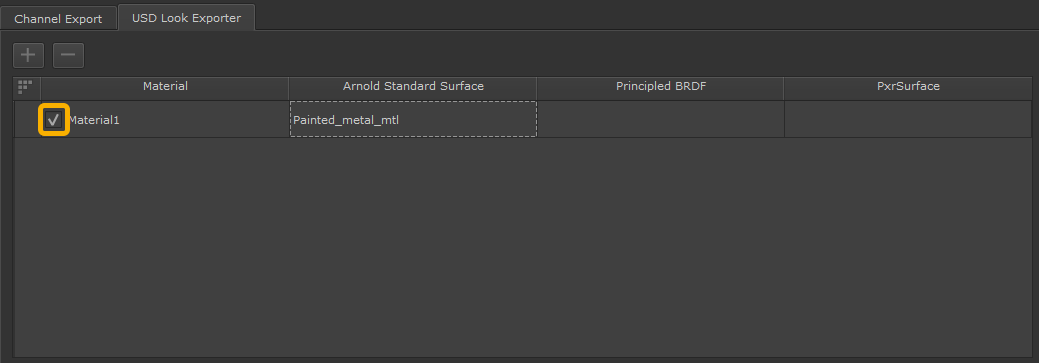
Esure that the checkbox next to your shader is checked.
-
Right click your material and select Edit Shader Inputs. In the window that appears, specify the export Size, Color Space, Depth, and Format per channel if needed.
-
Specify the target destination for your export and any variables for the file names of your textures. See Exporting Textures from Channels for more details.
-
Once all the relevant target destinations have been set, click Export to USD.
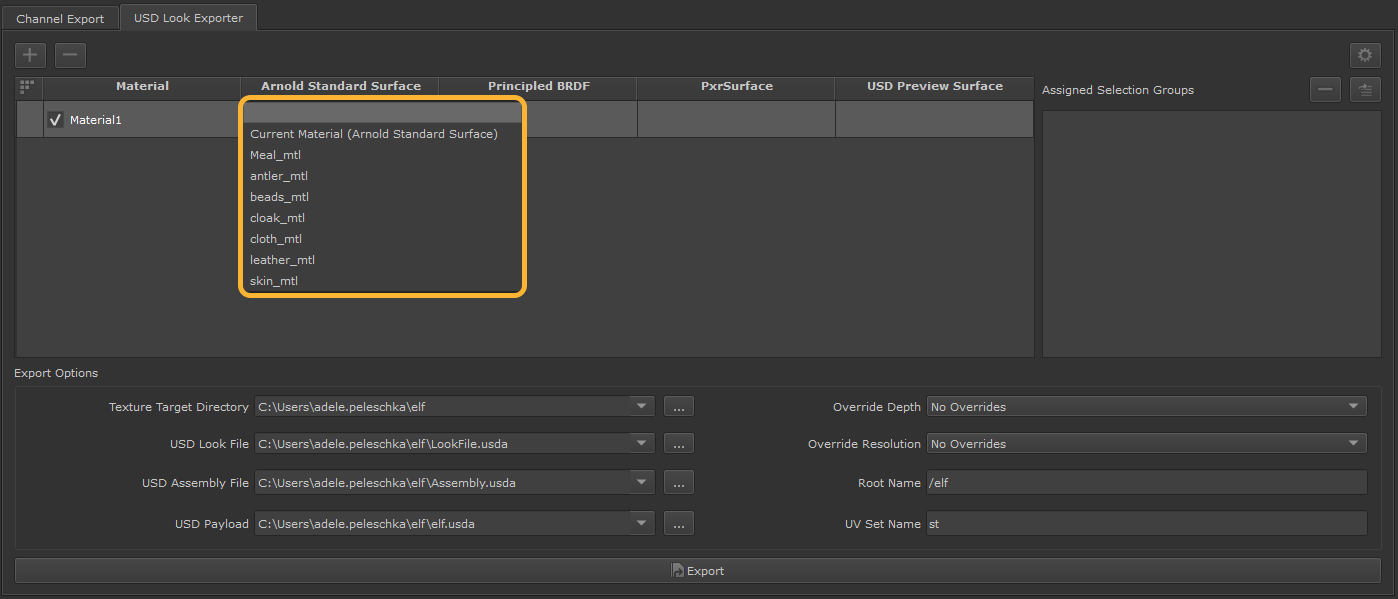
Note: The shader types available for export in the USD Look Exporter are dependent on the shaders present in your node graph. For example, if your node graph only contains an Arnold Standard Surface shader, only that shader is present in the USD Look Exporter. If you have Arnold Standard Shader, USD Preview Surface and Principled BRDF in your node graph, all three are available in the USD Look Exporter.
• If the export is a flattened preview, the target destination can be specified in the Texture File Name field.
• To generate a USD ‘look’ file of your channels, specify a target destination in the USD Look File field.
• To export an assembly file containing any geometry used with the shaders in your scene, specify a target destination in the USD Assembly File field.
Note: When exporting USD files, a root name must be specified in the Root Name text field. Any root name specified to this parameter must include the / (forward slash) prefix.