Layer Types and Examples
Below are descriptions and examples of the different adjustments available in the Layers palette.
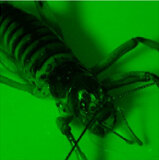
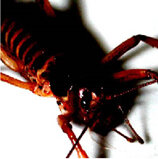
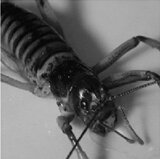
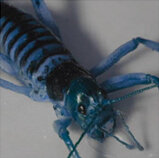
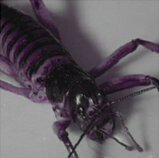
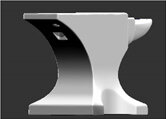
Examples of each of the filters are applied to the following image, for illustrative purposes:
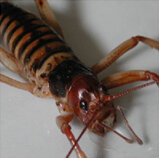
Note: Be sure to check for out-of-bounds values when adding adjustment layers. Ensure that your filters are applied correctly by adding a Clamp adjustment to fix any values that don’t fall between 0 and 1.
|
Type |
Description |
Settings |
Example |
|
Adjustment Layers - Filters |
|||
| Brightness |
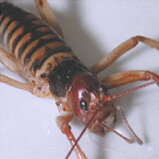
Changes the brightness of the paint on the model. You can also change the contrast at the same time. In a layer stack, the Brightness filter is always connected to the hidden transparency layer at the bottom of a layer stack if the filter is also at the bottom of the layer stack. To prevent this from disrupting the transparency layer, avoid placing Brightness filters at the bottom of a layer stack. |
Adjust the Brightness using the text field or slider. |
|
|
Brightness Lookup |
Changes the brightness of the paint on the model. You can adjust the brightness using the curve to get a specific brightness value. |
Use the Map curve to adjust the specific level of brightness. |
|
|
Clamp |
Clamps color values to lie within the specified upper and lower values. |
Set the Min value and Max value by using the text field or adjusting the sliders. Select the individual color component to clamp in the R, G, B, and A checkboxes. |
|
|
Color Balance |
Adjusts the intensities of the colors on your model in the highlights, midtones, and shadows. |
Set whether to Preserve Luminosity, then adjust the Cyan/Red, Magenta/Green, and Yellow/Blue values in the Highlights, Shadows, and Midtones. |
|
|
Color Lookup |
Changes the color of the paint on the model. |
Use the curves to set the individual Red, Green, and Blue values. |
|
|
Color Switch |
Turns individual color channels on or off, as well as the alpha channel. |
Use the checkboxes to select which color channels display. When Mari applies the filter, it removes any unchecked color channel or the alpha channel from the painting. |
|
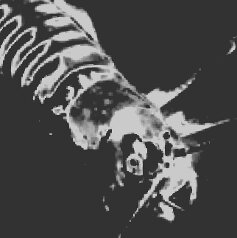
| Color to Mask | Allows a multicolored channel to be used for multiple masks by converting a selected color to a black and white mask. | Select a color using the color swatch, and set the error tolerance to determine how closely the RGB value has to be to the selected color in order to be considered part of the mask. |
|
|
Color to Scalar |
Converts color RGB values to scalar RGB values, which can be useful for using color data in a scalar channel such as Bump. |
N/A |
N/A |
|
Contrast |
Changes the contrast levels on the model. |
Select the amount of Contrast and specify a Contrast Pivot point that you want to adjust values around. |
|
|
Copy Channel |
Copies the value from one RGB color channel to the other two. The result is a grayscale image with the intensity values from the selected channel. |
Select the source channel from the list. When you apply the filter, Mari copies the selected channel over the other two channels. |
|
|
Flow |
Displays an image onto the model’s surface and uses vector data to animate it flowing. Note: If painting in the Clear blending mode, the Speed attribute is removed in that area. The vector inspector directional markers are still shown on the model. This concerns how the Flow procedural handles the alpha component. |
• Tile Image - the image used on the model for flow. • Repeat - sets the repetition value of the tiled image. • Animated - Enables or disables the animation. • Time Offset - controls the flow over time. • Speed - controls the sensitivity of Time Offset, which affects the speed of flow. |
In the example below, the Flow procedural would animate the molten liquid so that it appeared to moving across the surface of the texture:
|
|
Gamma |
Changes the gamma levels on the model. |
Select a particular gamma level using either the text field or the sliders. Invert reverses the gamma conversion. That is, a higher setting for Gamma results in a more washed-out looking image. |
|
|
Grade |
Changes the overall color grade of the black and white points, and allows you to adjust the gain and gamma of the paint on the model. |
Adjust the Blackpoint to allow you to change the depth of the darkest point in the paint. The Whitepoint allows you to increase the brightest point in the paint. Lift, Gain, Multiply, and Gamma all modify the specified aspects of the paint to change the overall texture; while, Offset changes the black and white points as one. |
|
|
HSL |
Changes the hue, saturation, and lightness of the colors on the model. |
Change the hue of the colors by setting the value for Hue. Adjusting the slider moves the colors around the color wheel. The rotation value is the degree around the color wheel that each color shifts, between 0 and 360 (adjusts the slider between -180 and 180). The Saturation slider adjusts the intensity of the colors in the image data. Select a multiplier from 0 to 1, where .50 is the original saturation value. You can also set the Lightness value the same way. |
|
|
HSV |
Changes the hue, saturation, and value of the colors on the model. |
Change the hue of the colors by setting the value for Hue. Adjusting the slider moves the colors around the color wheel. The rotation value is the degree around the color wheel that each color shifts (adjusts the slider between 0 and 1). The Saturation slider adjusts the intensity of the colors in the image data. Select a multiplier from 0 to 10, where 1.00 is the original saturation value. You can also set the Value the same way. |
|
|
Height As Normal |
Interprets the texture as height data, then computes the normals from the height map and converts the normals to a Diffuse RGB color. This is useful for baking normal maps from height maps. |
Bump Weight adjusts how much bump is applied. Lower values are smaller; higher values produce larger and more obvious displacement. Bump Mode displays the bump quickly (Fast) or accurately (Accurate). Bump Space UV mode - Normals are calculated relative to the UV coordinates space. Bump Space World mode - Normals are calculated relative to the World coordinates space. |
|
|
Hue Shift |
Changes the hue of the colors on the model. Set the value for Hue by adjusting the slider. This moves the colors around the color wheel. |
Select the overall hue. The rotation value for the color wheel is the degree around the color wheel that each color shifts, between -180 and 180. |
|
|
Invert |
Inverts the colors or the alpha in the layers lower in the layer stack. Invert replaces colors with their “opposite” in the color chart. For example, a color with a float value of 0.3 is replaced by a color with a float value 0.7. |
Set whether to invert the R, G, B, or A channels individually. |
|
|
Levels |
Changes the color levels in the paint. You can change the white, midtone and black points for each color channel or all together. |
Set the: • Color Component - to adjust the specific color channel (Red, Green, or Blue). • WhiteOut - how strongly to output the white in the filtered image. Higher values show the entire white output; lower values show decreasing amounts. • BlackOut - how strongly to output the black in the filtered image. Higher values show the entire black output; lower values show decreasing amounts. • White - the upper limit of displayed color intensity. Areas with a value higher than this are mapped to 1 (white). • Mid - the middle point between white and black. Mari remaps the values so that this is the middle of the range between the white point and black point. Moving this pushes the values towards that end of the spectrum. • Black - the lower limit of displayed color intensity. Areas with a value lower than this are mapped to 0 (black). |
|
|
Luminosity |
Outputs just the luminosity value of each pixel. That is, it outputs a grayscale image based on the brightness of each of the pixels in the original image. Layer masking, projection masks, and masks on projectors are all hardwired to use the red color component. If you want to use another component for your mask value, the Luminosity adjustment layer allows you to convert an RGB input to a grayscale output. |
None. |
|
|
Premultiply Alpha |
Either pre- or post-multiplies the alpha in the selected image. If you are painting using an image without premultiplied alpha onto one with it, use this filter to perform the premultiplication, so the images match and you avoid lines around the outside of the patch. Postmultiply works the same, but in reverse: it removes premultiplication to match images that do not have premultiplied alpha. |
If the Unpremultiply box is checked, this acts in reverse (that is, removes premultiplied alpha). |
|
|
Saturation |
Changes the intensity of the colors in the image data. |
The Saturation slider adjusts the intensity of the colors in the image data. Select a multiplier from 0 to 10, where 1.00 is the original saturation value. |
|
|
Scalar to Color |
Converts scalar RGB values to color RGB values, which can be useful for blending scalar data, such as a roughness map, into a color channel. |
N/A |
N/A |
|
Scale |
Directly modifies the overall scale of the color values for each channel individually. |
Adjusting the sliders for R, G, B, and A allows you to specify the exact level of scale for each channel, between 0 and 2. |
|
|
Set Value |
Changes the values of specific RGBA channels. |
Selecting Red, Green, Blue, or Alpha from the Channel dropdown menu allows you to adjust the slider (from 0-1) to change the value of the specific color channel. |
|
|
Shuffle |
Shuffles the RGBA channels so that any of them can be replaced by another color channel. Layer masking, projection masks, and masks on projectors are all hardwired to use the red color component. If you want to use another color component for your mask value, the Shuffle adjustment layer allows you to change the RGBA components so that any can be replaced by another. |
Change the channels of R, G, B, or A to affect the overall color of the paint on the model. |
|
|
Tangent To Screen |
Sets up a Tangent To Screen adjustment to be used for Vector Brushing. This adjustment is automatically created when creating default vector shaders. |
Suppress the blue value from the color-encoded vectors in screen space by ticking the Suppress Blue checkbox. |
|
|
Tangent To World |
Sets up a Tangent To World adjustment to be used for Vector Brushing. This adjustment is automatically created when creating default vector shaders. |
Suppress the blue value from the color-encoded vectors in the world space by ticking the Suppress Blue checkbox. |
|
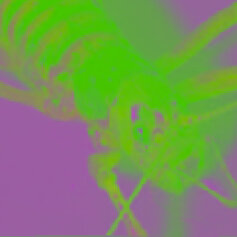
| World To Tangent | Sets up a World To Tangent adjustment so that you can convert normals from world space into tangent space normals. | Suppress the blue value from the color-encoded vectors in the tangent space by ticking Suppress Blue checkbox. Choose whether to flip the Y axis or leave the normals as they are on Flip Y. |
|
|
sRGB2Linear |
Applies an sRGB to linear colorspace conversion. |
Checking Invert applies a linear to sRGB colorspace conversion. |
|
Below are descriptions and examples of the different procedurals available in the Layers palette.
Examples of each of the procedurals are applied to the following image, for illustrative purposes:

Note: In Procedurals that include color attributes, the color controls contain a toggle ![]() that sets the context in which the procedural effect is to be used for Scalar or Color data. By default, Mari detects the channel's color data type and sets the toggle accordingly for layers created through the Layers palette. For Procedural nodes created through the Node graph, this color/scalar toggle defaults to color. Procedural nodes that are to be used within masks and scalar channels have to be set to scalar manually. See Color Data and Scalar Data for more information.
that sets the context in which the procedural effect is to be used for Scalar or Color data. By default, Mari detects the channel's color data type and sets the toggle accordingly for layers created through the Layers palette. For Procedural nodes created through the Node graph, this color/scalar toggle defaults to color. Procedural nodes that are to be used within masks and scalar channels have to be set to scalar manually. See Color Data and Scalar Data for more information.
|
Type |
Description |
Settings |
Example |
|
Procedural Layers - Basic |
|||
|
Color |
Applies the selected color to the rest of the paint on the model. |
Changing the Blend Mode and Amount allows you to adjust how the color is applied, and how strongly, to the model. Color allows you to select the color from the HSV swatch palette. |
Procedural color set to burgundy:
Color procedural (Screen blend):
|
|
Constant |
Generates a constant number across RGB or RGBA components that may be relied upon for mathematical operations. |
The Constant slider ranges from 0 to 10,000, and defaults to 1.000 when reset. Components may be set to either RGB or RGBA. |
Constant procedural (Multiply blend):
|
|
Vector |
Applies RGBA values to a vector (XYZW) map to produce a specific diffuse color that represents a vector field. |
The X, Y, Z, and W fields correspond to R, G, B, and A respectively to give a specific vector in a diffuse image. |
Vector procedural with XYZW values adjusted:
Vector procedural (Multiply blend):
|
|
Procedural Layers - Projection |
|||
|
Cube Map |
Simulates a shiny reflective surface using a cubic environment map as the input. This layer cannot be cached or baked, and is for display purposes only. |
• Cubic Image - the location of the cube map. • Falloff Start - controls where the cubic image starts. • Falloff End - controls where the cubic image ends. |
Cube Map procedural (Luminance blend):
Cube Map procedural (Luminance blend) over layer:
|
|
Sphere Map |
Simulates a shiny reflective surface using a spherical environment map as the input. This layer cannot be cached or baked, and is for display purposes only. |
• Sphere Map - the location of the environment map. • Falloff Start - controls where the spherical image starts. • Falloff End - controls where the spherical image ends. |
Sphere Map procedural
Sphere Map procedural
|
|
Cube Map Projector |
Uses a cubic image (in a .dds file format) as a texture to project onto the model. This layer cannot be cached or baked, and is for display purposes only. Note: When saving .dds files in other applications, they should be encoded as 8.8.8.8 ARGB files to avoid any complications when bringing them into Mari. |
• Cubic Image - the filepath to the cubic image to use for projection. • Cull Backfaces - when the checkbox is ticked, it ensures that projection does not affect areas facing away from the camera. • Offset X, Y, and Z - the offset of the projection image on the X, Y, and Z axes. • Rotation X, Y, and Z - the rotation of the projection image on the X, Y, and Z axes. • Edge Falloff Start and End - modifies how far away the falloff starts or ends. • Edge Falloff Curve - allows you to adjust the otherwise linear shape of the falloff to your desired shape. • Distance Falloff Start and End - adjust the start and end radial distance from the camera. • From 0-100, where 100 represents straight-on projection. • Distance Falloff Curve - allows you to adjust the otherwise linear shape of the falloff to your desired shape. |
|
|
Sphere Map Projector |
Uses a spherical image of any file type as a texture to project onto the model. This layer cannot be cached or baked, and is for display purposes only. |
• Cull Backfaces - when the checkbox is ticked, it ensures that projection does not affect areas facing away from the camera. • Spherical Image - the filepath to the spherical image to use for projection. • Offset X, Y, and Z - the offset of the projection image on the X, Y, and Z axes. • Rotation X, Y, and Z - the rotation of the projection image on the X, Y, and Z axes. • Edge Falloff Start and End - modifies how far away the falloff starts or ends. • Edge Falloff Curve - allows you to adjust the otherwise linear shape of the falloff to your desired shape. • Distance Falloff Start and End - adjust the start and end radial distance from the camera. • From 0-100, where 100 represents straight-on projection. • Distance Falloff Curve - allows you to adjust the otherwise linear shape of the falloff to your desired shape. |
|
|
Triplanar Projection |
Uses three different images to project onto the surface of your model from three different directions (Top, Front, and Right). Each of the parameters listed (other than World Scale) are for each of these three directions. |
• World Scale - overall scale control for the image projection. • Image - the images you want to project onto each of the three directions. • Repeat - frequency that the image is repeated across your model. • Angle - the rotation angle of the image on your model. • U Offset - how much the image on the model is offset by on the U axis. • V Offset - how much the image on the model is offset by on the V axis. • U Scale - how much the image on the model is stretched or contracted on the U axis. • V Scale - how much the image on the model is stretched or contracted on the V axis. • Falloff Start - controls where the image projection starts on the model. • Falloff End - controls where the image projection ends on the model. • Falloff - controls the falloff of the image projection between the start and end values. |
|
| Procedural Layers - Lighting | |||
| Environment Light |
Displays the environment light reflection, if the Image in the Environment light in the Lights palette has been set. This layer cannot be cached or baked, and is for display purposes only. |
• Sharpness - adjusts the sharpness of the reflections on the model, with higher values increasing the sharpness and lower values decreasing it. |
Environment Light procedural (using one of the preset environments shipped with Mari):
|
|
Procedural Layers - Geometry |
|||
|
Ambient Occlusion |
Applies an ambient occlusion shading to the surface. This overrides Mari's default ambient occlusion shader, allowing you to change the details. For example, you can edit the channel to use as an ambient occlusion map. If you want to save the default ambient occlusion data for the project as a channel, you can bake the ambient occlusion from the default shader. You can then edit this baked channel as you want. |
None. Note: This overrides the ambient occlusion shading Mari applies by default. This means that if you just bake out the ambient occlusion and then use this as the input to this shader, you see no difference (you're applying the ambient occlusion that Mari would apply anyway). Try changing the ambient occlusion value under the Lighting component of the shader, or edit the ambient occlusion mask channel. |
Ambient Occlusion procedural:
|
| BiTangent | Outputs bitangent vectors to, along with tangent and normal vectors, create a TBN matrix that can map from world space to tangent space (or the other way around). | None. |
BiTangent procedural:
|
|
Position |
Displays the graphic representation of the surface positions (XYZ as RGB). |
None. |
Position procedural:
|
| Selection Mask |
Outputs white (1.0) color values for masked regions and black (0.0) color values for unmasked regions, based on the current selection in the selection mode. It is best to convert the procedural to a paintable layer once you are ready to use it. |
None. Note: To create a selection mask, you must be using the Select tool, not the Marquee Select tool, in Face mode. |
Selection Mask procedural:
|
|
Surface |
Converts the present surface normals to a Diffuse RGB color. This is useful for baking out normal maps from the bump channel. |
None. |
Surface Normal procedural:
|
| Tangent | Outputs tangent vectors to, along with bitangent and normal vectors, create a TBN matrix that can map from world space to tangent space (or the other way around). | None. |
Tangent procedural:
|
|
UDIM Mask |
Masks out all other UDIMs on a model, except for the selected UDIM. |
The UDIM selector allows you to select which UDIM you can paint on and masks out all others. |
UDIM Mask procedural:
|
|
UV |
Converts the UV to a color, based on the UDIM values. Useful for debugging UV layouts. |
None. |
UV procedural:
UV procedural in UV view:
|
| UV Mask |
Outputs white (1.0) color values for regions where there is some geometry and black (0.0) for regions where there is no geometry. When baked to a texture by Convert to Paintable, the layer becomes a UV mask texture. |
None. |
UV Mask procedural:
UV Mask procedural in UV view:
|
|
Procedural Layers - Fractal |
|||
|
Cloud |
Blends seamless 3D noise in a cloud pattern with the shaded surface, using the specified Blend Mode. Note: If you are accustomed to using Fractal Noise from previous versions of Mari, you can still affect fractal properties such as Contrast by adding a Contrast adjustment to the Cloud procedural. |
You can control the look of the cloud pattern by adjusting the Size and Roughness of the pattern, as well as the pattern offset for the X, Y, and Z values. Color A and Color B allows you to set the cloud pattern colors used on the model. |
Cloud procedural:
Cloud procedural over layer:
|
|
Turbulence |
Blends seamless 3D noise in a turbulence pattern with the shaded surface, using the specified Blend Mode. |
You can control the look of the turbulence pattern by adjusting the Size and Roughness. Color A and Color B allows you to set the turbulence pattern colors used on the model. |
Turbulence procedural:
Turbulence procedural over layer:
|
|
Procedural Layers - Misc |
|||
|
Oil |
Blends seamless 3D noise in an oil pattern with the shaded surface, using the specified Blend Mode. |
You can control the look of the oil pattern by adjusting the Size and the Organicness or Roughness qualities. Color A and Color B allows you to set the oil pattern colors used on the model. |
Oil procedural:
Oil procedural over layer:
|
|
Procedural Layers - Noise |
|||
|
Cellular |
Blends seamless 3D noise in a cellular pattern with the shaded surface, using the specified Blend Mode. |
You can control the look of the cellular pattern by adjusting the Size and Type of cells to use. Additionally, you can specify the Distance method used to achieve a specific look. Color A and Color B allows you to set the cellular pattern colors used on the model. |
Cellular procedural:
Cellular procedural over layer:
|
|
Perlin |
Blends seamless 3D noise in a perlin pattern with the shaded surface, using the specified Blend Mode. |
You can control the look of the perlin pattern by adjusting the Size and color. Color A and Color B allows you to set the perlin pattern colors used on the model. |
Perlin procedural:
Perlin procedural over layer:
|
|
Squiggle |
Blends seamless 3D noise in a squiggle pattern with the shaded surface, using the specified Blend Mode. |
You can control the look of the squiggle pattern by adjusting the Size and color. Color A and Color B allows you to set the squiggle pattern colors used on the model. |
Squiggle procedural:
Squiggle procedural over layer:
|
|
Procedural Layers - Pattern |
|||
|
Cube |
Blends a seamless cubic pattern with the shaded surface, using the specified Blend Mode. |
You can control the look of the cubes by adjusting the Repeat pattern and Gap spacing. Falloff and Roundness give you even more aspects to fine-tune the pattern. Color A and Color B allows you to set the cube pattern colors used on the model. |
Cube procedural:
Cube procedural over layer:
|
|
Object Space Linear Gradient |
A procedural version of the Gradient tool. This behaves the same as Gradient without painting the gradient onto the model. |
Adjust the gradient Start and End points to determine where Color A and Color B are on the object. Use the Map to fine-tune the gradient as a color curve. Rotation X, Y, and Z points adjust the gradient along the X, Y, or Z axes. |
Object Space Linear Gradient procedural:
Object Space Linear Gradient procedural over layer:
|
|
Sphere |
Blends a seamless spherical pattern with the shaded surface, using the specified Blend Mode. |
You can control the look of the spheres by adjusting the Size and Falloff of the pattern. Color A and Color B allows you to set the sphere pattern colors used on the model. |
Sphere procedural:
Sphere procedural over layer:
|
|
Tiled |
Lets you select an image to tile across the surface of your model. This layer is disabled for Ptex channels. |
• Tile Image - the location of the image you want to tile across the surface of your model. • Rotation Angle (Degrees) - the angle (in degrees) that the image is rotated by. • U Offset - how much the image is offset by on the U axis. • V Offset - how much the image is offset by on the V axis. • U Repeat - the frequency at which the image is repeated on the U axis. • V Repeat - the frequency at which the image is repeated on the V axis. • Mirror U - check to mirror the image on the U axis. • Mirror V - check to mirror the image on the V axis. |
Tiled image:
Tiled Image over layer:
|
|
UV Grid |
Blends a seamless UV grid pattern with the shaded surface, using the specified Blend Mode. |
You can control the look of the UV grid by adjusting the Color and Thickness of the pattern, as well as the level of Repeat. |
UV Grid procedural:
UV Grid procedural over layer:
|
|
UV Linear Gradient |
A procedural version of the Gradient tool for use in UV space. Behaves the same as Gradient without painting the gradient onto the model. |
Adjust the gradient Start and End points to determine where Color A and Color B are on the object. Use the Map to fine-tune the gradient as a color curve. Adjust the Angle of the gradient and how much you want the gradient to be allowed to Repeat. Repeating the gradient does so by tiling. |
UV Linear Gradient in the UV tab (without UV image rendering):
UV Linear Gradient in the UV tab (with UV image rendering):
|
|
Procedural Layers - Plant |
|||
|
Wood |
Blends seamless 3D noise in a wood grain pattern with the shaded surface, using the specified Blend Mode. |
You can control the look of the wood pattern by adjusting the Size of the pattern and of the bands, as well as the Roughness of the pattern. The offset can be adjusted in X, Y, and Z space. Additionally, Color A and Color B allows you to set the wood pattern colors used on the model. |
Wood procedural:
Wood procedural over layer:
|
|
Procedural Layers - Smart Masks |
|||
|
Color Procedural |
The available color procedurals from the Shelf appear in this list. See Smart Mask Node for more information. |
||
|
Scalar Procedural |
The available scalar procedurals from the Shelf appear in this list. See Smart Mask Node for more information. |
||
|
Procedural Mask |
The available procedural masks from the Shelf appear in this list. See Smart Mask Node for more information. |
||
