Creating the Projector
| 1. | In the Projectors palette, either: |
• right-click and select Create Projector from the dropdown menu, or
• click the ![]() button at the bottom of the projectors list.
button at the bottom of the projectors list.
The new projector displays.
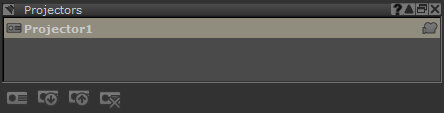
| 2. | To rename the projector, double-click on its name in the list and enter the new name. |
| 3. | Click to select your new projector. |
The bottom half of the Projectors palette displays details of the projector.
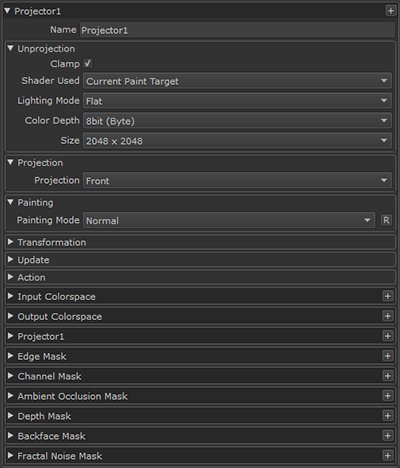
| 4. | The settings in the Unprojection section control how the projector takes screen snapshots. |
• If Clamp is checked, Mari restricts the range of the image to values between 0 and 1.
• The Shader Used defaults to Current Paint Target, but you can change this to determine which shader you want to unproject.
• The Lighting Mode defaults to Flat, but you can change this.
• You can set the Color Depth and the image Size - these default to the settings of your paint buffer when you create the projector.
| 5. | Set the Output File Path, to specify where the projector saves the image. You can either: |
• type this directly, or
• click the ![]() button.
button.
The Save File dialog box opens, allowing you to set the location for the saved files.
| 6. | Navigate to where you want to save the projector, type in the filename, and click Save. |
Tip: If you want to take shots of multiple channels using this projector, include $CHANNEL in the filename. When Mari saves the files the projector produces, it replaces this variable with the channel name for each.
Mari sets the file type (from the listed possibilities) by the file extension you include.
| 7. | Set the Input File Path, to specify where the projector looks for updated images to load. As with the output file path, you can type this directly or click |
You can also include $CHANNEL in the input file path.
Tip: Decide whether you want to use the same file for output and input, or use separate files. This depends on how you prefer to work. For example, you may prefer to export to .tif, edit the file and save the changes as a .png for re-import. Or you may prefer to use the same .tif file for both output and input.
Tip: Don't change the settings for Transformation or Perspective. These show the details of the paint buffer and perspective camera settings when the projector was created (including, for perspective cameras, field of vision and clipping planes).
If absolutely necessary, you can edit these, but it's usually easier to just set the main view to your desired settings and create a new camera.
| 8. | To switch to the view from another projector, either: |
• right-click on the projector in the Projectors palette and select Make Projector Current, or
• double-click on the projector in the Projectors palette.
The view switches back to how it was when you created the projector, including any masking you had set and the Painting Mode that was in use. The name of the projector in use appears on the current tab in the canvas.
Tip: You can also adjust projection mask properties in the Projectors palette. Note that if you adjust these properties, you need to click the Update Only Masks From Projector button to see the effect of your changes in the canvas. When you do, the equivalent projection mask properties in the Painting palette are also updated.
Similarly, you can adjust other global properties such as the Painting Mode or Projection behavior in the Projectors palette. If you do, click Update Global Settings From Projector to update the equivalent global properties (including masks) in the Painting palette.
Tip: Masks on projectors are hardwired to use the red color component. If you want to use another color component for your mask value, the Shuffle adjustment layer allows you to change the RGBA components so that any can be replaced by another. Additionally, the Luminosity adjustment layer allows you to convert an RGB input to a grayscale output.