Creating a New Project with OBJ and Ptex Files
Multiple files can be used to create a project in the Ptex workflow. If this is the case, it is recorded in the dialog’s history as a set of files instead of only one file.
Note: These instructions primarily discuss the steps for creating a new project that are specific to OBJ and FBX files. For more information on creating a new project, from start to finish, refer to Managing Projects.
To create a new project, using either one file or a set of files, follow the steps below:
| 1. | As with most commands in Mari, you can select the New Project option a few different ways, pick any one of the options below. |
• from the File menu, select New,
• click ![]() on the toolbar,
on the toolbar,
• click the New button,
• right-click in the Projects tab and select New from the dropdown menu, or
• press the Ctrl/Cmd+N shortcut key.
The New Project dialog box displays.
| 2. | Enter a name for your project and the location of the geometry you want to work on. |
| 3. | You have the option to load either .ptx files or .obj files. If you choose to load an .obj file, the Mesh Options panel displays with options for setting the Mapping Scheme for the project, using Selection Groups, and working with Multiple Geometries Per Object. |
|
Mesh Option |
Description |
|---|---|
|
Mapping Scheme |
If there is a UV map available, and you would like to use it, select UV if available, Ptex otherwise. If you prefer to use Ptex, select Force Ptex. This option loads the selected geometry and replaces the existing UV map with a Ptex map. |
|
Selection Groups |
If you want to select a specific object group in the geometry while you work, this option allows you to set up selection groups using Create From Face Groups during project creation. |
|
Multiple Geometries Per Object |
If your .obj consists of multiple geometries, you have the option to Merge Geometries Into One, which is the default behavior, or Create Separate Geometries (Ptex Only). If you select Merge Geometries Into One, Mari combines the individual geometries into a single geometry, while selecting Create Separate Geometries (Ptex Only) creates individual geometries. |
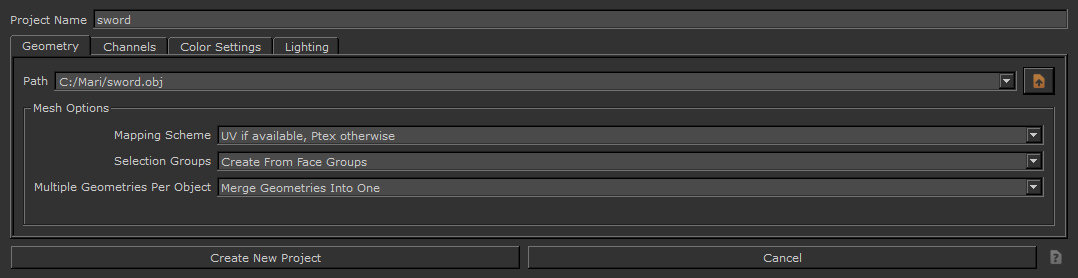
New Project dialog: .obj mesh options.
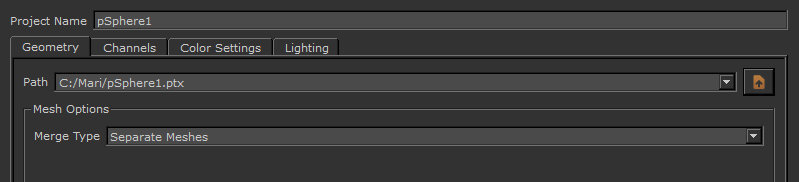
New Project dialog: .ptx mesh options.
| 4. | If you choose to load a .ptx file, the Mesh Options only provide the option for selecting Separate Meshes or Single Mesh for the Merge Type field. |
If you are importing more than one Ptex file, this option allows you to specify whether you prefer for each separate file to constitute a separate object or separate geometries within a single object.
Note: Even if you select Create Separate Geometries (Ptex Only), Mari only displays a single object on the canvas. However, when you export a channel you have the option to export individual .ptx files for each geometry.
For Ptex projects, the channel setup and texture import section of the New Project dialog can be ignored. A single channel named Ptex is created by default, you can create additional channels once the project has loaded.
| 5. | Continue setting up your new project as you would with any other file type. |