Setting the Ptex Face Texture Options
If you use an .obj file to create a new project, and the file does not have a UV map assigned (or you selected Force Ptex as the Mapping Scheme), the Ptex Import or Creation dialog box displays once the project is created.
You can also manage Ptex face textures by accessing the Preferences menu.
Importing Ptex Options
If you have a topologically matching .ptx file for the .obj, you can import it using the Import Ptex options field. However, if you don’t have matching texture sizes, it can be resized upon import from the Ptex Texture Import
dialog.
Creating Ptex Options
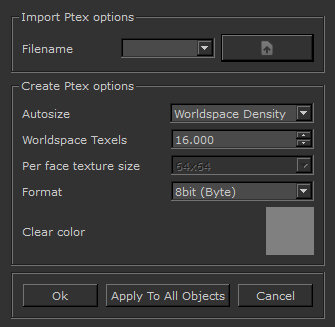
If you don’t have a matching Ptex file for the .obj:
| 1. | Under Create Ptex options, you can select constant colored textures for each face, whose resolutions are based on either: |
• Uniform Face Size - for face sizes that are equal and determined by the resolution set in the Per face
texture size dropdown menu, or
• Worldspace Density - for a given number of texels per unit of world space, where small faces have smaller
textures and large faces have larger textures. You can set the number of texels in the Worldspace Texels field.
Note: Please note that texture quality may be affected when painting across adjacent faces if the faces are spatially different in size.
| 2. | Set the bit depth of the Ptex image data by clicking on the Format dropdown menu. You can set this to Byte, Half or Float. |
| 3. | Click OK. |