Paint Blending Modes
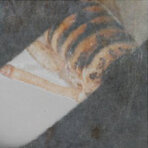
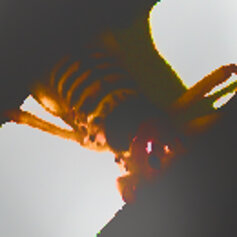
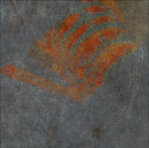
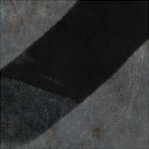
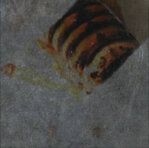
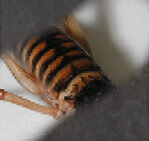
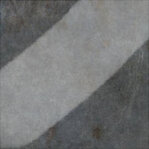
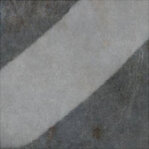
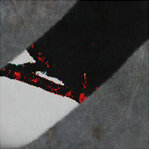
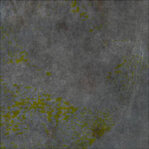
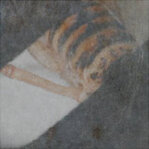
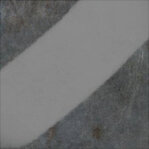
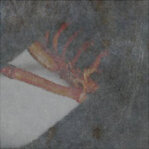
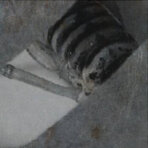
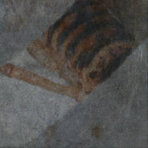
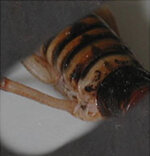
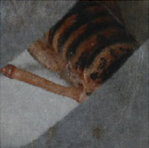
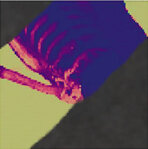
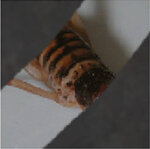
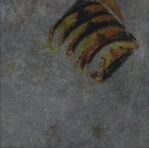
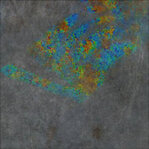
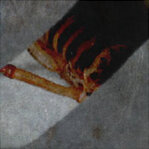
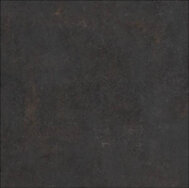
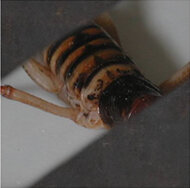
Mari comes with several paint blending modes. The chart below uses the following example surface and painting to illustrate the effect of applying the different modes:
|
|
|
|
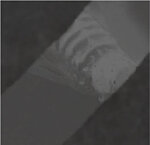
Unpainted surface. |
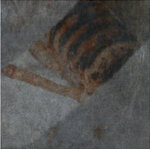
Paint stroke in default |
There are a number of shortcuts that can help you switch between Previous Blend, Last Blend, or Next Blend modes (among others), as well as resetting the paint blend mode. For a list of available shortcuts, see Keyboard Shortcuts.
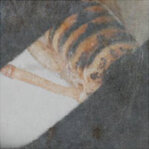
In the application, these effects are grouped by functional area, for example, all the light modes (hard light, soft light, and so on) are grouped together. This list is alphabetical to make it easier for you to find a description of a particular effect.
|
Blend mode |
Description |
Example |
|
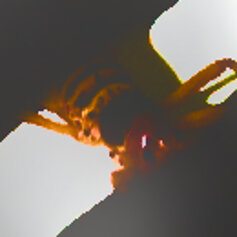
Add |
Adds the values of the colors in the paint buffer to the values on the layer's surface. |
|
|
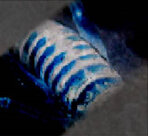
Add Normal Maps |
Blends two RGB-encoded vector layers with the Add input by converting the raw values from the 0.0 to +1.0 colorspace-encoded range to the -1.0 to +1.0 vector range, applying the blend factor to the Over input, adding the values, then normalizing the values before converting it back to the 0.0 to +1.0 colorspace-encoded range. |
|
|
Burn Highlights |
Burns the layer based on the highlights in the paint buffer. |
|
|
Burn Midrange |
Burns the layer based on the middle range (that is, not the lightest or darkest pixels) of the paint buffer. |
|
|
Burn Shadows |
Burns the layer based on the contents of the paint buffer, with darker pixels being burned harder. |
|
|
Clear |
Subtracts the opacity of the paint stroke from the current surface. For example, an 80% opaque stroke leaves a surface with 20% opacity. |
|
|
Color |
Takes the luminance of the layer, and the color and saturation of the paint buffer. |
|
|
Color Burn |
Burns the layer, using the contents of the paint buffer as input for the burn operation. |
|
|
Color Dodge |
Dodges the layer surface, using the contents of the paint buffer to control the degree of dodging. |
|
|
Contrast |
The destination color moves away from the painted color by contrasting around the painted color. How much it contrasts depends on the alpha. |
|
|
Darken |
Gives each pixel the darker of two possible values: the current layer surface or the contents of the paint buffer (whichever is darker). |
|
|
Decontrast |
The destination color moves towards the painted color by decontrasting around the painted color. How much is decontrasts depends on the alpha. |
|
|
Difference |
Inverts the colors. Mari subtracts the values in the paint buffer from those on the layer surface. |
|
|
Dodge Highlights |
Dodges the layer based on the highlights in the paint buffer. |
|
|
Dodge Midrange |
Dodges the layer based on the middle range (that is, not the lightest or darkest pixels) of the paint buffer. |
|
|
Dodge Shadows |
Dodges the layer based on the contents of the paint buffer, with darker pixels being dodged harder. |
|
|
Exclusion |
Inverts the colors, but with a lowered contrast. |
|
|
Hard Light |
Mimics a harsh spotlight. Makes light areas lighter (using a screen effect), and dark areas darker (using a multiply effect). |
|
|
Hard Mix |
First performs a vivid blend, then thresholds the colors to their extreme values. The result is that the pixels can be one of eight colors - black, white, red, green, blue, cyan, magenta, or yellow. |
|
|
Hue |
Takes the luminance and saturation from the layer pixels, with the hue from the paint buffer. |
|
|
Inverse Difference |
Subtracts the colors in the paint buffer from the layer surface, and then inverts the result. |
|
|
Invert |
Uses the paint buffer as the input to invert the pixels on the base layer. |
|
|
Lighten |
Gives each pixel the lighter of two possible values: the current layer surface or the contents of the paint buffer (whichever is lighter). |
|
|
Luminance |
Takes the hue and saturation of the layer color, and the luminance of the paint buffer. (This is the opposite of the Color blend mode.) |
|
|
Mix Normal Maps |
Blends two RGB-encoded vector layers with the Mix input by converting the raw values from the 0.0 to +1.0 colorspace-encoded range to the -1.0 to +1.0 vector range, applying the blend factor to the Over input, adding the values, then normalizing the values before converting the value back to the 0.0 to +1.0 colorspace-encoded range. |
|
| Mix Reoriented Normal Maps | Blends two RGB-encoded vector layers in a way that preserves the strength and details of both the base and the overlay inputs. |
|
|
Multiply |
Darkens the color. Mari multiplies the layer color by the color in the paint buffer. |
|
|
Normal |
Replace values on the layer's surface with those from the paint buffer. (Mari's default mode.) |
|
|
Nudge Flow Vectors |
Changes the paint buffer to tangent vector space. Keeps the vectors flat to the object’s surface in 2D space. The Nudge Flow Vectors mode adds the vectors together to get the blend result, and is best for use with flow maps. |
|
|
Nudge Normal Vectors |
Changes the paint buffer to tangent vector space. Allows the z value to face outward in 3D space, so that vectors face out from the object’s surface anywhere on the model. The Nudge Normal Vectors mode adds the vectors together to get the blend result, and is best for use with normal maps. |
|
|
Overlay |
Uses the patterns and colors from the paint buffer, but keeps the highlights and shadows from the layer. Adjustment stacks always use an overlay blend mode. |
|
|
Paint Flow Vectors |
Changes the paint buffer to tangent vector space. Keeps the vectors flat to the object’s surface in 2D space. Unlike Nudge Flow Vectors, the Paint Flow Vectors mode blends between the vectors instead of adding them. This mode is best for use with flow maps. |
|
|
Paint Normal Vectors |
Changes the paint buffer to tangent vector space. Allows the z value to face outward in 3D space, so that vectors can face out from the object’s surface anywhere on the object. Unlike Nudge Normal Vectors, the Paint Normal Vectors mode blends between the vectors instead of adding them. This mode is best for use with normal maps. |
|
|
Pin Light |
For light areas in the paint buffer, replaces pixels on the layer's surface that are darker than the corresponding pixels in the paint buffer. For dark areas in the paint buffer, replaces pixels on the layer's surface that are lighter than the corresponding pixels in the paint buffer. (Otherwise, leaves the layer surface unchanged.) |
|
|
Saturation |
Takes the luminance and hue of the layer color, with the saturation from the paint buffer. |
|
|
Scale Vectors |
This is most useful with the basic Paint tool, while preferably using grayscale paint. Scale Vectors uses the intensity of color to control the length of the normal in 3D space. |
|
|
Screen |
Lightens the image. Mari divides the color on the surface of the layer by the value of the paint. (This is the opposite of Multiply.) |
|
|
Soft Light |
In dark areas on the layer, burns the paint buffer onto the layer surface. In lighter areas, dodges it on. |
|
|
Sponge Desaturate |
Uses the paint buffer as the input to desaturate the pixels on the base layer. |
|
|
Vivid Light |
In dark areas on the layer, adds the paint buffer with more contrast. In light areas, adds it with less contrast. |
|