Opening the Shaders Palette
| 1. | Start Mari and open your project. |
| 2. | Open the Shaders palette: |
• right-click on the toolbar, and select Shaders from the dropdown menu, or
• from the View menu, select Palettes > Shaders.
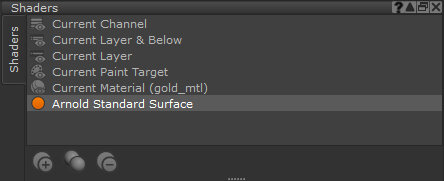
The Shaders palette displays, showing the default shaders and any shaders you’ve already set up for your current project.

| 3. | The default shaders in the list are: |
• Current Channel - shows only the currently selected channel on the model in the viewport. For example, if you only wanted to see the diffuse color channel on your model, you can select the channel and press Current Channel.
• Current Layer and Below - displays the paint in your selected layer or sub-stack. If you have a layer in a mask or adjustment stack selected, the selected layer and all layers below in the sub-stack are displayed in the viewport. If you don't have a layer in a sub-stack selected, all layers up to the currently selected layer are shown.
• Current Layer - shows the selected layer on the model in the viewport.
• Current Paint Target - displays the paint in your selected layer, including any selected mask, layer in a mask or adjustment stack, filter, or group associated with the layer.
• Current Material - shows the currently selected material, node, or group on the model in the viewport. This allows you to isolate your material from the rest of your channel data so you can make edits to your material with a more lightweight shader.
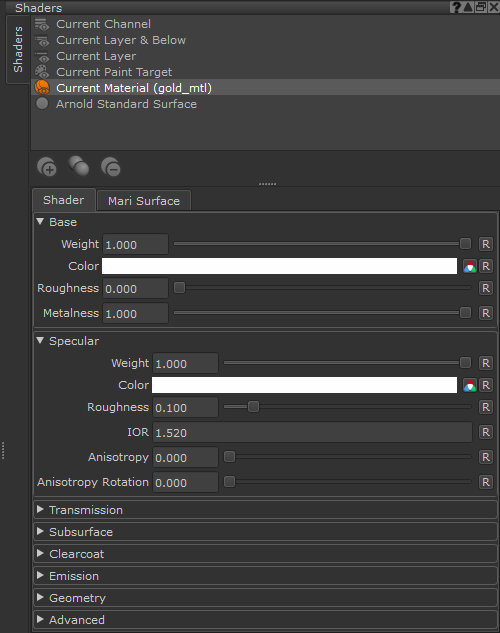
When you select a shader, the bottom of the palette shows the details, as shown in the example image below.

| 4. | The shader components that are shown in the bottom pane of the palette differ depending on what shader is selected. |
Tip: Click the ![]() toggle to change the influence of channels connected to the shader without disconnecting them from the shader input. The Displacement shader input is toggled off by default.
toggle to change the influence of channels connected to the shader without disconnecting them from the shader input. The Displacement shader input is toggled off by default.
