Search is based on keyword.
Ex: "Procedures"
Do not search with natural language
Ex: "How do I write a new procedure?"
Painting Overview
Modo provides you with the ability to sculpt your models in a variety of ways and then texture them easily in one integrated environment and work non-linearly. This flexibility means you can model, sculpt, apply a basic texture, and then go back and model some more. As with all the tools in Modo, the functions are deeply integrated and take advantage of the core functionality to provide an intuitive and powerful set of options.
Combining a natural blend of 2D- and 3D-painting techniques, you can select a brush and begin painting in any viewport — including UV views! Modo tries to determine the best options automatically when painting or sculpting, but you need to know about a couple requirements necessary to get the best results. Modo's default interface provides a Paint layout tab, which is dedicated to painting, sculpting, and Vertex Map-editing tools, and a toolbox with the related tools.
You may benefit greatly from using a pressure-sensitive tablet when painting or sculpting in Modo, but this is not a strict requirement. (Most users find tablets to be a more natural way to work with the pen-based input instead of using a mouse.) The additional control from the pressure-sensitive stylus can provide a greater degree of precision and subtlety when modeling and texturing creations.
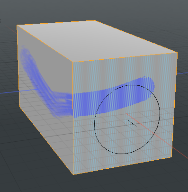
Tip: When a brush based tool is activated, a circle is drawn under the mouse when you hover over a surface. This makes it easier to see where the sculpt or paint is applied when the mouse is right-clicked and dragging across the surface of your mesh. To change the size of the brush tip, left-click and drag your mouse.
Painting
To paint in Modo, you need a 3D model and a bitmap texture. You apply the texture map to some (or all) of the model's polygons with the Shader Tree. Modo has several tools for you to quickly do these tasks — including extensive UV mapping tools and functions to add textures to your model.
Modo has two different painting technologies: a standard, 3D-painting method (which paints directly onto the 3D model) and a projection-painting method. Standard painting keeps the brush stroke size consistent with the canvas, but projection painting keeps it consistent with the viewport. Standard 3D painting often results in oddly-shaped brush strokes when painting on complex objects (such as a character). With projection painting you paint in the viewport (similar to painting onto a plane of glass) and Modo projects each stroke onto the 3D model (similar to a movie theater screen). This eliminates the distortions inherent in standard 3D painting.
Warning: You can paint complex objects, but painting on complex objects with any of the various non-UV texture projections (such as Planar, Cubic, or Spherical) usually yields unsatisfactory results.
Particle Paint Tools
Particles have many uses in Modo, but most uses are as point-sources for Replicators and Texture Replicators as well as for blobs, sprites, and volumes. You could create these particles procedurally with Surface Generator or indirectly by generating geometry and then removing the polygon edges between the vertices. The Particle Paint tools provide a way to create and edit particle-point sources directly using the familiar brush-based workflow.
Creating particles is a simple procedure. You only need to prepare by having a geometry surface to spray the particles onto. You use the Particle Paint Tool as the main tool to create the initial particles. Then you use the editing tools to mold and shape the particles for the intended use. When using any constrain actions, the particles always conform to the target surface and Modo knows what is a particle and what is a regular polygon. Therefore, you can't accidentally edit the base geometry to which the particles are being applied.
Customizing Brushes
Like the rest of the Modo toolset, the paint and sculpting tools are modular and composed through the Tool Pipe. If you are not familiar with the Tool Pipe, you don't have to use it. You can do 3D painting and sculpting with the provided tools. Using the standard tools fulfills most (if not all) of your modeling and texturing requirements.
For those who understand the power of the Tool Pipe, you can understand the flexibility and power this brings to the painting system. The Tool Pipe has components that you can add together to create custom tools. These components include the paint tool, a brush tip, custom inks, nozzles, and even falloffs. For basic painting and sculpting, you only need a tool and a brush tip. You can add (or remove) the inks, nozzles, and falloffs depending on the intended effect. With the Tool Pipe you can combine a variety of components to create customized tools specific to your creative needs.
Sorry you didn't find this helpful
Why wasn't this helpful? (check all that apply)
Thanks for your feedback.
If you can't find what you're looking for or you have a workflow question, please try Foundry Support.
If you have any thoughts on how we can improve our learning content, please email the Documentation team using the button below.
Thanks for taking time to give us feedback.