Search is based on keyword.
Ex: "Procedures"
Do not search with natural language
Ex: "How do I write a new procedure?"
Smooth
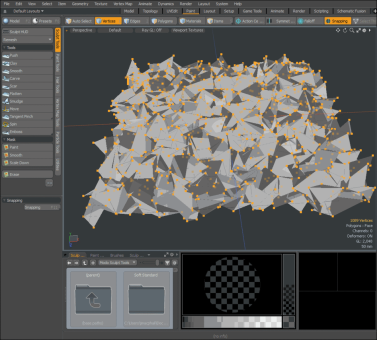
The Smooth tool evens out bumpy and irregular surfaces by averaging the positions of vertices under the brush tip. This makes surface inconsistencies and details disappear to produce a result similar to melting (like wax). The Smooth tool is essential to the sculpting workflow, which is why it is always available when using any of the other sculpting tools.
Tip: The Smooth tool allows you to maintain border edges and corner vertex of border polygons by using the Lock Corners and Lock Borders options.
Click on the image below to view an animated GIF.
The Smooth tool is in the Paint layout in the Sculpt Tools sub-tab in the toolbox. You can also access it from the Texture > Sculpt Tools menu.
By pressing Shift when sculpting, you can access the Smooth tool whenever any other tool is active. Press and hold Ctrl/Cmd to apply a more gentle sculpting technique that attempts to preserve the volume of the mesh. This has the same affect as the Preserve Volume option in the Deform Smooth tool.
You can combine this tool with the various Brush Tips as well as the Inks and the Tablet Nozzle to customize the way the brush affects the surface.
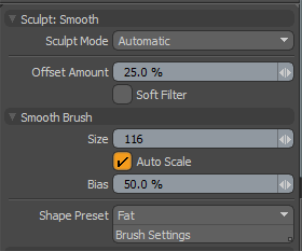
Sculpt: Smooth Properties
The following options are available:

Sculpt Mode: Specifies the sculpting method used. By default, the setting is Automatic, which performs mesh-based sculpting when there are no displacement images, and automatically switches to image-based sculpting when an image is available. You may want to force Modo to use mesh-based sculpting even with an image applied for displacement. Doing this can be helpful for blocking out shapes and forms because mesh sculpting only affects the cage vertices of the base geometry.
• Automatic: Switches between mesh and image sculpting depending on availability of a displacement image map texture.
• Mesh: Forces mesh sculpting only.
• Image Map (Details): Forces image sculpting only.
Offset Amount: Sets the Offset Amount. This option is disabled by default. To enable, set Sculpt Mode to Adaptive. This percentage value modulates the extent of the brushstroke. The total sculpting deformation is equal to the brush size times the percentage specified as the Offset Amount.
Note: This is an important value for controlling sculpted detail. As such, you can adjust this value by middle-clicking and dragging to the left or right.
Soft Filter: Softens the image map by filtering out small details to produce a different result from the standard smoothing. This only applies to image-based sculpting.
For information about the Smooth Brush options, see Customizing Paint Tools.
For information about locking borders and corners when using this tool, see Locking Borders and Corners.
Sorry you didn't find this helpful
Why wasn't this helpful? (check all that apply)
Thanks for your feedback.
If you can't find what you're looking for or you have a workflow question, please try Foundry Support.
If you have any thoughts on how we can improve our learning content, please email the Documentation team using the button below.
Thanks for taking time to give us feedback.
