Search is based on keyword.
Ex: "Procedures"
Do not search with natural language
Ex: "How do I write a new procedure?"
Material Group
Material groups are containers that hold any of the various Shader Tree items, such as shaders, materials, textures, and even render outputs. These containers can be useful for simply organizing the Shader Tree, but are incredibly powerful when used to control how surfaces are applied to polygons at render time. Referred to in the Add Layer function of the Shader Tree as a Group, in this topic, the term used is Material Group to avoid confusion with the Groups Viewport.
Surfacing in Modo is separated from the geometry. Individually, Shader Tree item layers affect an entire scene, unless you limit them to specific areas using a mask. The masks themselves are procedurally created, and defined by Polygon Tags. Tags are simply bits of information tied to a polygon that associate it with a particular grouping. The most common tag is a Material tag. When applied to any polygon selection using the M shortcut or Texture > Assign Material Group... command, it automatically creates an appropriately named Material Group layer in the Shader Tree, with the proper tag specification and a Material sub-item. Once created, changes made to the various layers under the Material Group only affect the polygons with that tag. Since polygons can only have one type of material tag at a time, additional layer masks can be applied using Selection Sets, polygon Parts, and item masks.
These masks that the material groups define are based on the settings under the Group header. They can be used individually, or in combination, and while the functions may appear simple, they are an efficient means of surfacing a scene. Understanding what each does is an important step in understanding the Shader Tree itself and realizing the power that it provides.
Material Group Properties
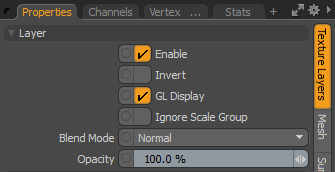
Layer Options
|
Enable |
Toggles the effect of the group (and its contained layers) on and off, duplicating the functionality of toggling visibility in the Shader Tree. When un-checked (disabled), the layer has no effect on the shading of the scene. However, disabled groups are saved with the scene and are persistent across Modo sessions. |
|
Invert |
Inverts the RGB values for the group, producing a negative effect. |
|
Blend Mode |
Affects blending between different groups, allowing you to stack several groups for different effects. For more on blending, see Layer Blend Modes. |
|
Opacity |
Changes the transparency of the current group. Reducing this value increasingly reveals lower layers in the Shader Tree, if present, or dims the effect of the layer itself on the surface. |
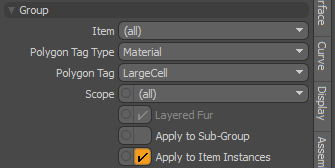
Group Options
|
Item |
Limits the application of the layers within a material group to a specific Mesh Item (these are the Mesh Item layers of the Items List). When defined, these are considered an Item Mask. The (all) setting applies the materials to the entire scene. This setting can also be used in combination with a polygon tag, further limiting the surface. |
|
Polygon Tag Type |
Specifies the type of polygon tag. Several types are possible and each limits or masks the application of the shading items contained within the group to only the polygons tagged as such: • Material - The most common polygon tag type. Material groups with this type of tag are automatically created when using the M keyboard shortcut. Polygons can only have one Material tag at a time. • Part - Similar to a selection set but, like a material tag, a polygon can only belong to one Part group at a time. • Selection Set - Useful for recalling previous polygon selections. However, when specified here as a tag type, the selection set masks the material groups layers to the associated polygons of the specified selection set. One polygon can belong to many different selection sets. |
|
Polygon Tag |
When any type of tag is created, you are presented with a dialog box requesting a name. All tags of the defined type contained in the scene appear here, where you can use this dropdown to select the particular named tag you wish to use. |
|
Scope |
The effect of the material group's layers can be further limited to only Fur materials, polygonal Surface, or All. As a fur material typically derives its surfacing from the underlying polygons (technically, from the surface's material item layer), duplicating a material group and setting the scope to Fur allows you to specify surfacing attributes exclusive to the fur layers. This is how it's possible to have green grass growing from a brown dirt surface. |
|
Layered Fur |
When enabled, you can have multiple Fur item layers with different settings on a single surface. |
|
Apply to Sub-Group |
Using undefined Material Groups (when no tags are specified) can be a convenient way to organize Shader Tree layers. With the addition of the Apply to Sub-Group option, they can also be an effective way to apply a setting to a number of material groups all at once. |
|
Apply to Item Instances |
When enabled, the Material Group is applied to all instances of the original item. |
Apply to Sub-group Example
In the example below, there are three colored spheres, a box, and a ground plane. In the Shader Tree, you can see that the three colored spheres are grouped together into an undefined Material Group. Directly below the group parent, a checkerboard texture has been added (next to the red arrow). Since it is above all the other layers in the tree, and the group above it is undefined, it affects the entire scene, as illustrated by example one.
By simply enabling the Apply to Sub Groups option to the top Material Group layer, the checkerboard effect is limited to those material groups that are descendants of the group, as illustrated by example two. By setting the checkerboard pattern to Normal Multiply as the blending mode, you can quickly see how powerful the Apply to Sub-Group option can be for quickly and easily applying a single texture layer to multiple surfaces, as illustrated in example three.

Tip: As item layers and materials add up in the Shader Tree, it can quickly become a long list that gets confusing and tedious to edit. While there are many functions that speed up and simplify the task of locating certain layers (such as the material selection mode), good Shader Tree organization is important.
You can select multiple related layers and press the keyboard shortcut Ctrl+G, which automatically groups together the selected items. In this case the material group creates no mask for shading, but is simply used as an organizational tool. Renaming the layer further helps in identifying it in later sessions.
Scale Options
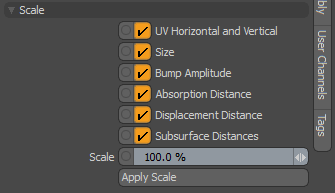
Manually scaling individual texture layers in the Shader Tree may be difficult. The separate layers might not contain the same relative scale or tiling, which means you have to figure out what the relative scaling is. These parameters allow you to scale all layers within a material relative to one another in the Shader Tree.
The items you can scale here are:
- UV Horizontal and Vertical - Scales the Horizontal and Vertical Wrap values when the layer's Projection Type is set to UV Map.
- Size - Scales the size when the layer's Projection Type is not set to UV Map.
- Bump Amplitude - Modifies the amount of bump on the surface.
- Absorption Distance - Colored transparent surfaces don't often exhibit even coloration. Thin areas appear colorless while thicker areas are tinted with color. Absorption Distance determines how far a ray must travel to get 100% of the Transparency Color.
- Displacement Distance - Determines the maximum range that vertices can be created, or moved away, from the original mesh surface during micro-polygon tessellation.
- Subsurface Distance - Determines how far light must travel through the surface before exiting in order to be fully tinted by the subsurface color.
Note: For more details on each of these properties, see Material.
Enable the layers you want to scale and specify the Scale amount. Your render is updated with the new Scale value. By default, all layers are scaled to 100%.
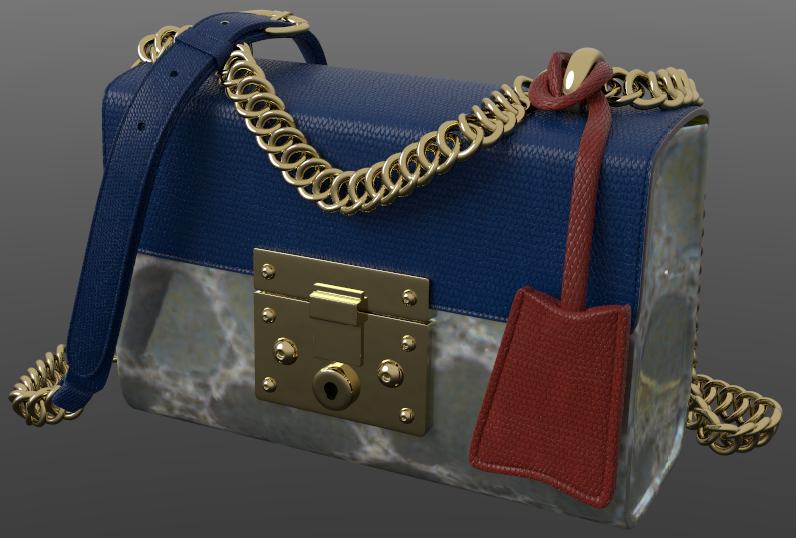
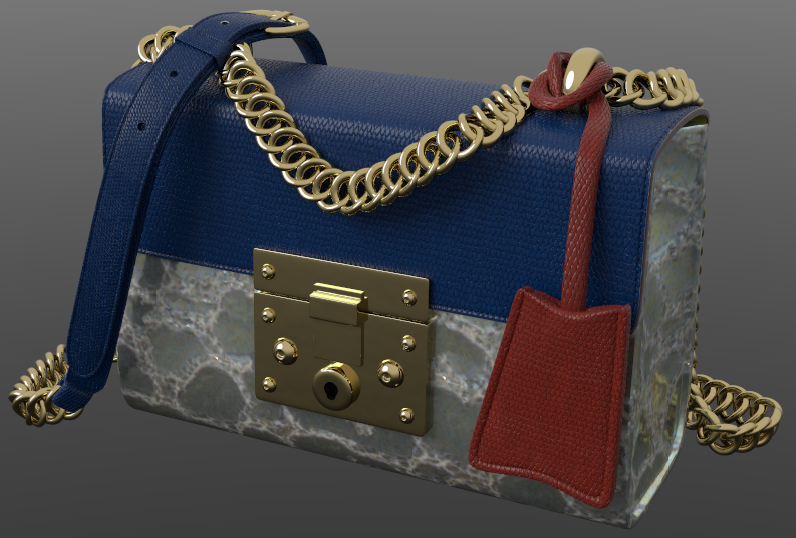
This example shows the gray snake skin leather AxF texture scaled:
|
|
|
|
Scale at 100% |
Scale at 50% |
To bake the scale value into the selected attributes of the material, click Apply Scale. This modifies the values on the material. For example, scaling Displacement Distance to 50% halves the material's Displacement Distance value.

Note: You can still scale individual texture layers manually, independent of the Group's Scale options. To do this, select the texture layer in the Shader Tree, and in the Layer properties, enable Ignore Scale Group.
Sorry you didn't find this helpful
Why wasn't this helpful? (check all that apply)
Thanks for your feedback.
If you can't find what you're looking for or you have a workflow question, please try Foundry Support.
If you have any thoughts on how we can improve our learning content, please email the Documentation team using the button below.
Thanks for taking time to give us feedback.