Fusion Example
As a quick introduction to MeshFusion, let's work through a simple example that combines Qbic primitives. This example uses the 3D Tree to work with the Fusion (as opposed to the Schematic).
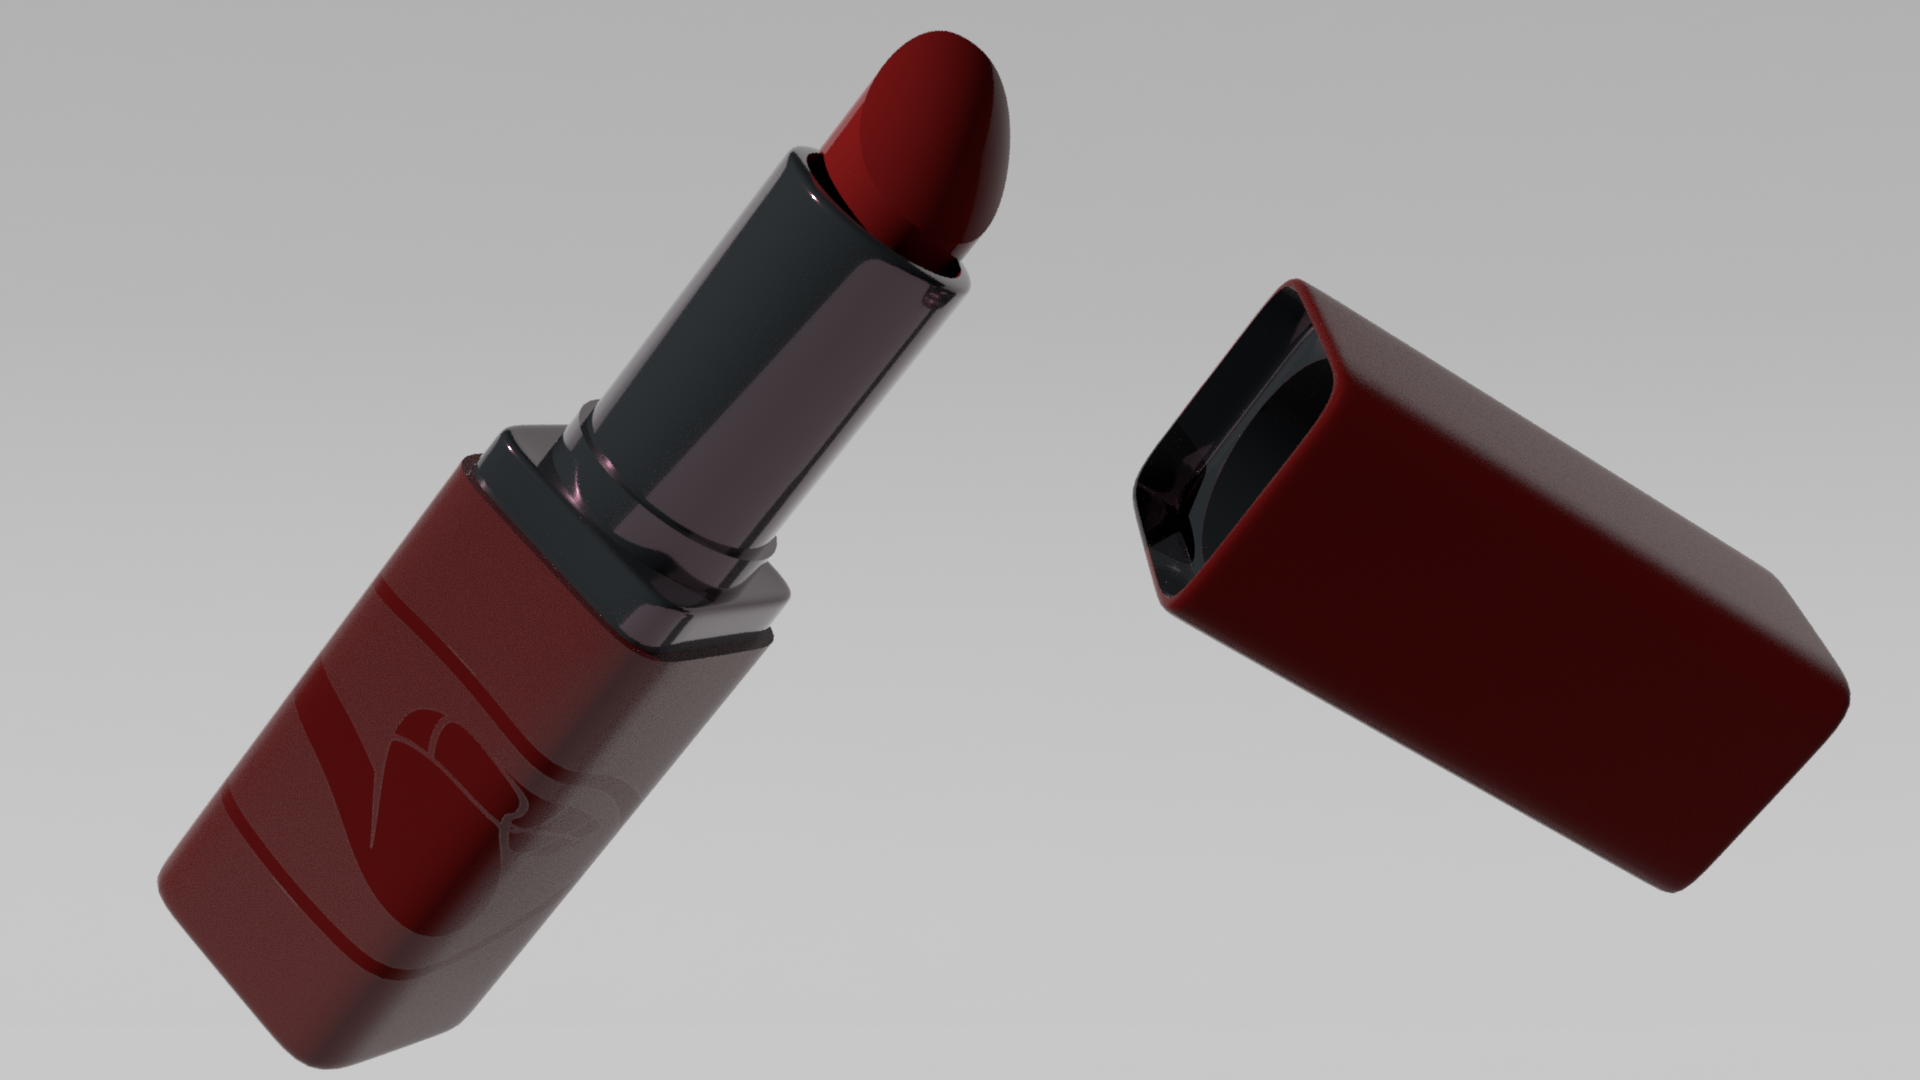
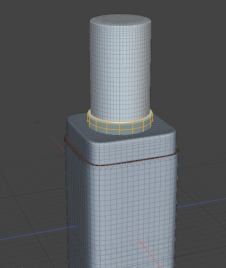
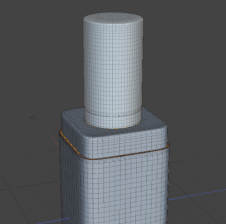
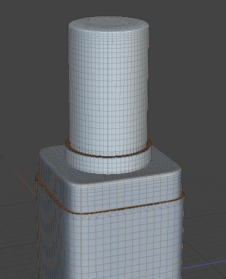
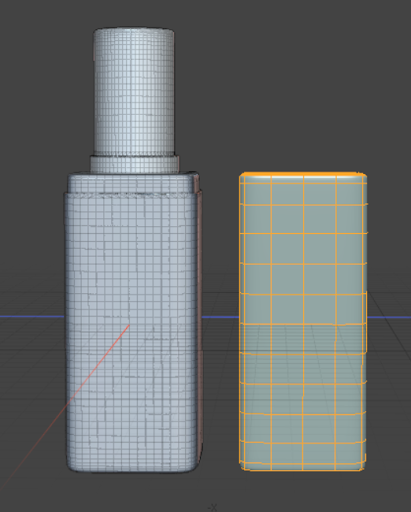
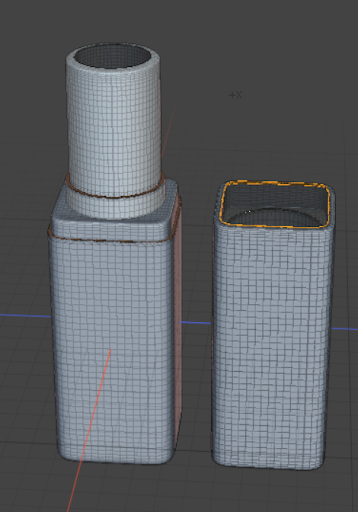
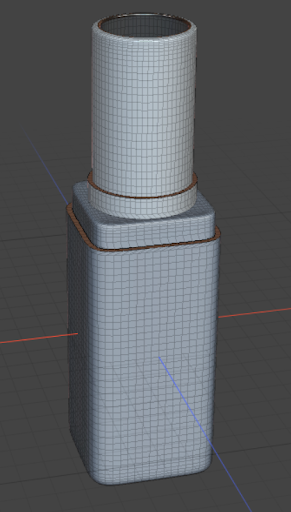
This example shows you how to model a lipstick case and bullet, pictured below.
Making the Case: Primary Trims and Embossing
To make the lipstick case, we will be using Primary Trims to create the lower half that houses the lipstick bullet, and Subtractive Trims to create a hollow in the lid and lipstick tube for the bullet to sit in. To begin with, we will be making the lower half.
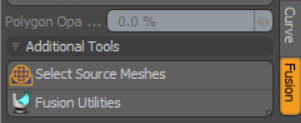
While working with MeshFusion, you may find it beneficial to enable Auto-Select and Select Source in the Fusion tab in the window to the left of your screen. Auto-Select will automatically disable the visibility of any items that aren't currently selected, and Select Source allows you to select and edit the source mesh of a fusion item by clicking on it whilst viewing a Fusion Mesh.
To start the example, make sure you’re in the Model layout with an empty scene.
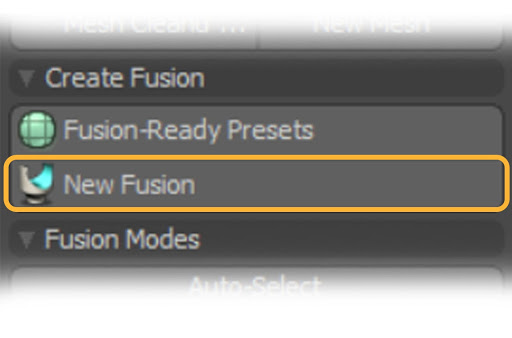
- Click the Fusion tab in the modeling toolbox on the left panel
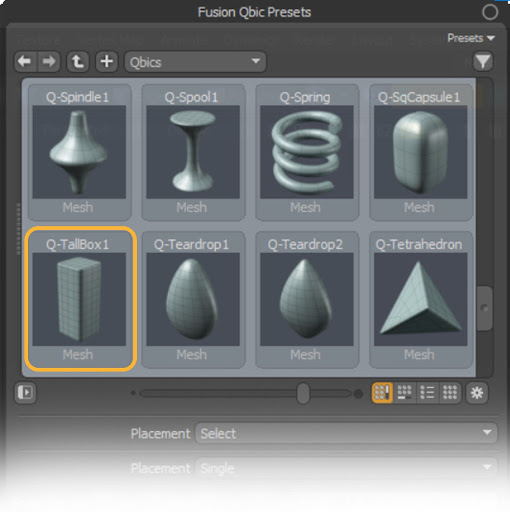
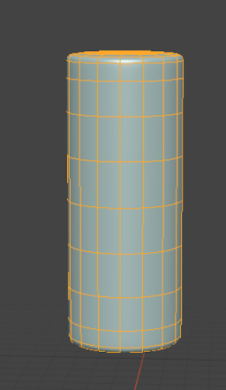
- To start the lipstick case, let’s add a Qbic box. In the Fusion tab, click the Fusion Ready Presets button and the Fusion Qbic Presets window will appear. From here, we want to select a Q-TallBox1. To bring the mesh into the scene, double-click the mesh icon in the asset window.
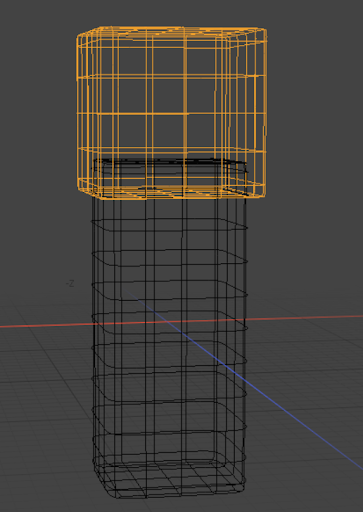
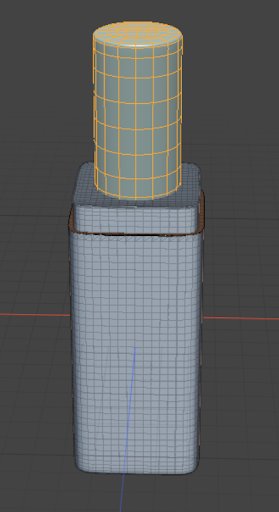
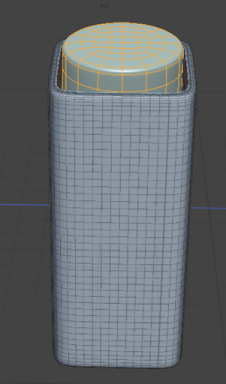
- With the box visible in the 3D Viewport, the next thing we need to do is create an embossing for the lipstick tube to sit on. To do this, open the Fusion Qbic Presets window again and create a Q-MediumCube.
- Scale the Cube so it’s slightly larger in the X and Z-axis. The Y-axis can be left as is. Once the cube has been scaled, move it so that it is intersecting slightly with the top of your first box.
- After the Cube has been placed, select the original box and create a new Mesh Fusion. To do this, navigate to the Fusion tab in the panel to the left of the viewport and then press New Fusion.
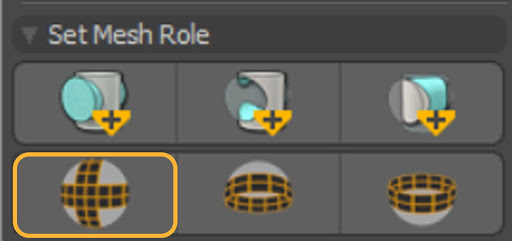
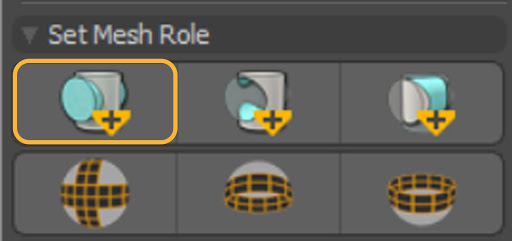
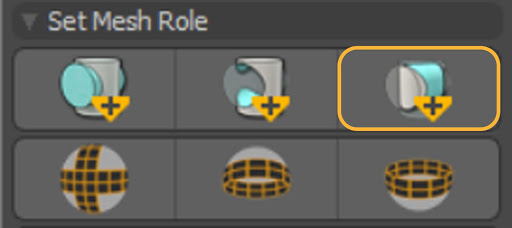
- Now that you have a Fusion Item, it’s time to emboss it. To do this, select both your cube and your box, navigate to the Fusion tab on the left and then under Set Mesh Roles, click the Two Sided Subtract Grid icon.
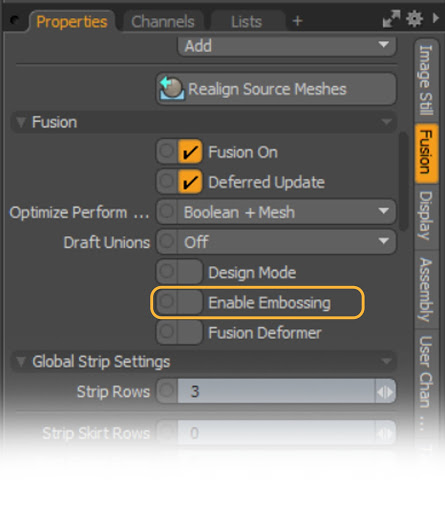
- Before we can emboss our mesh, we need to enable it in both our Primary and Trim meshes. To do this, select the Fusion Item in the Items List, then enable Embossing within the Properties window on the right side of the 3D Viewport. Enable Embossing can be found under the Fusion sub-menu of the Fusion tab in the Properties window.
- Select the Q-MediumCube in the Items List and repeat this process.
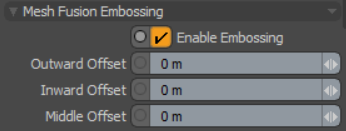
- Once embossing has been enabled on the Cube mesh, the Mesh Fusion Embossing menu will become available.
- From here, set the Outward Offset to 25mm. This will extrude anything below the embossing strip outward.
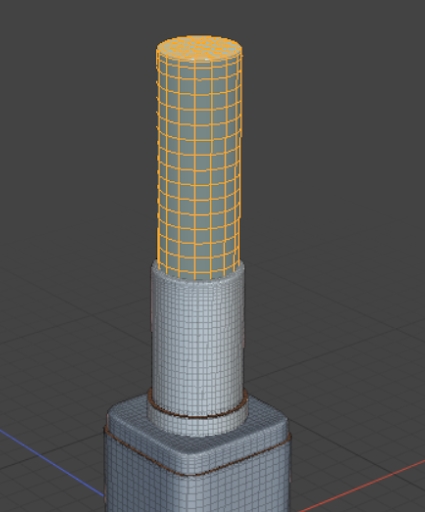
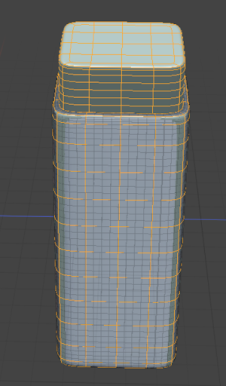
- With the embossing finished, we can now start to create the tube that the lipstick bullet will sit in. To do this, navigate to the Fusion Qbic Presets menu again, and create a QCylinderMed.
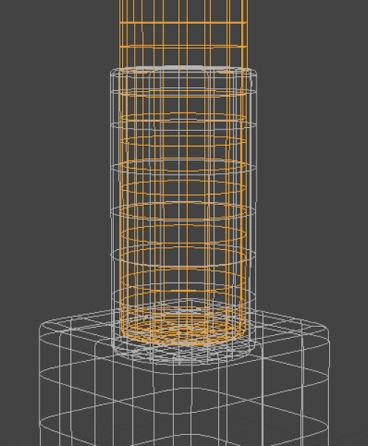
- The Cylinder now needs to be scaled and moved into position. Press R to activate the scale tool and then scale the Cylinder 50% in the X & Z-Axis and 60% in the Y-Axis. After the cylinder has been scaled, press W and move the cylinder in the Y-Axis so it’s intersecting the top of the box slightly.
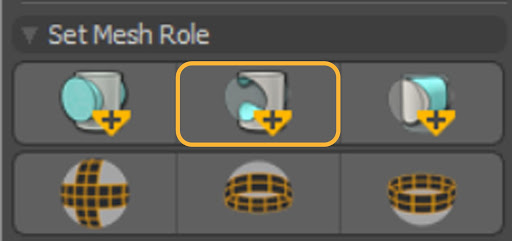
- Once the cylinder has been positioned, select both the cylinder and the box in the Items menu.
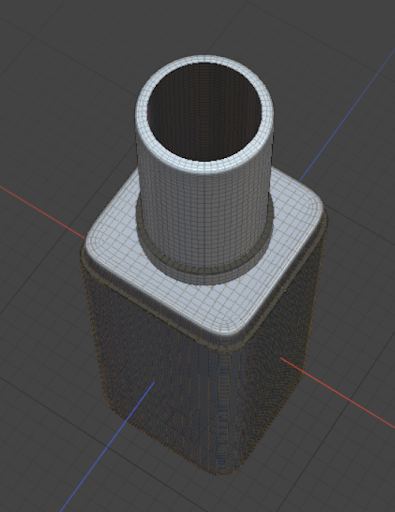
- On the left panel, in the Fusion tab, under Set Mesh Role click the Apply Primary icon.
- Now that the two meshes have been fused, we will be using the Emboss function again to create a rim around the lipstick tube.
|
|
|

Note: You can change the scale of objects in their axis by adjusting Scale XYZ under the Transform menu in the Mesh tab of the Properties window. Scaling, rotating and translating in the Properties window is helpful when modeling to measurements or specifications.
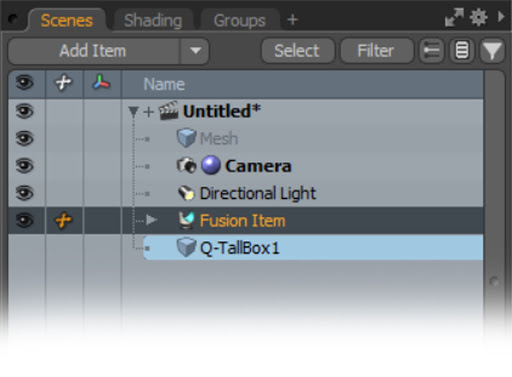
Once your mesh has been converted to a Fusion Item, a new item type called Fusion Item will appear in the Items List to the right of the viewport. This mesh will now be your Primary mesh.
Note: As you begin to add more meshes to your scene, it’s good practice to begin naming your items to keep your Items list organized and easier to navigate. You can do this by double right clicking on your mesh or Fusion Item in the Items List, and typing in a name.
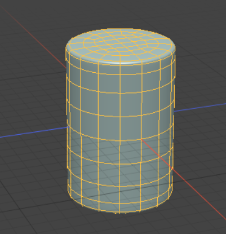
This will create a Strip around your mesh, which we will use to emboss the box in the next step.

The two meshes will now be fused.
|
|
|
Create a Q-CylinderMedium and scale it 55% in all Axis. |
|
|
|
Position it so it’s intersecting with the bottom of your lipstick tube and then select both cylinders in the Items List. |
|
|
|
With both cylinders selected, click the Two-Sided Subtract Grid button in the Set Mesh Role menu. |
|
|
|
Making sure that Embossing is enabled on the fusion item and your smaller cylinder, set the cylinder’s Inward Offset to 35mm. |
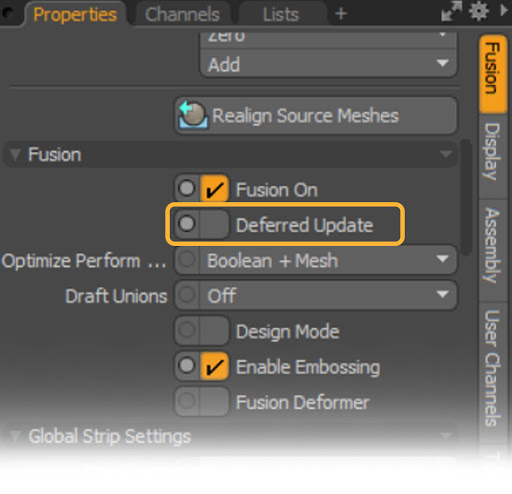
In the next section, we will be using Subtractive Trims to hollow out the lipstick tube, as well as create a cap for the piece we just made. However, should you want to, you can now resize or reposition your mesh, as well as change the offset of your embossings to change the look of the lipstick as you like. By default in Modo 15 or later, Deferred Update is enabled, meaning that any changes to the Fusion Item will not update until you release the tool.
This can be turned off and changed to real-time updates by selecting your Mesh Item in the Items list, and then unchecking Deferred Update in the Fusion sub-menu of the Fusion tab in the Properties window.
Making the Cap: Subtractive Trims
Now that you have created the base and tube of the lipstick case, it’s time to hollow the tube and create the cap. To do both of these, we will be using Subtractive trims. Subtractive trims are the opposite of Primary trims; where Primary trims add mesh to the Fusion Item, Subtractive trims remove mesh from a Fusion Item.
As with the base of the lipstick case, we will be using Qbic meshes to create our Fusion Item and Subtractive trims.
Hollowing the Lipstick Tube
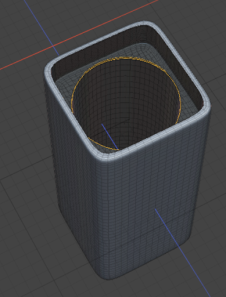
- Using the Fusion Qbic Presets window, create a Q-CylinderLong.
- Once created, scale the cylinder inwards so it’s slightly smaller than the lipstick tube. Once scaled so that it fits within the tube, translate your cylinder in the Y-Axis so that it’s sat slightly above the square base of the lipstick case.
- Now that the mesh we’re going to use for a Subtractive Trim has been positioned, it’s time to assign it a Mesh Role. To do this, select the cylinder that you’ve just placed and the lipstick tube in the Items List.
- With both meshes selected, navigate to the Set Mesh Roles submenu of the Fusion tab and click the Apply Subtractive Trim icon.
- With the subtraction in place, the bottom half of the lipstick tube is now finished. The next section will cover making the cap for the lipstick.
Note: It’s easier to see if your mesh is intersecting or not if you set your view to Wireframe. To do this, select the dropdown menu in the top left of your viewport and change it from Default to Wireframe.
|
|
|
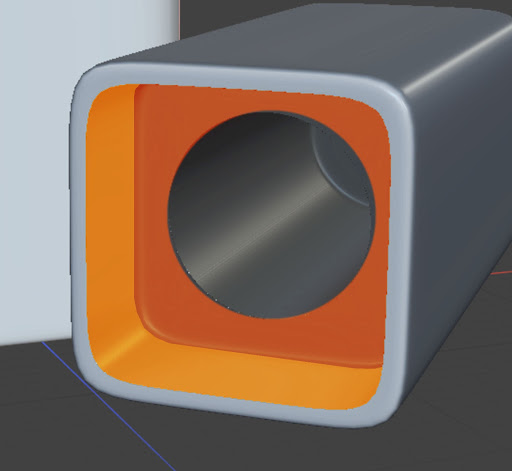
|
Example of how the subtractive mesh should be positioned in the lipstick tube. |
|
Making the Cap
To make the cap for the lipstick case, we will be creating a new Fusion Item with Qbic meshes and then hollowing it out by layering Subtractive Trims.
- First, we need to create another Q-TallBox-1. Navigate to the Fusion Qbic Presets window once again, and double click to bring the Mesh in to the 3D Viewport.
- Once the box is in the 3D Viewport, make sure that it is the same size as the box we used to create the base of the lipstick case.
- With the mesh for the cap in the 3D Viewport, the first thing we will do is turn it into a new Fusion Item. To do this, select the mesh and then click the New Fusion button that can be found in the Fusion tab in the window to the left.
- With a new Fusion Item created, it’s time to begin hollowing out the inside of the cap. The first subtraction we are going to make will create the recess in the cap that is highlighted in the image below.
- To create this recess, first we need to make another Q-Tallbox and then change the scale of the cube in the X and Z-Axis to 90% and to 25% in the Y-Axis.
- Once the cube has been scaled, move it in the Y-Axis so that it’s sat slightly within the cap as shown in the image below.
- With the cube in place, select both the cube and the mesh for the cap in the Items List.
- With both meshes selected, navigate to the Set Mesh Roles submenu of the Fusion tab and click the Apply Subtractive Trim icon.
- With the Subtractive Trim added, you will now have a mesh that looks like the image below.
- To finish off the cap, we need to hollow it out further with a cylinder. This will allow the tube of the lipstick to sit within the cap. The process is the same as the one we have just covered, but will be outlined in the image sequence below.
Note: Because we’re trying to keep all our mesh items as similar in size to each other as possible, another way we could generate these mesh pieces by duplicating them. To do this, select the mesh you want to duplicate and then click on the Fusion Utilities button in the Fusion tab of the left window. Once clicked, the Fusion Utilities menus will open. From there, click the Duplicate as non-Fusion Mesh button and your mesh will be duplicated and ready to edit.

The reason we’re creating another Fusion Item is because the cap is an object separate from the lipstick base that we were just working on. This means that in order to add trims or strips to it, it needs to be its own Fusion Item.
In a tube of lipstick, this is where the embossed edges would click into place to create a locking mechanism and prevent the cap from falling off accidentally.
|
|
|

|
|
|
Create a Q-CylinderMedium and scale it so it’s 65% in the X and Z-Axis and 110% in the Y-Axis. |
|
|
|
Position the Cylinder so that it’s inside of the cap. |
|
|
|
Select the Cylinder, cap Fusion Item and the cube that has already been subtracted and then apply a Subtractive Trim. |
|
|
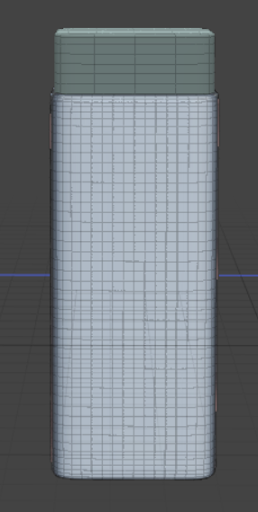
|
Once the Subtractive Trim has been applied, you will be left with a cap that looks like the image above. |
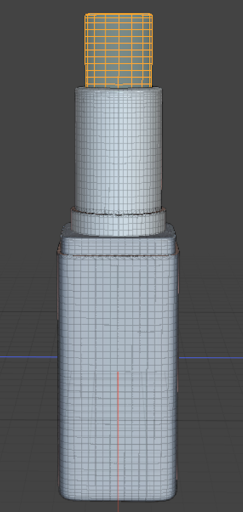
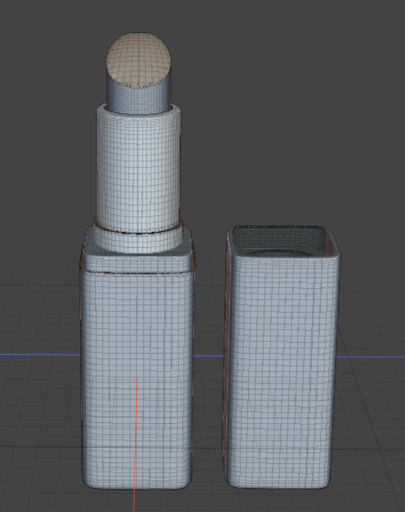
We now have a lipstick tube and cap that should look like the image below.
The next three sections will cover how to use Intersect Trims to create the lipstick bullet, as well as how to edit strips and patches and how to convert your Fusion Items into finished meshes.
Making the Lipstick Bullet: Intersection Trims
The final piece of mesh we will be making is the lipstick bullet. To make the bullet, we will be using two Qbic meshes and an Intersection Trim. When applied to a mesh, anything inside of the Intersecting mesh is kept, while anything outside of the mesh is removed.
- Create a Q-CylinderLong.
- Scale it so it fits within the lipstick tube, but make sure it’s not intersecting with the bottom of the tube but is also tall enough to come out the top.
- Similarly to the cap, the lipstick bullet will be its own Fusion item and as such needs to be turned into one. To do this, click New Fusion in the Fusion tab.
- Once the cylinder has been converted to a Mesh Item, we need to generate the mesh that will be used for the Intersection Trim. To do this, navigate once again to the Fusion Qbic Presets window and create a Q-Ellipsoid-2.
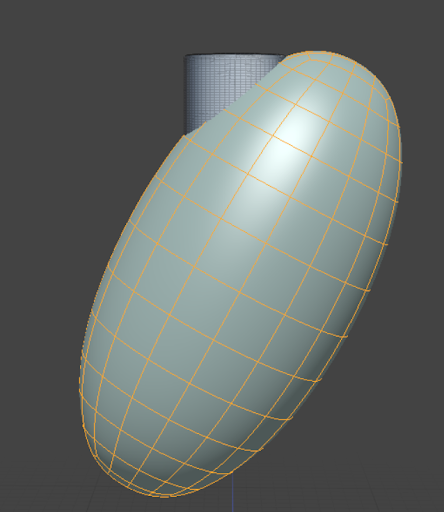
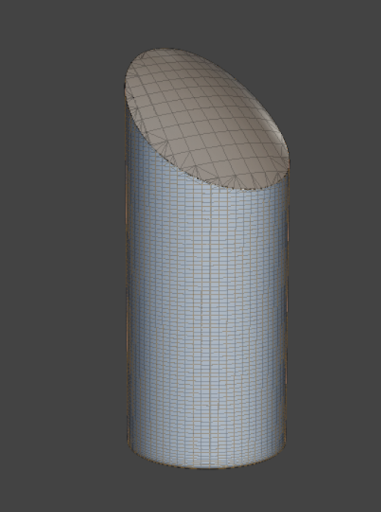
- Before we can create the Intersection Trim, we need to translate and rotate the ellipsoid so that it’ll create a diagonal edge at the top of the cylinder. In the image below, the ellipsoid is rotated 28° in the Z-Axis, but feel free to play around with rotation, scale and how high up you want your cut to be.
- Once the ellipsoid is positioned, we can create the trim. To do this, select both the ellipsoid and the Cylinder in the Items List. With both meshes selected, navigate to the Set Mesh Roles submenu of the Fusion tab and click the Apply Intersect Trim icon.
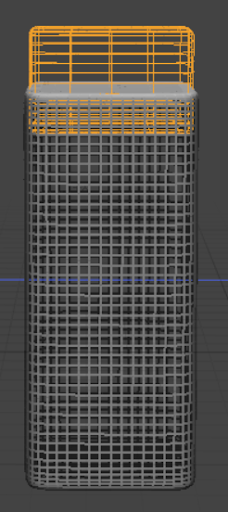
- Once the trim has been applied, you will be left with a mesh that should look similar to the one in the image below.
- Now that all three individual components have been created, you can enable visibility on all three of your Fusion Items and check the model. You should have a set of Fusion Items that look similar to the image below.
We’ll use the curves of the ellipsoid to cut the top of the cylinder to make the tip of the lipstick whilst maintaining a slight curve to the new patch the trim will create.
At this point, feel free to change the depths of any embossing, or the heights or sizes of any of the lipstick components. The next two topics will cover how to fine tune a model by editing Surface Strips, as well as how to convert a Fusion Item into a mesh.
Fine Tuning: Editing Surface Strips
Before converting our Fusion Items to mesh, we might want to edit our strips to add some smoothness to the edges of our objects. Lets edit the edge of the lipstick tube to see how this is done.
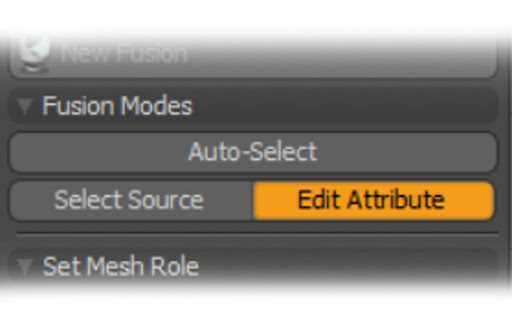
- In order to edit Surface Strips, Edit Attributes must be enabled. To do this, click the Edit Attributes button found under the Fusion Modes submenu of the Fusion tab.
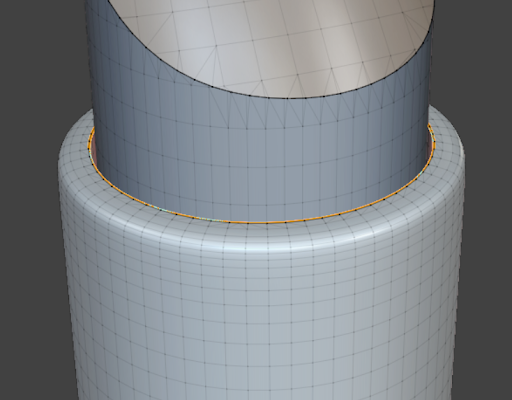
- Once that Edit Attribute has been enabled, it’s time to select our stips. There are a couple ways to do this. The first way is to select your Fusion Item in the Items List and you can select single strips by zooming into the strip you want to select and left clicking it once. You can also select all strips on your Fusion Item by double clicking any strip on the mesh.
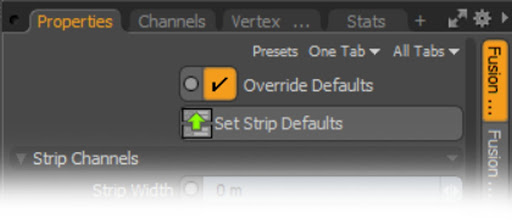
The strip that we want to select and edit is the one at the rim of the lipstick tube, highlighted in orange in the image below. - Next, we need to enable Override Defaults. If this is not enabled, any changes you make to Fusion Strips will not update. To do this, while the strip is selected, go to the Properties window and click the checkbox next to Override Defaults.
- Now that we have Override Defaults enabled, we can edit our strip. To do this, in the Properties window, change the Strip Width to 35mm. This will widen the strip and have a smoothing effect.
|
|
|
|
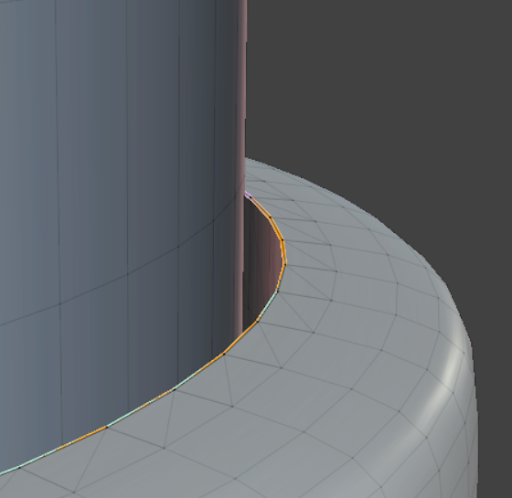
Strip Width set to 0 mm. |
Strip Width set to 35 mm. |
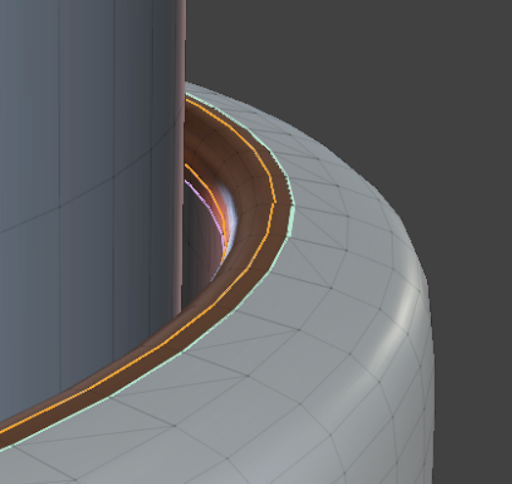
As you can see in the images above, by increasing the width of the strips we have also increased how curved the edge is.
You can now edit other surfaces strips on your Fusion Items. Also try experimenting with the Strip Profile setting, which controls the roundness of the strip. A Strip Profile of 0% makes a flat bevel, at 100% it is fully rounded.
Note: For more information on editing Surface Strips, see Fusion Surface Strips.
Converting to a Mesh
When you've finished creating a Fusion mesh, you can convert it into a regular mesh. This prepares it for 3D printing or for editing the geometry using standard geometry tools. Each Fusion Item in the Item List can be converted into a mesh using the Convert to Mesh Item button on the item's Properties panel.
Lets convert the Lipstick tube first.
- Select the Fusion Item for the lipstick tube in the Items List.
- In the Properties panel ensure the Fusion tab is enabled, and scroll down to the Output Mesh menu.
- In the Output Mesh menu, change the Mesh Mode to Airtight Final.
- In the same section, click Convert to Mesh Item.
- Click OK to replace the Fusion Item with a Mesh Item.
- Click OK on the next dialog.

The Fusion Item has now been converted into a Mesh.
You can now convert the bullet and cap to meshes and position both as needed.