Smooth
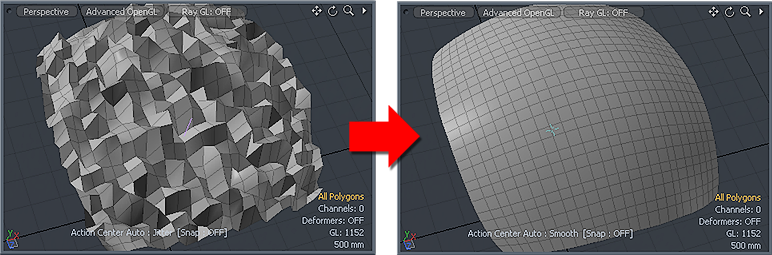
The Smooth tool reduces the jaggedness or roughness of a surface.
In addition, the Smooth tool allows you to smooth positions along boundary edges and corner vertices.
The tool operates in the 3D and UV viewports, and is good for smoothing overall topology, or for smoothing specific areas of a UV map.
Note: Jagged surfaces are also known as jittered polygons.
This tool also uses any active falloffs (including a Background Constraint) for you to target specific areas for smoothing.
The Smooth tool is found in a number of places in the interface:
• Model layout: In the Toolbox on the left panel, under the Deform sub-tab. It is also an option in the Jitter and Quantize tools.
• Topology layout: In the Toolbox on the left panel, under the Tools sub-tab.
• Edit menu: Click Edit > Deform > Smooth.
• Procedural Mesh Operation: Open the Mesh Operations tab on the right panel, click Add Operator, expand the Deform category, and click Smooth. For more information, see .Smooth Tool Procedural Mesh Operation.
Smooth Tool Properties
The following properties are available for the Smooth tool:
Note: Property options vary between the direct modeling and the procedural versions of the tool.
| Option | Description | |||
|---|---|---|---|---|
|
Smooth |
||||
|
Strength |
Controls the amount of smoothing applied to the model. |
|||
|
Iterations |
Determines the number of times that Modo applies the smoothing. A combination of both Strength and Iterations controls the overall smoothing of the model. |
|||
|
Thread |
Provides faster feedback on the smoothing results, but it can reduce overall system interactivity. It may be useful to enable this option on complex models even though the smoothing calculations are processor intensive. |
|||
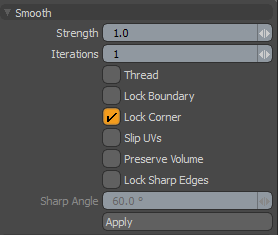
| Lock Boundary | Locks the vertex positions along boundary edges. | |||
| Lock Corner |
Locks the vertex positions at a corner vertex with a valence of 2. The corner vertex is shared by a single polygon and it is on the boundary. |
|||
|
Slip UVs |
Checks to stop edits to the geometry changing the existing UV map. UV values are generally fixed to specific vertices, therefore further edits to the geometry may warp, deform, or otherwise distort the UV values in undesirable ways. When this happens, you may need to adjust the map or to redo it altogether. To avoid this, enable Slip UVs so as to not disturb any existing UV mapping applied to the geometry.
|
|||
|
Preserve Volume |
Allows you to maintain some of the definition of the original object by preserving object volume. This is done by constraining smoothing points to the original object's surface. |
|||
| Lock Sharp Edges | Locks sharp edges. | |||
| Sharp Angle | Calculates the threshold angle to determine which sharp edges to lock. This is the angle between normal vectors from two face polygons which shared edges. The edges, which have a larger angle than the Sharp Angle, are locked. | |||
See Applying Snapping and Specifying Action Centers and Falloffs for further control options.
Smooth Tool Procedural Mesh Operation
The Smooth tool is available as a procedural operation for use in the Mesh Operations List. In the Procedural Preset Browser, you can find this tool under Procedural > Deform.
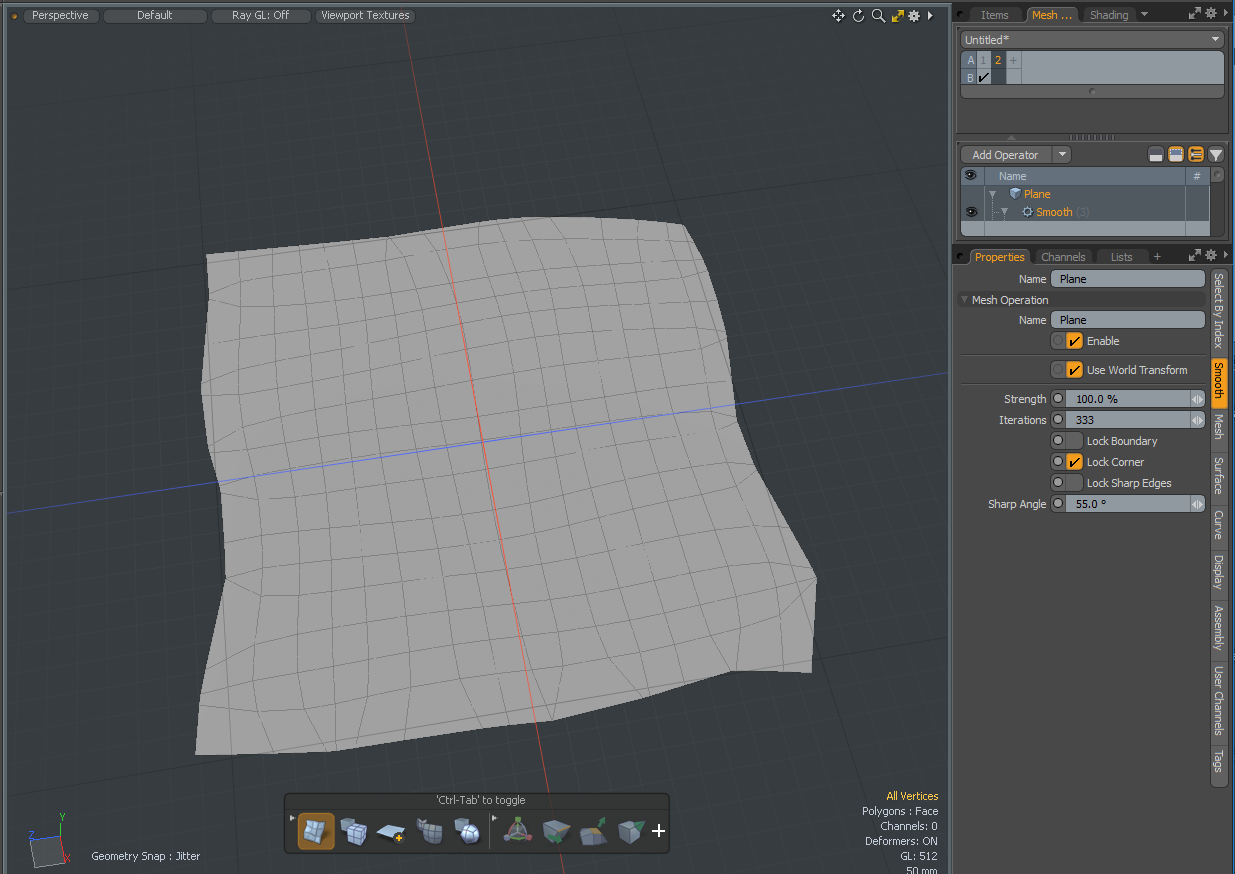
The following is an example of applying the procedural Smooth tool to a plane with a jittered surface.
Creating a jittered plane:
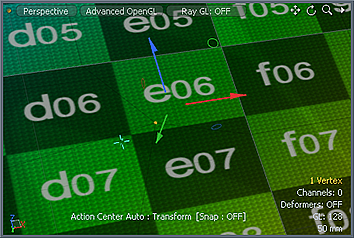
| 1. | Open the Model layout. |
| 2. | In the toolbox, open the Basic tab, hold Shift and click Plane. |
The Plane is added to your scene.
| 3. | Under the Switcher bar, click Polygons. |
| 4. | With the Plane selected, click Shift + D. |
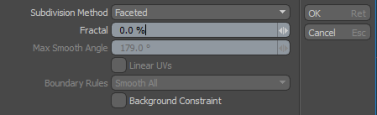
The Subdivide Polygons dialog opens.
| 5. | Set the Subdivision Method to Faceted. Repeat this step to create more subdivisions. |
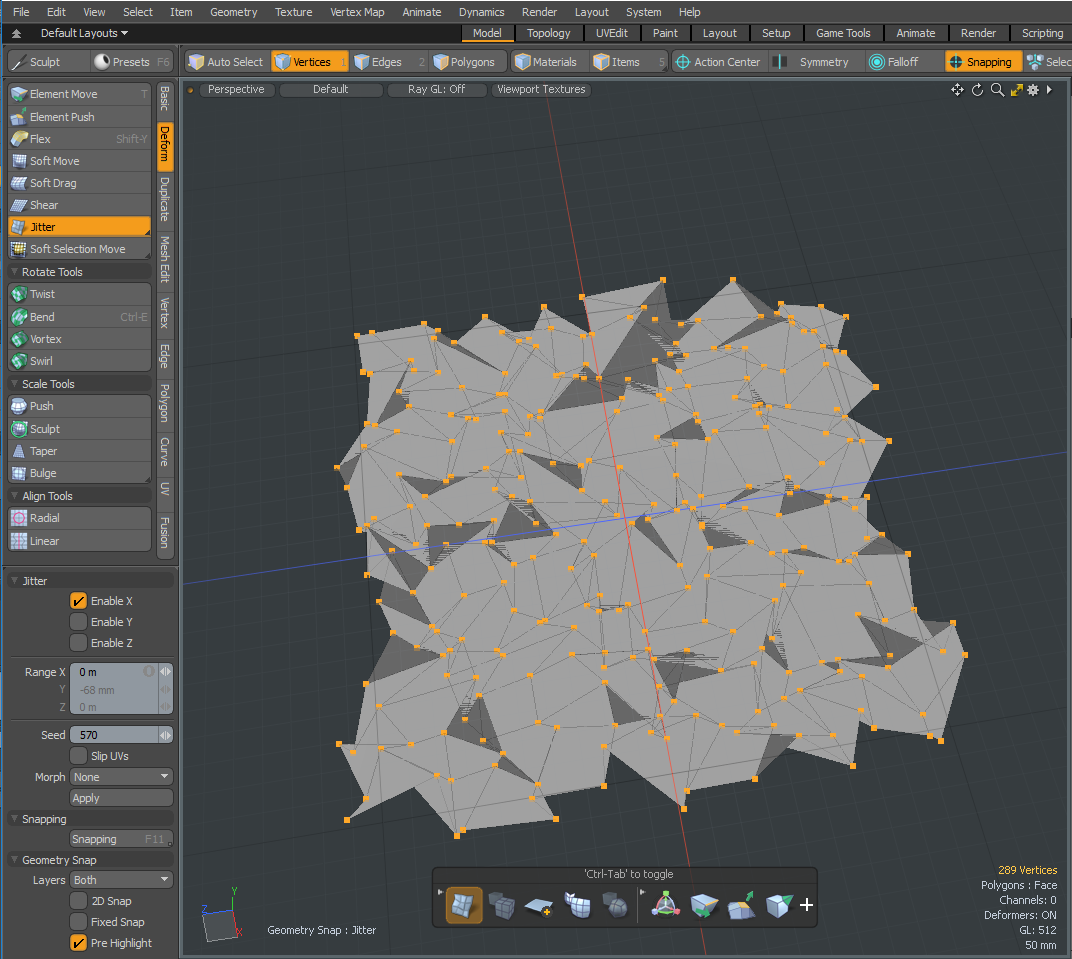
| 6. | Under the Switcher bar, click Vertices, right-click and drag to select all the vertices. |
| 7. | On the Toolbox panel, open the Deform tab, and click the Jitter button. |
Tip: If the Jitter tool is not visible, click and hold the Smooth/Quantize button to reveal the additional options, then select Jitter.
| 8. | With the tool active, click and drag in the viewport to interactively apply the jitter, or type the Range values in the tool's Properties panel, and then click Apply. |
For more information about the Jitter tool properties, see Jitter.
Applying a procedural Smooth operation:
| 1. | With the Plane item selected, open the Mesh Ops tab on the right panel. |
| 2. | Click Add Operator, select Mesh Operations > Deform, and double-click Smooth. |
The Smooth tool is listed below the Plane in the Mesh Ops tab.
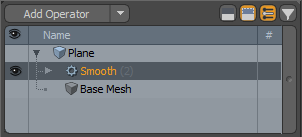
| 3. | Hold Shift, click the Plane item, and open the Smooth tab in the right panel. |
| 4. | Adjust the properties as required. |
When working in the Setup layout, the Smooth tool has two parameters you can set up.
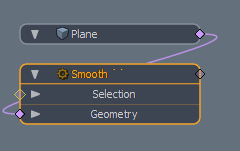
• Selection - Lets you restrict the smoothing to a sub-selection of mesh elements. See Procedural Selection for more details.
• Geometry - This lists any geometry that is affected by the tool. Meshes are connected automatically if they are below the tool in the Mesh Operations list. You can connect additional meshes by clicking (Add Geometry) to open the Preset Browser. From there you can select an existing mesh or add a new, empty mesh.
The procedural version of the Smooth tool has the following properties:
| Option | Description |
|---|---|
| Enable | Toggles the Smooth tool off and on. |
|
Strength |
Controls the amount of smoothing applied to the mesh. |
|
Iterations |
Determines the number of times that Modo applies the smoothing. A combination of both Strength and Iterations controls the overall smoothing of the mesh. |
| Lock Boundary | Locks the vertex positions along boundary edges. |
| Lock Corner | Locks the vertex positions at a corner vertex with a valence of 2. The corner vertex is shared by a single polygon and it is on the boundary. |
| Lock Sharp Edges | Locks sharp edges. |
| Sharp Angle | Calculates the threshold angle to determine which sharp edges to lock. This is the angle between normal vectors from two face polygons that share edges. The edges, which have a larger angle than the Sharp Angle, are locked. |
|
Preserve Volume |
Allows you to maintain some of the definition of the original object by preserving object volume. This is done by constraining smoothing points to the original object's surface. |