Markup
The Markup tool allows you to draw directly onto selected camera views so you can add annotations, notes, and comments to your animations or stills. Assign the Markup image to the current camera item by selecting the camera and clicking Markup in the Images properties. Once assigned, you can use a selection of Markup tools and controls to draw on your camera view in the viewport.
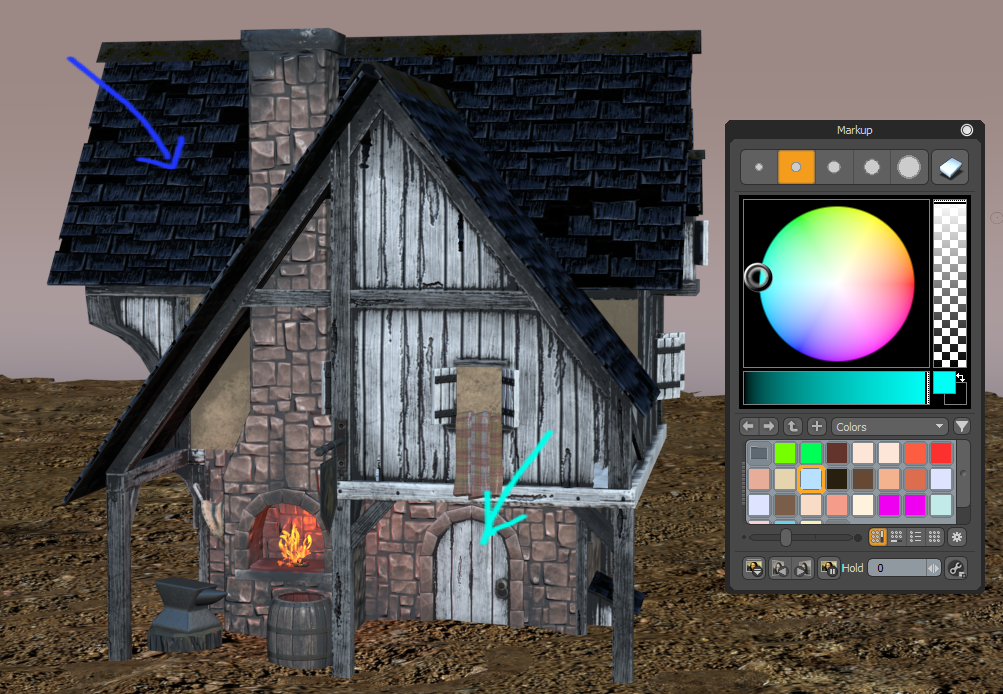
The Markup tool being used to annotate areas of the scene that require lighting and animation.
Assigning Markup to a Camera
| 1. | Select or create a camera in the Item List. |
Tip: See Camera Items for more information on adding cameras to your scene.
| 2. | Use the camera view option in the upper left of the 3D viewport to set the selected camera to the active camera view. |
| 3. | In the camera Properties, under Images click Markup. |
An Assign Markup dialog box appears, allowing you to select a Resolution for your Markup image.
| 4. | Select the Resolution you require for your image from the dropdown, and click OK. |
A save dialog appears, allowing you to select a location, format, and name for your Markup image.
| 5. | Provide a name, save location, and image format for your Markup image, and click Save. |
The Markup tool popover appears, an Image Sequence is created, and the Image Sequence tab becomes active. A Canvas item is also added to the Item List. Now you can draw in the viewport using the Markup tools.
Note: To remove Markup from a camera, delete the associated Canvas item found in the Item List. For example, if you want to remove Markup from "Camera (05)", deleted "Canvas : Camera (05)" from the Item List.
Markup Tool Popover
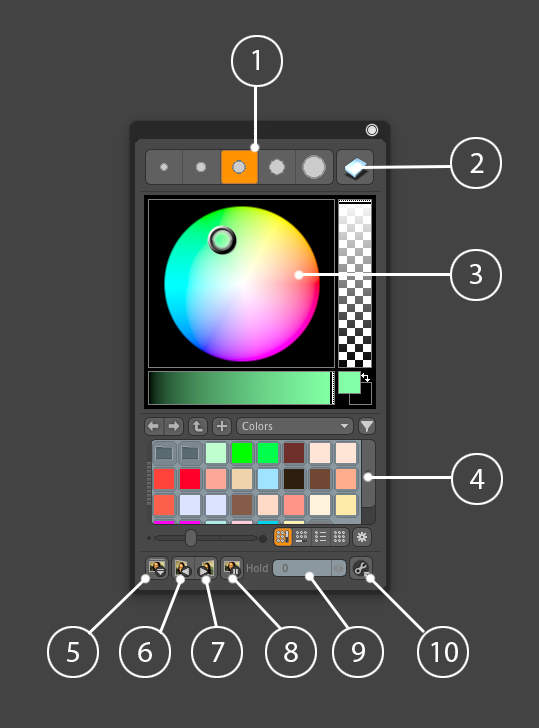
The Markup tool popover.
|
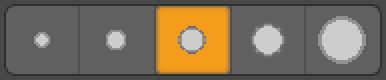
1. Preset Brush Sizes |
A selection of brushes, increasing in size from left to right. |
|
2. Eraser |
Erases any drawing you have made in the viewport. Tip: Holding Shift with this tool active changes this tool to Erase Image, that allows you to clear an entire drawing in the frame. |
|
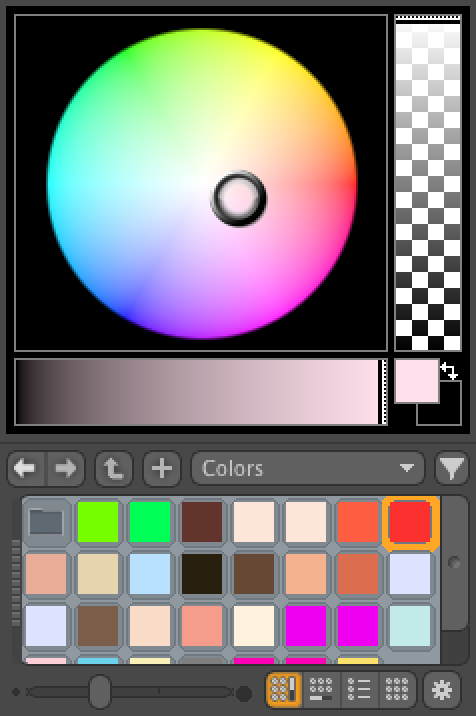
3. Color Picker |
Allows you to select a color to draw with when a brush is active. |
|
4. Color Presets |
A selection of preset colors to draw with. |
|
5. Save |
Saves any changes to the Markup image(s) to disk. If there are multiple Markup images across multiple frames, an image is saved to disk per frame affixed with the frame number. |
|
6. Previous Image |
Navigates to the previous image on the previous frame. |
|
7. Next Image |
Navigates to the next image on the next frame. |
|
8. Toggle Frame Hold |
By default, images are only displayed for the frame they were created on. Turn Frame Hold on to display the previous image for all frames until a new image is drawn. |
|
9. Hold |
If Toggle Frame Hold is off, use Hold to specify a number of frames to hold an image for. |
|
10. Paint Tool Properties |
Opens Modo's full paint tool properties. See Paintbrush. |
Drawing in the Viewport with Markup
| 1. | Select a preset brush size from the Markup tools popover. |
| 2. | Select a color to draw with from the Color Picker or Color Presets. |
| 3. | Hover over the 3D viewport, and click and drag to draw. |
Tip: If at any point you lose your Markup tool popover, open the Camera Properties and click Markup Tools to reopen the tool popover.
Tip: You can open the Timeline to select specific keyframes to draw on by clicking the Time button at the bottom of the 3D viewport.
| 4. | Activate the Eraser  to erase any drawings you have made in the viewport. to erase any drawings you have made in the viewport. |
| 5. | Click Save  to store your drawing to disk. to store your drawing to disk. |