Transforming Items
With the transform tools in Modo you can quickly, easily, and most importantly, accurately apply transformations to items — whether hauling or applying values numerically. All the transform tools are universal in how they work. They respect the settings for falloffs, action centers, and the work plane. You can apply them in any mode: component modes (Vertices, Edges, and Polygons), Items, Center, Pivot, and even Materials modes. For information on using a specific tool, click any link below to see its topic.
Tip: You can middle mouse button click without dragging to repeat the last modeling or transform tool action.
Cage Mode
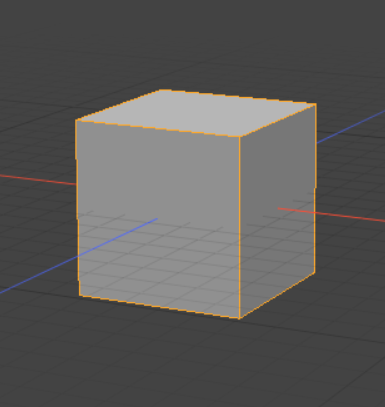
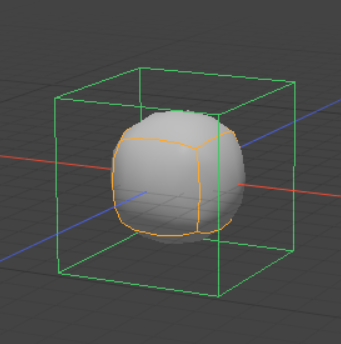
Cage Mode is a tool used in SubDiv Modeling that allows you to edit a smoothed or subdivided mesh whilst working with a low poly wireframe (or cage). Working with the cage is a good way to make large edits to a high poly mesh quickly. When cage mode is enabled, models will still render at a higher render layer, also known as a Render Level.
Enabling Cage Mode
In Modo 15 or later, Cage Mode is equivalent to zero sub divisions. This means that Cage Mode no longer needs to be toggled on and off in the Subdivision menu found in the Surface tab of the Properties window and can now be enabled by setting the Subdivision Level to zero.
Tip: To enter the SubDiv modeling space, press the Tab key. You will be able to tell if you are in the SubDiv space by whether your model is Smooth or not. A smooth model means you are in the SubDiv space, while a faceted model means you are not.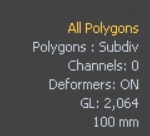
You can also check the current polygon type of your mesh in the bottom right corner of the 3D Viewport, as shown in the image above.
To activate the tool, navigate to the Surface tab within the Properties editor.
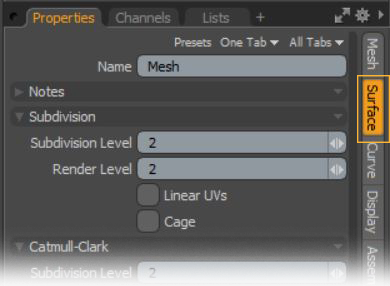
Under the Subdivsion menu, set Subdivision Level to zero. This will enable Cage Mode.

Tip: To view your cage even while subdivisions are enabled, press O on your keyboard, then navigate to the Active Meshes tab and select Show Cages.
|
|
|
|
Cage Enabled |
Cage Disabled |
Duplicating Geometry with the Transform Tools
You can transform and duplicate geometry at the same time by using the transform tools (Transform, Move, Scale, Rotate). To do this, activate the tool, then hold Ctrl/Cmd+Shift, and drag on the handles in the 3d viewport.
Depending on the selection type, you can do the followings:
• In Items mode, create an instance of the item.
Note: You can convert an instance into actual geometry by right-clicking the instance, then selecting Change Type > Mesh.
• In Polygons mode, copy the selected polygons.
• In Edges mode, extend the edge. Clicking on the move handles edits the current segment, clicking outside of the handles creates a new segment.
• In Vertices mode, slide the vertex along one of the connecting edges, the one that is most aligned to the transformation vector.
|
Transform |
||
|---|---|---|
|
|
Combines Move, Rotate, and Scale transformations into a single tool. |
|
|
|
Moves or translates a selection across a specific distance. |
|
|
|
Rotates a selection by a specific number of degrees. |
|
|
|
A Rotate tool that it is limited to editing a single axis at a time. |
|
|
|
Makes a selection larger or smaller. |
|
|
|
Constrains all three axes, forcing uniform scaling operation. |
|
|
|
Moves and rotates a polygon and/or all connected vertices to any other polygon in the model. |
|
|
|
Commands that center a geometry selection at the World Origin position. |
|
