Using MeshFusion with Zero Subdivision
MeshFusion converts all of its source meshes to Catmull-Clark geometry, which is then converted to a polygonal mesh using the Fusion source mesh's Fusion SubDivs property as the subdivision level. Generally, MeshFusion uses one or two levels of subdivision. This is required by certain topologies, such as triangles, n-gons, and vertices with three edges converging on them, that MeshFusion can't handle without subdivision. If your source mesh was already quite dense to start with, this can cause problems.
In such cases you can set the subdivision level to 0. You can do this when creating your Fusion meshes, in the New Fusion dialog. For more information, see Creating a New Fusion Item.
If you already have a fusion mesh, you can modify the subdivision level in its properties. To do this:
| 1. | Select your Fusion source mesh in the 3D viewport or the Items list. |
This opens its Properties on the lower right panel.
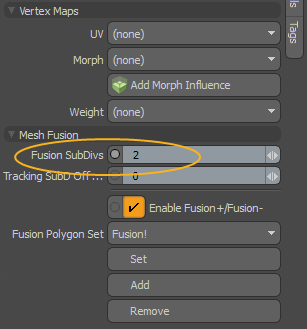
| 2. | Under Mesh Fusion, set Fusion SubDivs to 0. |
Troubleshooting
Using 0 level of subdivision can lead to some issues with the geometry and shading. This section walks you through how you can resolve them with the existing tools in Modo.
Geometry
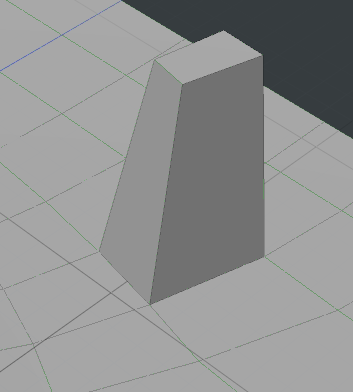
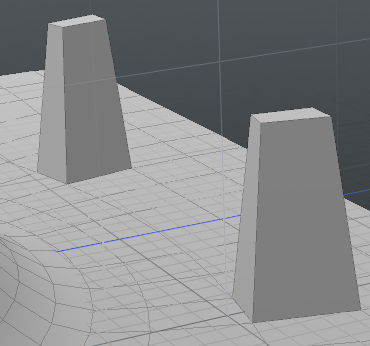
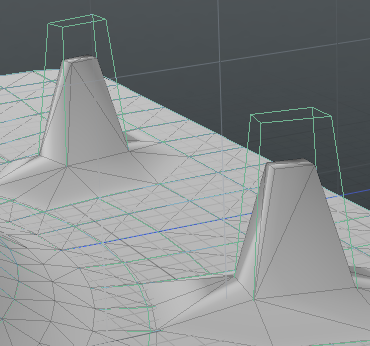
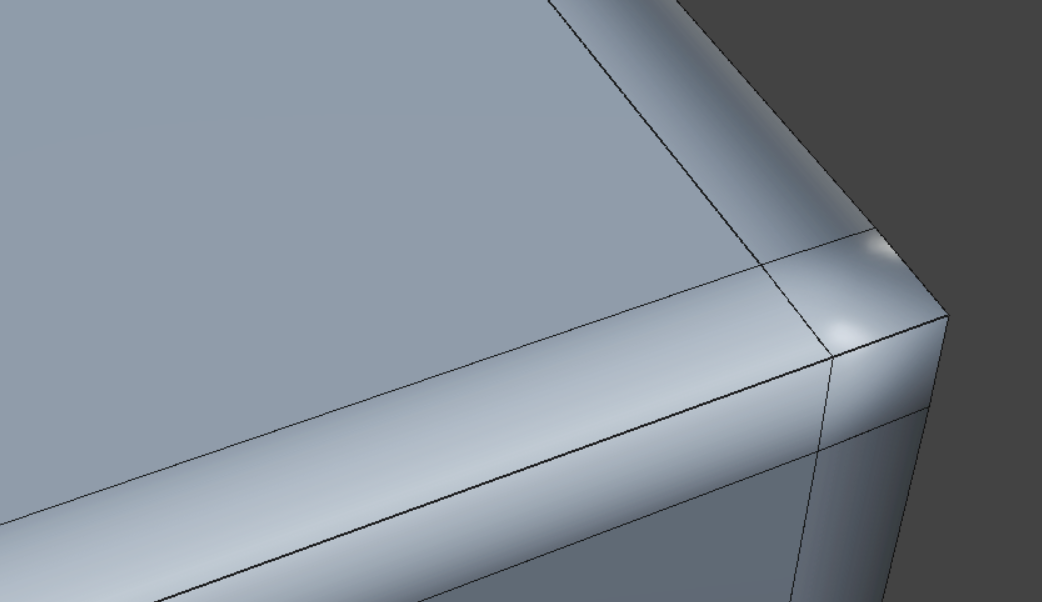
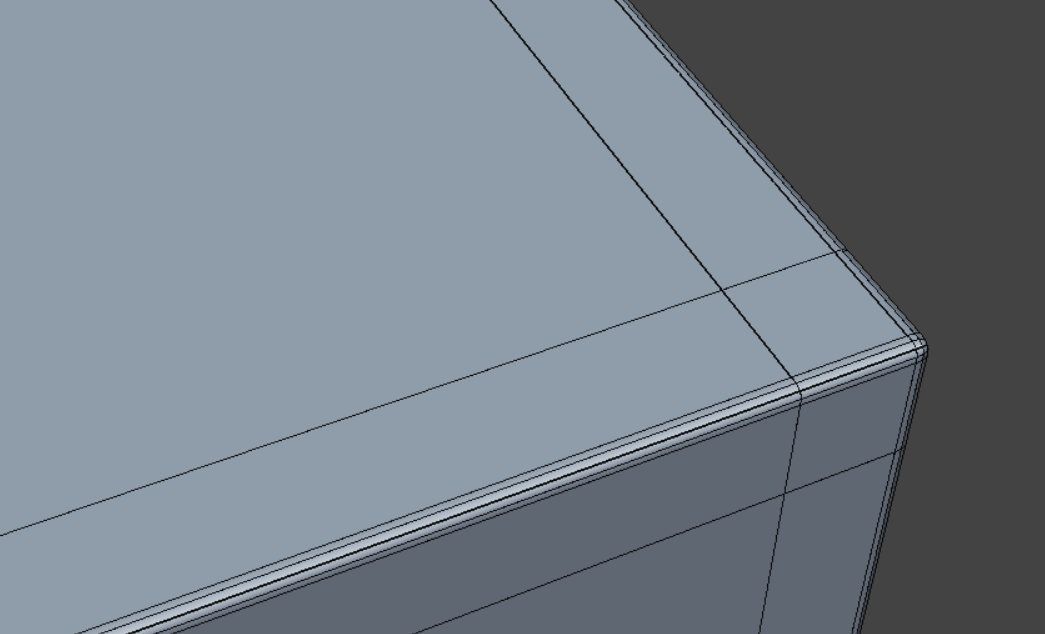
As a result of converting the mesh to Catmull-Clark, the nature of the geometry changes, even with Fusion SubDivs set to 0. The images below show you an example of this problem:
|
|
|
|
Original Mesh |
Fusion Item with 0 Subdivision |
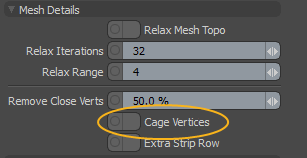
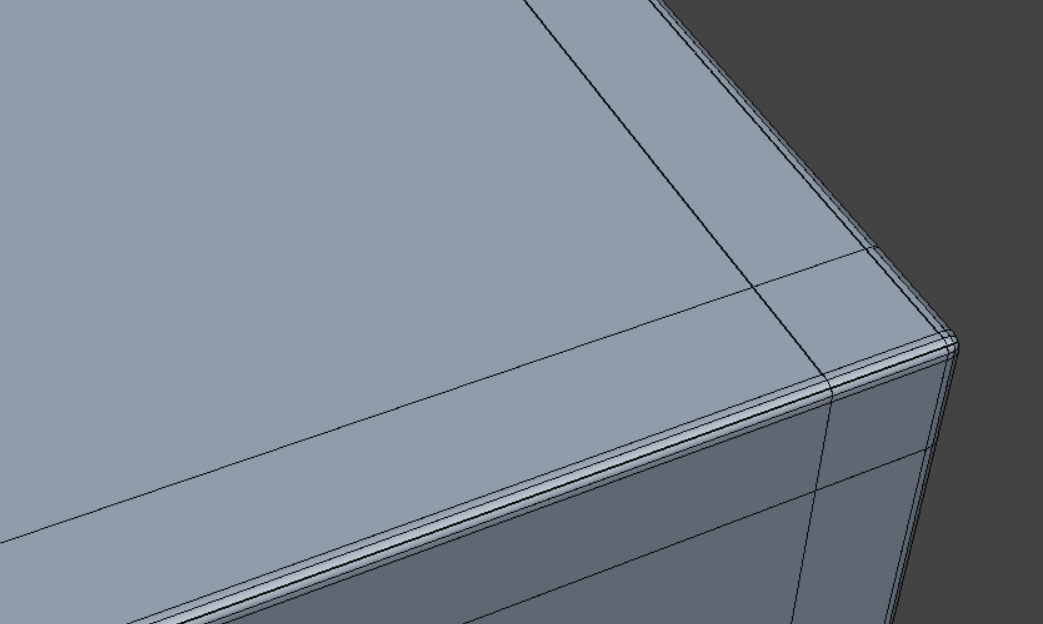
You can fix this by enabling the Cage Vertices option in the Fusion Item's properties:
| 1. | Select your Fusion Item in the Items list. |
This opens its Properties on the lower right panel.
| 2. | Under Mesh Detail, enable Cage Vertices. |
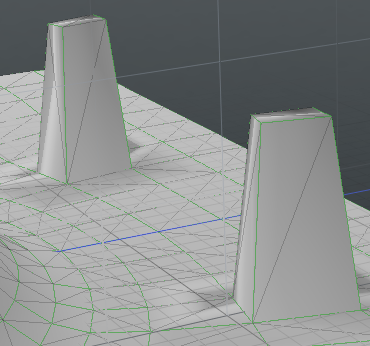
This uses the cage vertices of the source meshes, making the geometry structurally identical to the original:
Incompatible Topology
Topology that triggers MeshFusion to use a subdivision level of 2 remains incompatible with MeshFusion at zero level subdivision. This means that you can't have seams and the strips they generate pass through them.
You can identify problematic areas by hiding any incompatible polygons:
| 1. | Select your Fusion Item in the Items list. |
This opens its Properties on the lower right panel.
| 2. | Under Modeling Utilities, enable Hide Incompatible Polys. |
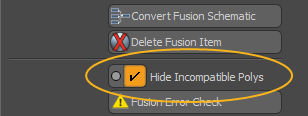
This hides incompatible polygons.
Note: This option hides the affected geometry from the output too, so make sure you only use this method for diagnostic purposes.
N-gons
MeshFusion can't handle n-gons automatically. To deal with them, you can utilize the Quadruple Polygon tool to divide them. For detailed information on these tools, see Polygon Tools.
If your n-gon is non-planar, the safest option is to apply Triple to it.
Edge Weighting
Edge Weighting is a useful tool for creating highly detailed, zero-subdivision meshes with low poly counts. Keeping a low poly count is useful for instances where your model is placed in a real time environment, a game asset or used for practical applications such as 3D printing.
There are four different Edge Weighting types in MeshFusion
|
Single Loops |
Single loops add one loop on either side of each weighted edge.
|
|
Double Loops |
Double loops add two loops on either side of each weighted edge.
Double Loops are useful for keeping edge integrity and clean topology while working with zero SubDivisions. |
|
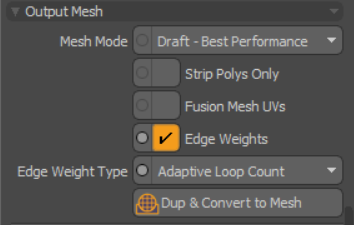
Adaptive Loops |
Adaptive Loop automatically adds a single or double loop based on the topology of the mesh.
|
|
Accurate Edge Weighting |
Displays the actual edge weighting of a mesh based on its subdivision level. This means that no additional edge loops are added to create edge integrity.
|
Note: For information on how to apply weighted edges to a mesh, see Edge Weight Tool
Enabling Edge Weighting
MeshFusion does not apply edge weighting by default, but it can be applied in one of two ways.
The first way is to enable it from the New Fusion Properties window.
- Select your mesh and go to the Fusion tab in the window to the left of the screen.
- Press and hold the Alt key.
- Click New Fusion Properties to display its controls.
The New Fusion button in the Fusion tab changes to New Fusion Properties.
In the New Fusion properties window, locate the Edge Weighting section.

From here, you can enable Edge Weighting on your Fusion Item and assign which type of weighting is suitable for your model.
The second way to enable edge weighting, is to enable Edge Weights and then assign an Edge Weight Type to your Fusion Item in the Fusion tab of the Properties window. This option is useful for applying edge weighting to pre-existing Fusion items.
- Select your Fusion Item in the Items List.
- Navigate to the Properties window below the Items List, and scroll down in the Fusion tab to the Output Mesh section.
- Click the checkbox next to Edge Weights so that it turns orange. This enables edge weighting.
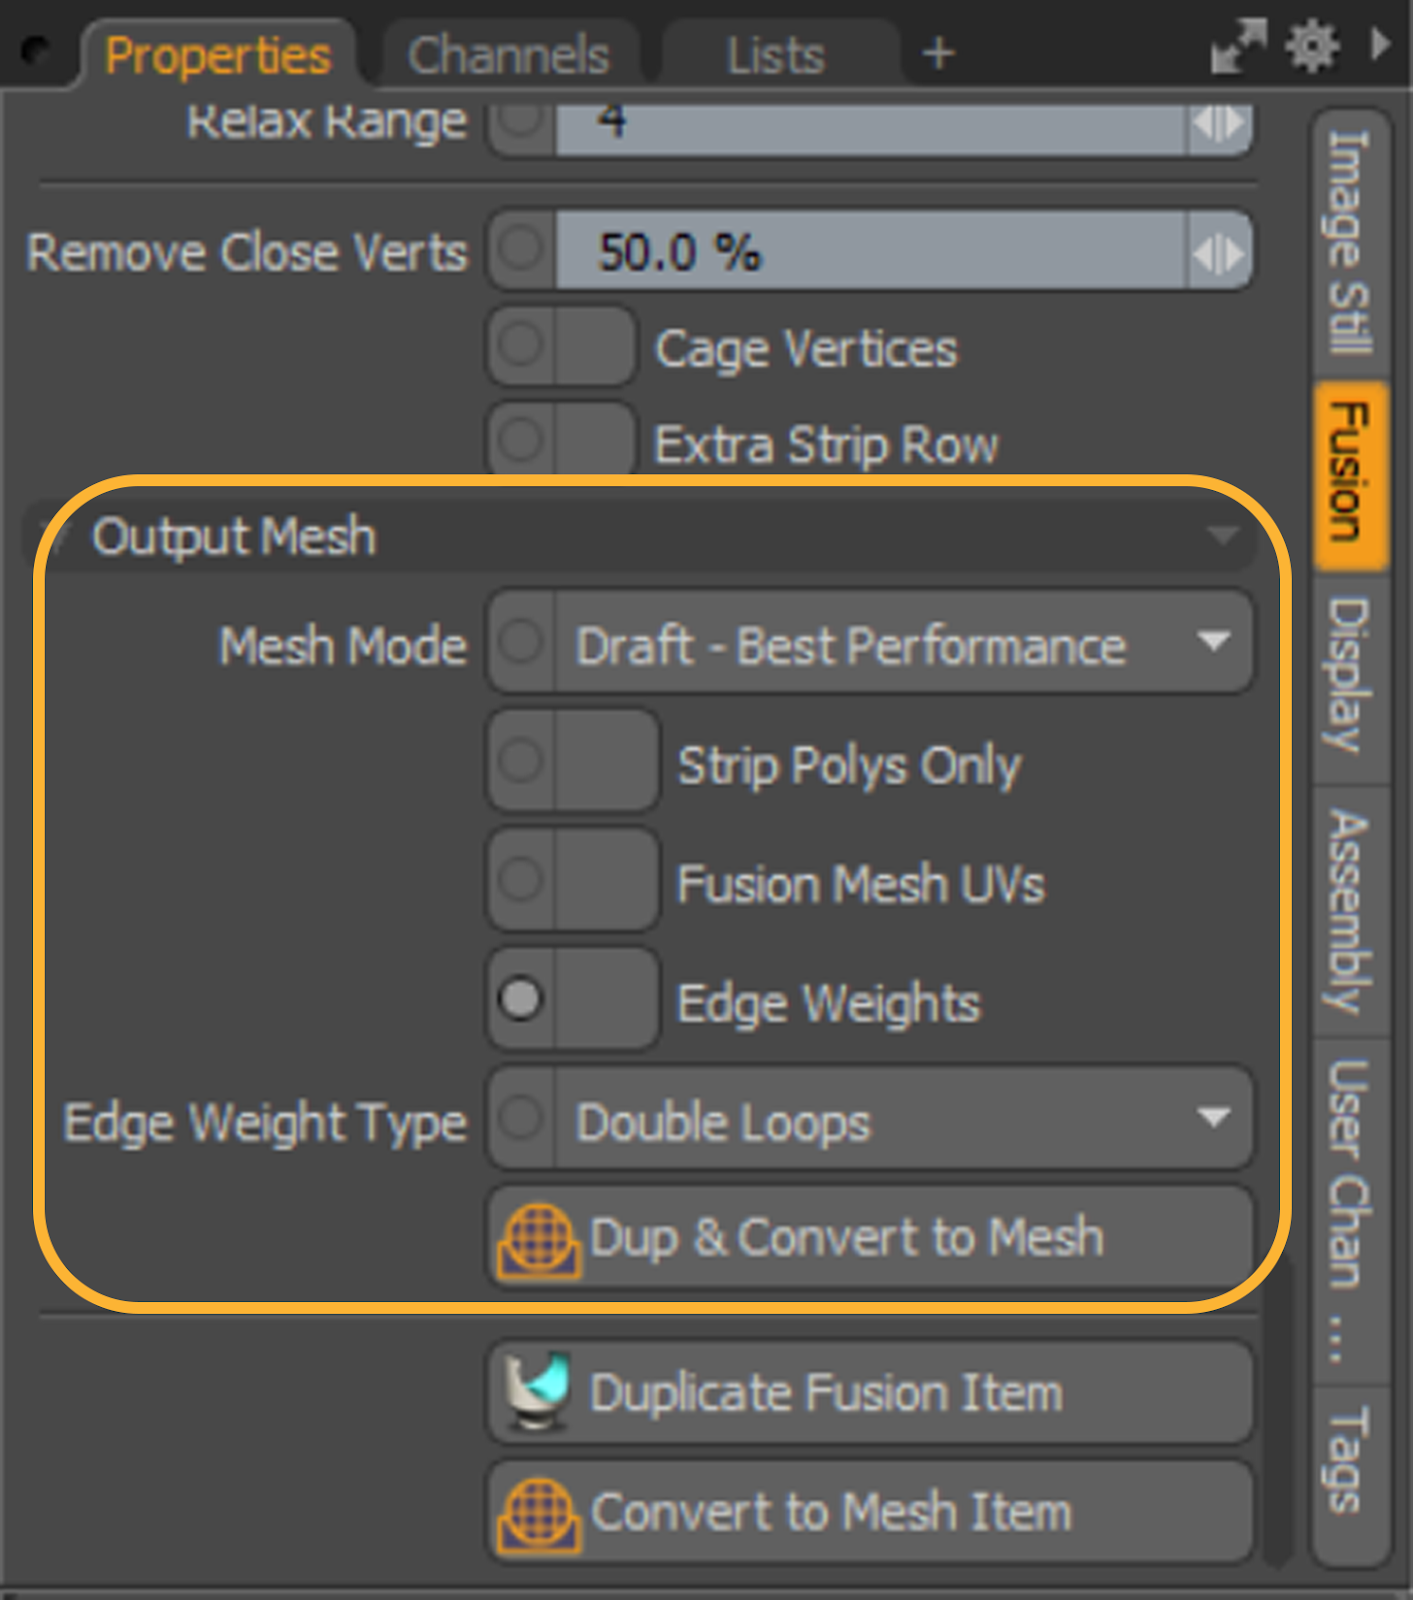
Once edge weighting is enabled, your mesh automatically updates to reflect that. From here, you can change the Edge Weight Type to whichever suits you and your model best.
Shading Issues
MeshFusion generates a normal map, replacing the usual shading. This can cause sharp edges to be shaded incorrectly, as shown on the image below:
You can deal with this issue by turning the normal map off for problematic areas, after converting your Fusion model into a regular mesh.
Note: See Fusion Mesh Conversion on how to convert your Fusion item.
To delete the normal map from a specific area:
| 1. | In Polygons selection mode, select the polygons of the problematic area. |
Tip: It's best to have the boundary of the normal map and the cleared area in a place that doesn't contain much curvature.
| 2. | In the Lists or Vertex Map List viewport on the right panel, expand Other Maps. |
normals is the normal map generated by MeshFusion.
| 3. | Right-click normals and click Clear. |
![]()
This clears the normal map from the selected area and it defaults to regular shading: