Mesh Paint
The Mesh Paint tool provides a method to directly apply one mesh layer onto the surface of another. For example, you can brush many copies of boulders across a landscape.
You can paint geometry, instances, and replicas and accurately place a single copy or apply hundreds of copies with a single stroke.
Mesh Paint Tools
• Mesh Paint - Paints a single copy of the background mesh item onto a surface. Each background item added to the surface of the target is added to the mesh item.
• Mesh Paint Instance - Paints instances of an item onto a surface. The first background item added to the surface of the target is added to the mesh item. Adding an additional item adds an instances to the target mesh until you change the source item.
• Mesh Paint Replica- Paints replicas of an item onto a surface. The first background item is added to the surface of the target mesh item and a point cloud and replicator are created. Adding additional source items are then added to the point cloud.
To activate the Mesh Paint tool:
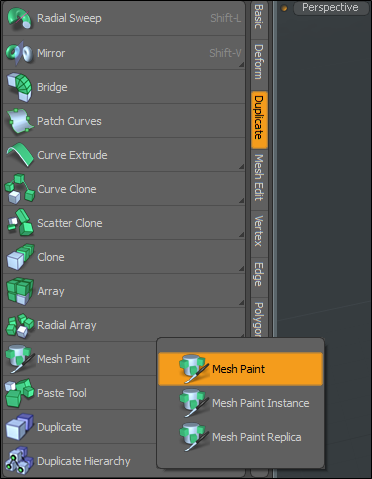
• On the left panel, open the Duplicate tab, click the down arrow on Mesh Paint, and select one of the Mesh Paint Tools.
• Alternatively, click Geometry > Duplicate > Mesh Paint.
Mesh Paint
There must be at least two Mesh Items in the Item List. The currently selected item is the target of the tool and the background (visible but unselected) item is the source item applied onto the target.
With this setup, you can drag across the selected Mesh Item and Modo applies the background mesh along the brush stroke.
Tip: You can use Snapping with Vertex and Polygon Center options enabled while applying the Mesh Paint Tool. The background item is snapped to the polygons or vertices of the target surface. For more information, see Applying Snapping.
In addition, you can use Symmetry while using the Mesh Paint tool to apply mirrored background items across a chosen axis. For more information, see Applying Precision .
Applying Mesh Paint
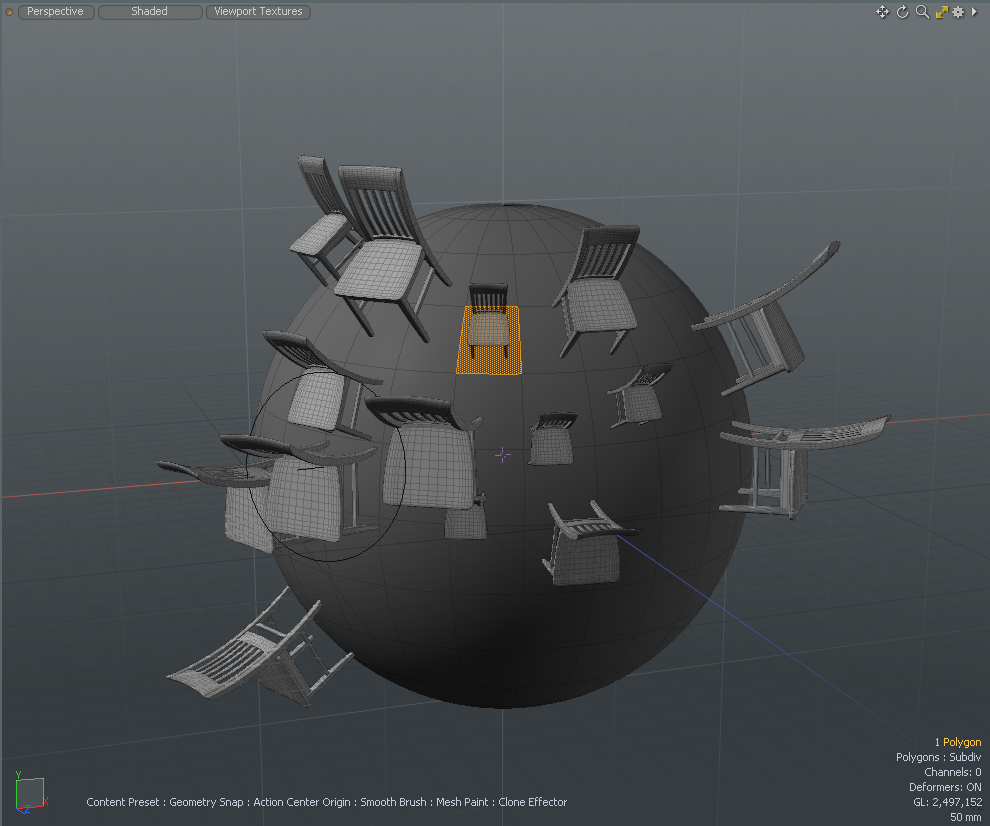
In this example you'll paste a chair model from our Preset Browser over the surface of a sphere.
| 1. | In Model layout, on the left panel, open the Basics tab, and Shift + click Sphere. |
The Sphere added to the scene an is selected in the Items tab on the right panel.
| 2. | Under the layout menu bar, click the Polygon selection mode |
| 3. | On the left panel, open the Duplicate tab and click Mesh Paint. |
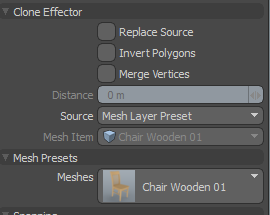
| 4. | Set Clone Effector > Source to Mesh Layer Preset. |
| 5. | Under the Mesh Presets properties, click and select Meshes > Interior > Chairs > Chair Wooden 01. |
For more information about navigating in the Preset Browser, see Browsing the Directory Tree.
| 6. | With Polygon selection mode active, click a polygon on the Sphere's surface. |
The chair is added to the surface of the chair.

| 7. | Right-click and drag over a target area on the Sphere's surface to change the brush size and then click again. |
Tip: You can also change the Smooth Brush > Size value in the toolbox properties and then click on the sphere's surface.
| 8. | Click and drag on the sphere's surface to position the next chair and repeat. |
Mesh Paint Options
|
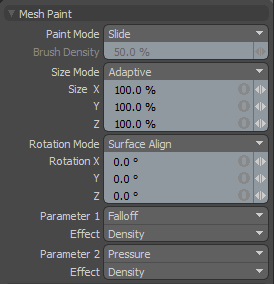
Paint Mode |
There are several modes that control how Modo applies the background Mesh Item(s) with each stroke.
• Slide - Drags a single item over the target surface and positions it where you release the mouse button. You can also press Ctrl before clicking to interactively set the scale of the duplicates.
• Strokes - Scatters multiple items along the brush stroke to clone many items across a surface with randomized placements.
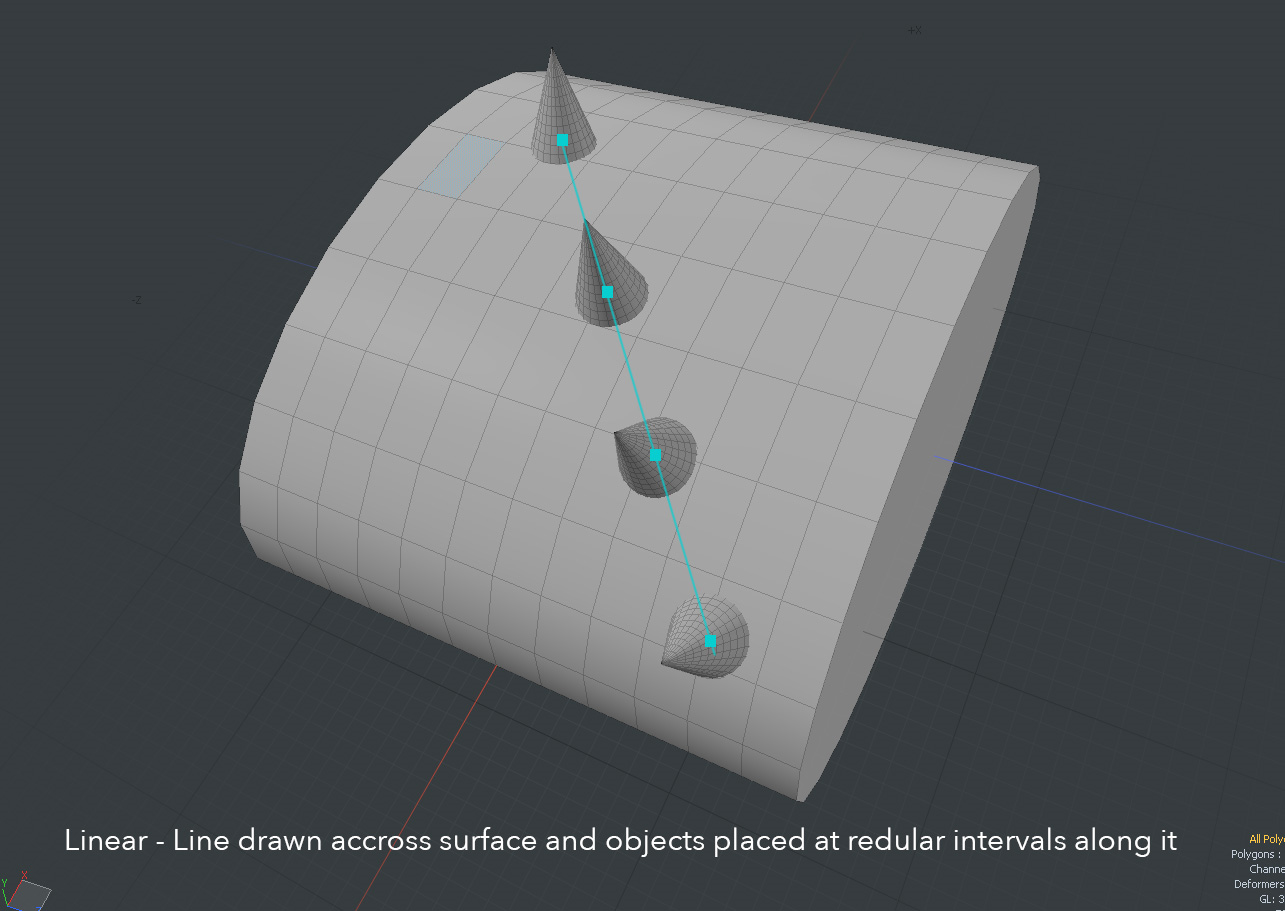
• Drop - Places a single item at the intersection of the pointer (when you click) and the target surface. You can drag to interactively scale and rotate the item. • Linear - Creates objects along a line. Click and drag to position. You can set the number of duplicates in the Linear Count option. The stroke is constrained the angle to 45 degree by holding the Shift key.
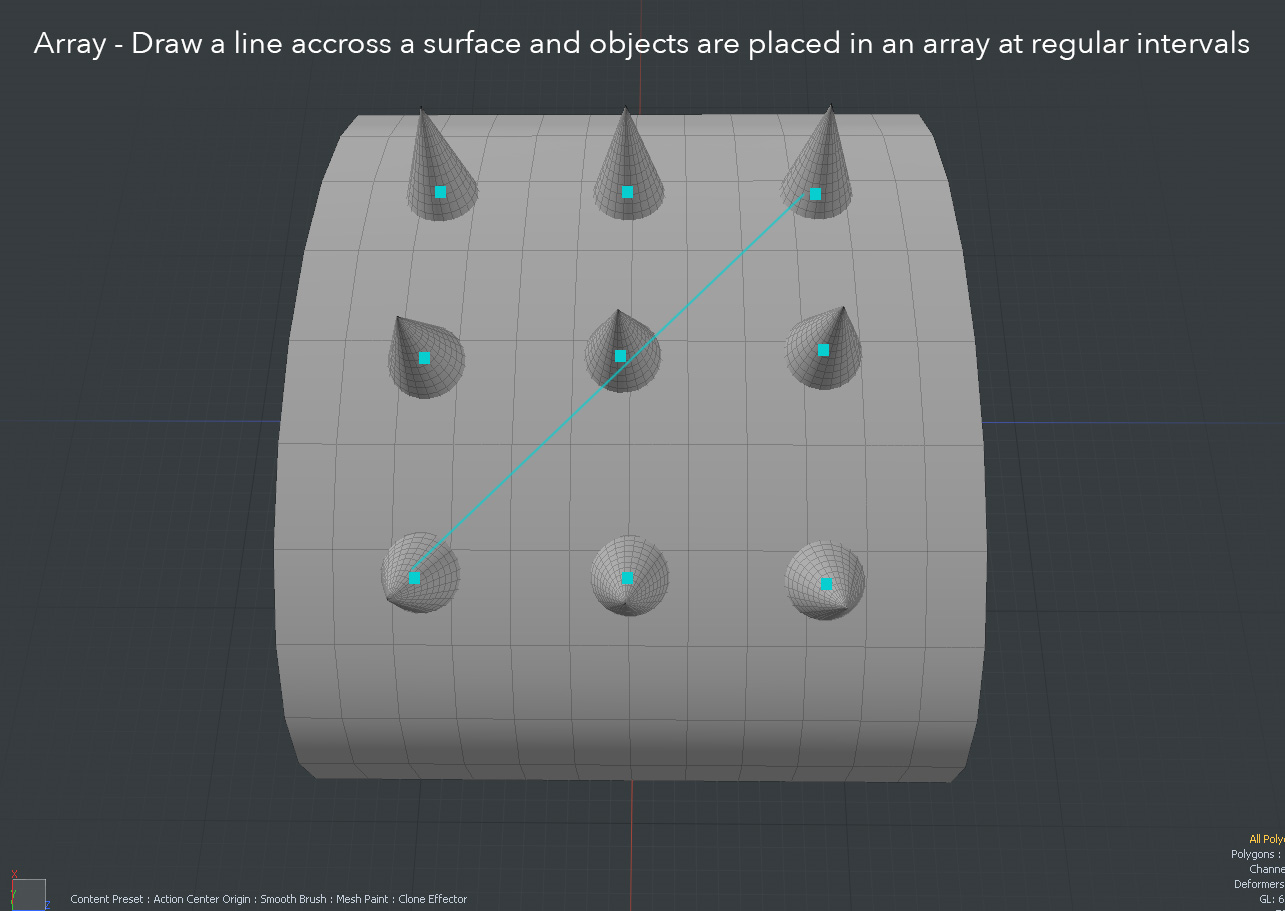
• Array - Creates objects at the grid points. Click and drag to position. Array Count X is the number of duplicates along X. Array Count Y is the number of duplicats along Y. The stroke width and height is constrained to square by holding the Shift key.
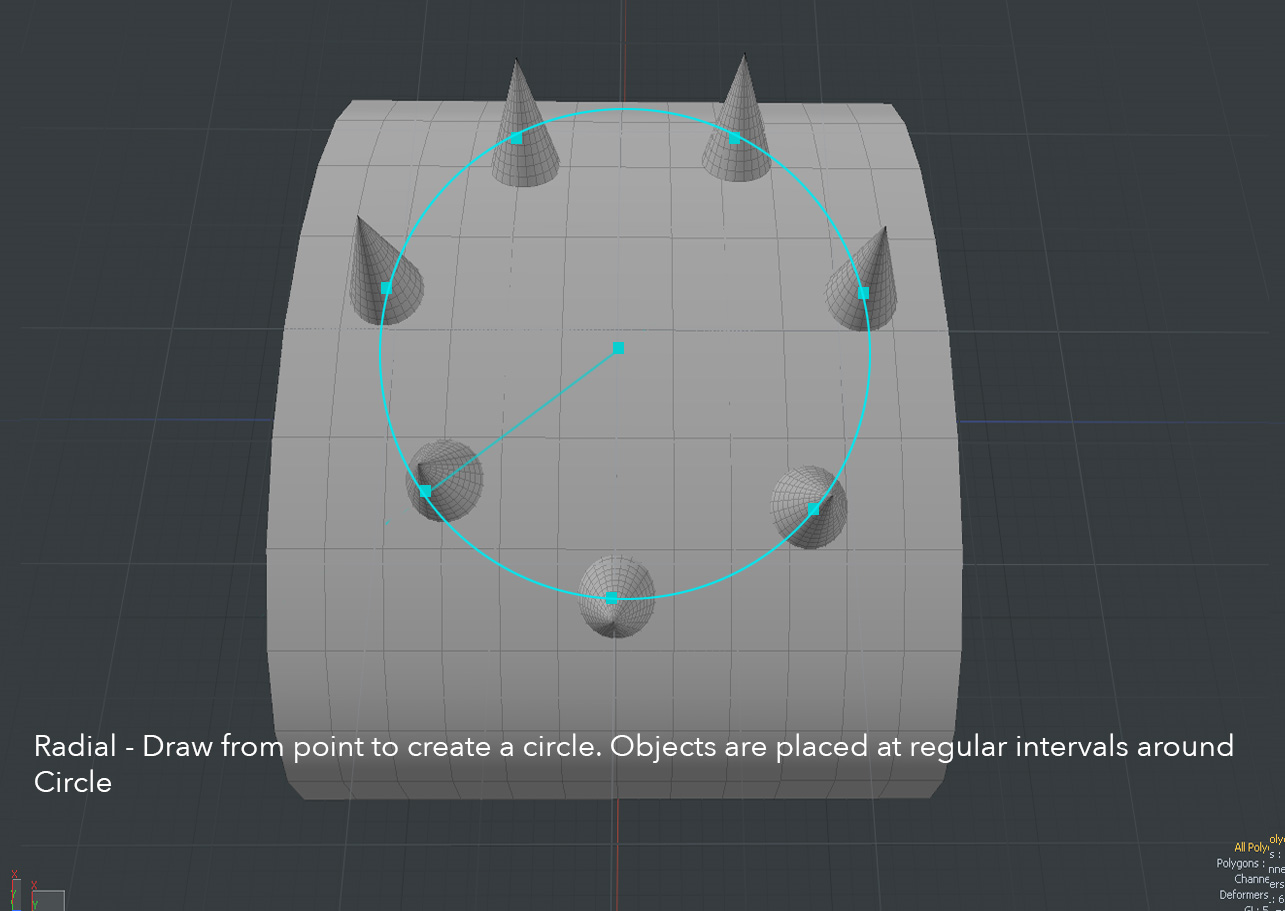
• Radial - Creates objects along the circle at the first click point. Click and drag to position. The radius of the circle is distance from the first click point and moving point. Radial Count is the number of duplication. The start of radial position is constrained the angle to 45 degree by holding the Shift key.
|
|
Size Mode |
Determines the scale of the mesh duplicates on the surface.
• Uniform - Retains the original size of the item when placed. You can adjust the scale with the X, Y, and Z values as a multiplier of the original size. (Modo ignores Item mode transforms on the source.)
• Adaptive - Adapts the size of the item to the brush size. You can adjust the scale with the X, Y, and Z values as a multiplier of the generated size. (Modo ignores Item mode transforms on the source.)
• Random - Scales each duplicate randomly as determined by the X, Y, and Z values. 0% provides no variation; larger values increase the amount of variation. • Adaptive + Random - Combines the properties of these Size modes to add randomness to the adaptive scaling of cloned duplicates. • Locked - Locks the size of the placed mesh at the current size. You can then zoom the viewport without the brush being resized. |
|
Size X, Y, Z |
Changes the X, Y, and Z dimensions of the geometry on the target surface. |
|
Rotation Mode |
Determines the orientation of the placed mesh duplicates onto the surface.
• Uniform - Retains the original orientation of the item when placed. You can adjust the rotation with the X, Y, and Z values as an offset of the original rotation. (Modo ignores Item mode transforms on the source.)
• Surface Align - Aligns the target surface's normal facing direction with the up (Y+) direction of the cloned item.
• Random - Rotates each duplicate randomly as determined by the X, Y, and Z values. 0° provides no variation; larger values increase the amount of variation.
• Surface Align + Random - Aligns the item's up direction to the target surface's normal facing direction and then randomizes it away from that as determined by the X, Y, and Z values.
• Surface Align + Tablet - Aligns the item's up direction to the target surface's normal facing direction. You can then rotate items based on the stylus' orientation to the tablet's surface. (This requires a pen tablet with orientation support.)
• Surface Align + Tablet (no Pitch) - Ignores Pitch rotation (the Z axis), but otherwise is the same as Surface Align+Tablet.
• Screen Align + Tablet - Considers the orientation of the view on screen. You can then rotate items based on the stylus' orientation to the tablet's surface (This requires a pen tablet with orientation support.)
• Screen Align + Tablet (no Pitch) - Ignores Pitch rotation (the Z axis), but otherwise is the same as Screen Align+Tablet. |
| Rotation X, Y, Z | Changes the rotation position of the geometry painted on the surface. The default is 0 degrees for X, Y, and Z. |
|
Parameter 1/Parameter 2 |
Provides additional controls over the duplicated geometry by using a number of criteria. The parameters are the controlling factors; the effects of each determine what the relevant parameter controls. • Falloff - Uses a falloff.
• Pressure - Uses the strength of the stylus' pressure against tablet.
• Slope - Uses the slope (angle) of the target surface.
• Altitude - Uses the altitude (height) of the target surface.
• 1.0 - Slope - Inverts the Slope parameter.
• 1.0 - Altitude - Inverts the Altitude parameter. |
|
Effect |
Determines the aspect controlled by Parameter 1 or Parameter 2.
• (none) - Affects nothing. This disables the Parameter 1/2.
• Density - Controls the number of duplicates.
• Size - Controls the scale of the duplicates.
• Rotation - Controls the orientation of the duplicates.
• Size + Density - Applies simultaneously both the Size and Density attributes. |
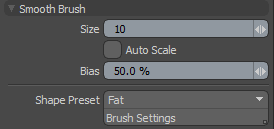
Smooth Brush
This is one of the standard brushes used in Modo for painting and sculpting. See Smooth tool for details.
|
Size |
Controls the area across which Modo scatters the duplicates and their initial density when placing elements with the Strokes mode. Larger brushes (in relation to the surface) spread duplicates across a larger area. When the Size mode is set to Adaptive, the size of the brush also affects the size of the duplicated geometry. |
|
Auto Scale |
Automatically resizes the brush based on the zoom level. |
| Bias | Changes the curve adjustment to favor one side over another. |
|
Shape Preset |
Provides preset brush shapes to control the initial density of the duplicates. |
Clone Effector

| Replace Source | Replaces the source with a duplicate shape. |
| Invert Polygons | Reverses the normals of polygons |
| Merge Vertices | Measures the distance between vertices in the currently selected geometry to see if any fall within a specific distance threshold to one another and then merges them. |
| Distance | Specifies the distance to merge vertices. |
|
Source |
Determines the source mesh that Modo clones into the array. • Active Mesh - Uses the currently selected item(s) as a clone source.
• Specific Mesh- Specifies a mesh item as the clone source based on the Mesh Item information.
• All BG - Combines all the currently visible background items and clones them as a single mesh.
• Random BG - Selects a random background item from all the currently visible background items at each clone position.
• Mesh Layer Preset - Clones a mesh preset selected in the Preset Browser. Click Mesh Item and select a mesh preset. • Random Preset - Uses the current selected preset at random. |
|
Specifies the mesh to be cloned. This is only relevant if you set Source to Specific Item. |
Mesh Presets
|
Meshes |
Opens the Preset Browser, where you can select a mesh preset to use as the Source. For more information, see Preset Browser. |
Mesh Paint Instance
The Mesh Paint Instance tool provides a method to directly apply a mesh instance onto the surface of a mesh layer. To activate the tool, open the Duplicate tab on the left panel, right-click the Mesh Paint tool and select Mesh Paint Instance from the list.
For more information, see Instances.
Mesh Paint Instance Options
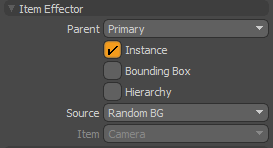
In addition to the Mesh Paint and Smooth Brush properties described above, the following properties are available in the Item Effector section for the Mesh Paint Instance tool.
|
Parent |
Determines how Modo treats instanced items in the Item List.
• Off - Clones source item as additional instanced layers in the Item List.
• Hierarchy - Creates a cascading array where each subsequent clone is a child of the previous clone.
• Root - Creates instances as child items of the source mesh.
• Primary - Creates Instances as children of a group locator that is parented to the source mesh. |
|
Instance |
When enabled, each cloned item is an instance of the source mesh. Instances contain no physical geometry, but they reference a source layer and are represented in 3D Viewport by pink wireframes. This is enabled by default. |
|
Bounding Box |
When enabled, the resulting instances display as bounding boxes rather than wireframe meshes. This may provide a 3D viewport performance increase when Modo generates many instances. |
|
Hierarchy |
When enabled, clones any child items of the source geometry and retains their hierarchy through each subsequent clone. |
|
Source |
Determines the source mesh that Modo clones into the array. • Active Items - Uses the currently selected item(s) as a clone source.
• Specific Item - Specifies a Mesh Item as the clone source based on the Mesh Item information.
• All BG - Combines all the currently visible background items and clones them as a single mesh.
• Random BG - Selects a random background item from all the currently visible background items at each clone position.
• Mesh Layer Preset - Clones a mesh preset selected in the Preset Browser. Click Mesh Item and select a mesh preset. |
|
Item |
Specifies the item to be cloned. This is only relevant if you set Source to Specific Item. |
Mesh Paint Replica
The Mesh Paint Replica tool provides a method to directly apply a mesh replica onto the surface of a mesh layer. To activate the tool, open the Duplicate tab on the left panel, right-click the Mesh Paint tool and select Mesh Paint Replica from the list.
For more information, see Replicator Item.
Mesh Paint Replica Options
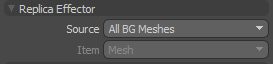
In addition to the Mesh Paint and Smooth Brush properties described above, the following properties are available in Replica Effector section for the Mesh Paint Replica tool.
For more information, see Replicators.
|
Source |
Determines the source mesh that Modo clones into the array.
• Active Item - Use the currently selected geometry as the clone source.
• Specific Item - Specifies a Mesh Item as the clone source based on the Mesh Item information.
• All BG Meshes - Combines all the currently visible background items and clones them as a single mesh.
• Mesh Layer Preset - Clones a profile shape selected in the Preset Browser. Click Mesh Item and select a mesh preset. |
|
Item |
Specifies the item to be cloned. This is only relevant if you set Source to Specific Item. |