Spacing Chart
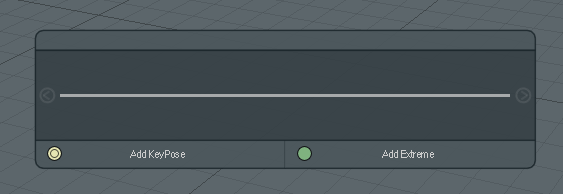
The Spacing Chart aids animators in a workflow popularized by traditional hand-drawn animation by concentrating on the poses of the character and treating a keyframe position like a single drawing in an animated sequence. With the Spacing Chart, you can define specific key poses for a character before working out the timing. Once the poses are set, then you can modify the timing independently.
The following worflow is based on the approach used by Keith Lango (see References below) where the timing of the animation is done after the creation of all the key poses, demonstrating the use of the Spacing Chart interface. This shouldn't be considered the only way of working with this interface though, the animation can be timed out at any point, the use of breakdowns and inbetweens is just as valid whenever the timing is done.
Setup
You need to set up a few things before starting:
| 1. | Create an Actor for all the items being animated. |
| 2. | Create an Action for the animation. |
| 3. | Set the Action Interpolation to Stepped or Linear in the Action pop-up form. |
| 4. | Make sure that all the channels you intend to animated have a keyframe at the start frame. |
For more information on creating actors and actions, see Creating Actors, Actions, and Poses.
Usage
You open the Spacing Chart interface (HUD) by clicking the button at the top-left toolbar area in the Animation layout.
The Spacing Chart UI opens within the 3D viewport where you can reposition it by dragging the header bar area of the UI.
KeyPoses
First, create the KeyPoses for the animation. These are also referred to as golden poses, story-telling drawings, or simply keys. These are the poses that tell the story in that they are the specific poses that have to be there to show what's happening in the animation — not necessarily how the character moves or changes unless it's important to the story.
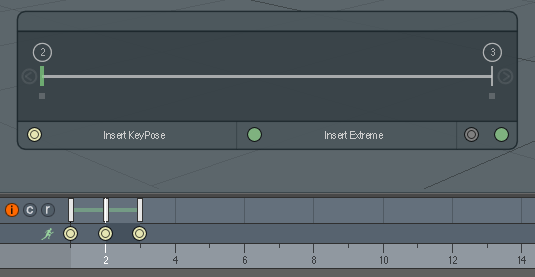
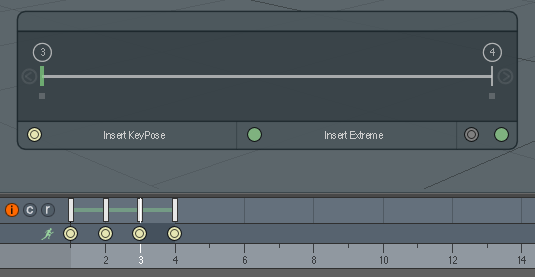
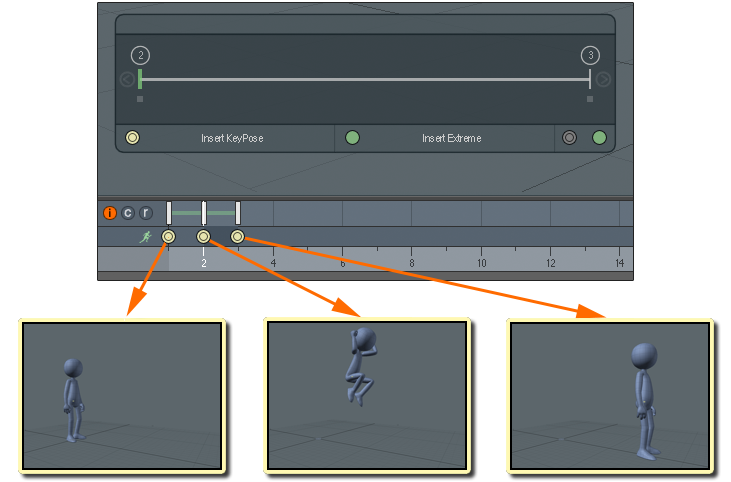
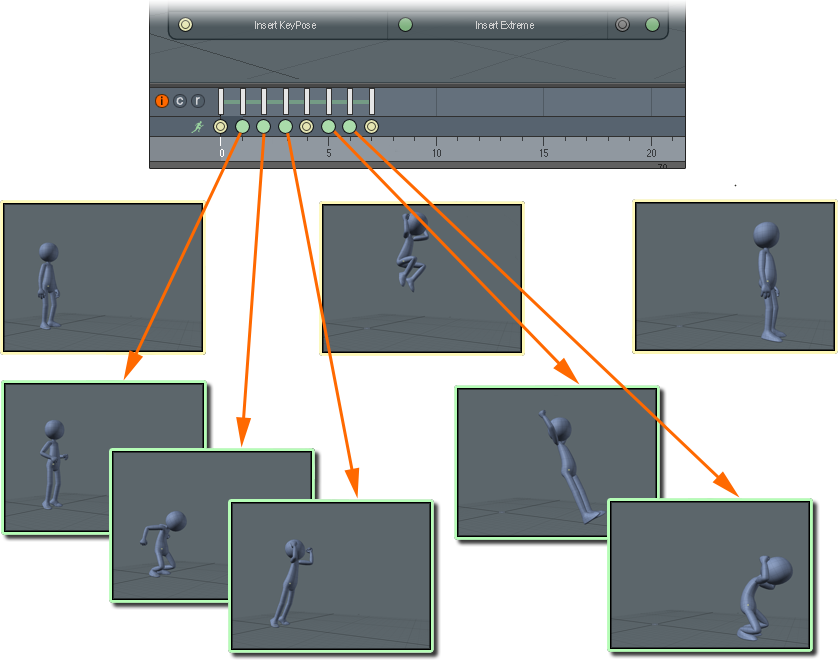
Clicking the Add KeyPose button in the HUD adds a KeyPose time marker to the active action and keyframes all the animated channels in the actor. For easy reference, Modo indicates a KeyPose in the Timeline as a yellow double-circle. Next, pose the character in its starting position. Once you create the first KeyPose, move to the next frame of the Timeline. Click Add KeyPose again and pose the character as needed for this frame. Repeat this process as many times as necessary until you have added all the story-telling poses. A good way to determine whether you have all the poses you need at this point is to slowly step through each pose. You should be able to tell what's happening in the animation from these poses.
If you decide to insert an additional KeyPose to the Timeline, go to the frame (or pose) where you'd like to add it. After you've added a KeyPose, Modo shows the Insert KeyPose button. Click this button and Modo inserts a new frame after the current frame and moves all subsequent poses along to make room. Modo adds a KeyPose time marker, keyframes the action, and sets the current time to that of the new frame for the new pose.
A complete series of key poses for a jump might look something like this example.
Extremes
After you have added all the story-telling poses, you next add Extremes. These poses show how the character moves between the KeyPoses, and you add them for contact positions (for example, heel contact poses in a walk or when the character changes direction). You insert these between the KeyPoses by setting the current time to the start frame of the pair of KeyPoses between which you add the Extremes by clicking Insert Extreme.
As with inserting a KeyPose, Modo inserts a new frame and keyframes the action. Also, Modo adds an Extreme time marker to the action. The indicators for Extremes are different icons to distinguish them from the KeyPoses. Add as many Extremes as needed to define the animation between the KeyPoses.
If you add an Extreme and decide it's important enough that it should be converted to a KeyPose or you decide that an existing KeyPose is really an Extreme, you can convert between the two types by using the buttons at the bottom-right area of the toolbar. When showing an Extreme frame, Modo shows the KeyPose button and vice-versa for a KeyPose frame. To convert the current frame, click the available button.
Animation Spacing Charts
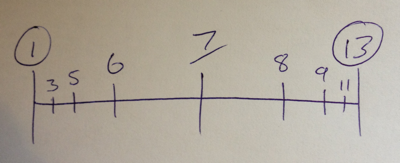
Traditional animators who did hand-drawn animations relied on the Animation Spacing Chart. Animators developed this tool to increase the amount of animation they could produce. Instead of creating every drawing in the animation, the animator would only draw the key ones (KeyPoses and Extremes) and one or two breakdowns, which were enough to define the motion. Then, for each pair of key drawings, the animator would create a Spacing Chart that defined where and in what order the in-betweens should be added. An assistant would then take these drawings and, following the Spacing Chart, create the in-betweens: drawings half-way between each of the drawings in the chart and in the order specified.
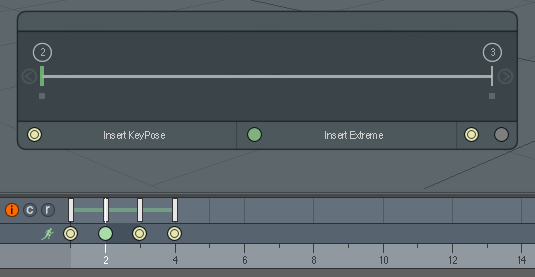
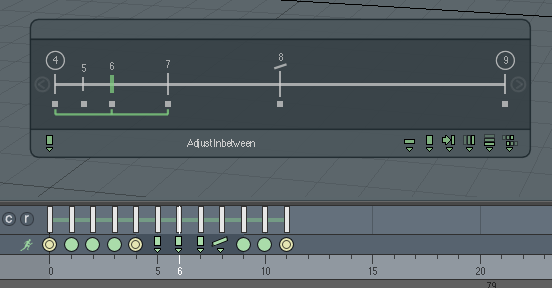
Modo follows the same principles. It displays a Spacing Chart for each pair of KeyPoses with frame numbers shown circled at either end of the chart. The Primary breakdown shows with its frame number underlined as is traditionally found on these charts. In-betweens appear as lines of decreasing length with their frame number. The length of the lines indicate the order of creation with longer lines first. With the Spacing Chart, you can read how the motion between the key drawings flows. The shorter the gap between the markers, the slower the movement is. Large gaps indicate fast movement.
Clicking an in-between or breakdown marker in the chart sets the current time to that frame, and Modo draws a green chart marker. In the example, the current frame is frame 6. The green brackets shown under the markers indicate which pair of drawings (or poses) were used to create the breakdown or in-between. The frames between the pair of key poses show under the chart markers as small squares: solid for the defined breakdowns and in-betweens and dimmer for those that Modo automatically creates. Use the arrows at either end of the chart to navigate between each chart in your animation.
Breakdowns
Breakdowns (or passing positions) are important poses that define how a character moves between key poses. It provides the interest for the movement and is the basis for defining the arcs and delays used throughout.
Creating a Breakdown
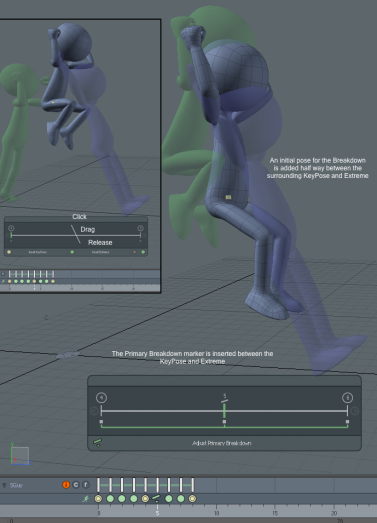
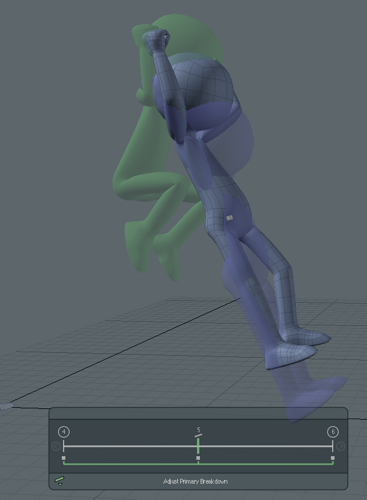
You create breakdowns by drawing in the Spacing Chart area of the HUD. Click anywhere above the central line and drag down to release the mouse button below the line. Modo inserts a new frame, keys the actor, adds a Breakdown marker to the Timeline, and sets an initial pose half-way between the surrounding poses.
Note: If you have spaced the KeyPoses and Extremes out already so that there are empty frames between them, then the button becomes the Add Primary Breakdown button. Clicking this button creates the pose at the current time without shifting the following poses forward. Similarly if you draw the breakdown on the Spacing Chart, Modo does not shift the following poses but sets a frame half-way between (or as close to half-way as possible) and adds the breakdown pose there.
As can be seen in the example, Modo creates a mathematically correct in-between pose (which is good most of the time), but this pose has no personality or feeling because it's just a linear blend between the two poses. For an animator, it is a useful starting point for creating a more interesting pose.
Editing a Breakdown
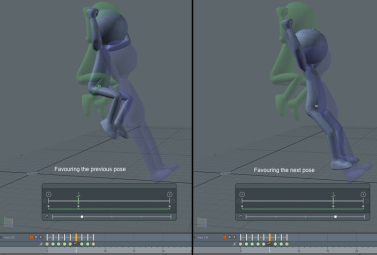
With the Breakdown & Spacing HUD you can interactively favor a pose for the entire character or just the currently selected items belonging to the actor. You favor a pose by specifying whether it's closer to the previous or next pose. Traditionally, you indicate this on an animation Spacing Chart by drawing the marker closer to the previous or next pose on the chart rather than half-way between.
With Modo, you favor a pose by dragging its marker in the Spacing Chart. (You can also click the Adjust Primary Breakdown button.) The marker in the Spacing Chart slides to the left or right to indicate how the pose is favored. If you do not select any items, then Modo uses the entire pose. You can limit the in-between process to specific items by selecting them first. If you select items, the position of the marker on the Spacing Chart is not affected.
Of course, you can make adjustments to the pose in any way (for example, by using the Transform tools or the Pose tool). The favoring helps to define the initial pose broadly before fine-tuning it. If you make adjustments to items by favoring selected items or manually by using the Transform tools, you can still use favoring on the entire character, and Modo takes into account any adjustments you have made.
Creating In-betweens
Traditionally, assistant animators draw in-betweens from the Spacing Charts created for each pair of key drawings. The drawings they create are straightforward half-way poses between the animator's key drawings and are drawn in the order indicated on the chart. In this context, Modo is your assistant, and it needs to be told specifically what to do. Modo achieves this in the same way as the assistant animators did — by defining the in-betweens in the required order.
You create in-betweens in the same way as you create breakdowns — by drawing a stroke in the HUD on either side of the Primary breakdown or between existing in-betweens. Modo automatically inserts a new frame, keys the actor, and defines a half-way pose.
Editing an Inbetween
Modo usually does a decent job of creating the half-way poses, but you may need to edit the in-between pose, itself, either for correcting Modo's interpretation (which can happen when interpolating the existing poses) or when the motion needs to be further refined. (For example, you may need to add a secondary breakdown.)
Editing in-betweens is similar to editing breakdowns. The green brackets under the chart markers indicate which frames the in-between was created from. These are the pair of poses that Modo uses to interpolate from as it adjusts for the favoring slider's position or if you dragged the in-between in the chart. This is different from the Inbetween tool that always interpolates between the previous and next keys.
There are several time marker shapes that you can specify for in-betweens that can indicate its purpose. For example, if you've created an in-between and edited it to act as a secondary breakdown or to act as the start of a moving hold, you can change the marker shape by using the icons to the right of the button area. These are purely graphical representations. Changing the time marker's shape has no effect on how the in-between functions. It just serves as a reminder about the purpose of the in-between and as an identifier to make it easier to find a specific in-between.
Timing
The previous information concentrates on collecting the poses (or drawings) for the animation. Depending on how many poses you have, the timing can be done quickly because you've defined the sequence in advance. To start, set the action's Interpolation to Linear and generate a GL Preview. Make notes of where time needs to added and use the Time Edit buttons on the Animation toolbar to insert and remove frames as needed. Repeat this until you're happy with the timing. When you click the button, Modo inserts or removes one frame at the current time and shifts subsequent keyframes as needed.
If your scene is simple enough to play back the animation in real time, you can make timing adjustments while the scene plays. To do this, click the Play button and middle-click to set a keytime along the Timeline. This defines where to insert or remove frames and Modo shows a green line in the Timeline. By using the Time Edit buttons, you can then insert or remove frames while you watch the animation play.
To make edits to various parts of the character in the frames that you've added for the timing, use the standard keyframing tools. Because all the main poses have time markers associated with them, you can identify where the adjustment edits occurred. You can adjust the timing earlier than described in this topic. Some animators prefer to roughly time an animation out after the breakdown stage and insert in-betweens afterwards.
Cleanup
Once you time the animation and adjust the keyframes as needed, you can do the final clean-up process. Now, you set the action's Interpolation to Curve and, starting with the root of the character, look at the curves in the Graph Editor and check for any anomalies. Because the data points are defined by the poses, you should only need to make small adjustments.
Watch the animation in the 3D view because if you consider making any changes based on the Graph Editor, the anomalies may there for a reason. It doesn't matter how the curves look because no one else sees them. What matters is how the animation plays in the viewport or through the camera. Work outwards from the root along the spine before moving onto the extremities such as the arms and legs.
Deleting Markers/Poses
To preserve the relationship of breakdowns and in-betweens to each other, you must delete them in a specific order: from the lowest level in-between upwards. For example, you cannot delete the Primary breakdown if it has in-betweens derived from it. To determine this relationship, select a marker in the Spacing Chart. If the green brackets enclose other markers (excluding the extents), then you delete those other markers first. You can select range of markers (in any order) and have Modo delete them all in the right order. If it cannot delete any, Modo displays a warning dialog.
Time Markers
The time markers used by the Spacing Chart are different from the normal Time Markers.
• Selecting a marker also selects keyframes at the same time as the marker.
• Deleting a marker also deletes selected keyframes that are at the same time as the marker.
• Dragging a marker also moves its associated keyframes.
• Markers cannot be moved past surrounding markers of this type.
• Only one Primary Breakdown marker can be made between each pair of KeyPoses/Extremes.
References
In his book The Animator's Survival Kit (particularly Advancing Backwards to 1940 ), Richard Williams advocates adjusting the timing of the animation after creating all the key poses. Keith Lango's VTS tutorials explain this in great detail as well and really emphasize the benefits. Eric Goldberg's Character Animation Crash Course! has great descriptions and examples of charts, key drawings, breakdowns, and so forth. Also, look at Jason Ryan's tutorials. He does most of his work in 2D before animating in 3D, but the principles are just as valid — more so because this process comes from traditional 2D animation workflows in the first place.

