Building Plug-ins
The easiest way to see how to setup the project files is to start with the sample plugins. There are both Xcode and Visual Studio projects included.
How do I create a new XCode project for a modo plugin?
Firstly, you don’t want to be creating a bundle, you want to create a C/C++ Library, set the type to Dynamic.
Then add a new target to the project, of the same type, but this one is a static library. Add the .cpp files in the SDK common directory to this target and set the header search path to look in the SDK header directory.
Then select your plugin target and go to build phases, add the SDK target as a target dependency. Also add the SDK target under Link Binary with libraries.
That should be everything you need to do.
Important Notes for Building on Xcode
It is crucial that plugins for OS X are compiled without exposing private symbols in order to avoid conflicts with other plugins, and also to support the same OS versions that modo supports.
In the Project Build settings enable the “Symbols Hidden by Default” checkbox.
In the Project Deployment settings, make sure the Mac OS X Deployment Target is set to Mac OS X 10.6
Coalescing across dylibs
In C++, if you instantiate a template with the same arguments in more than one file, these instantiations refer to the same thing. For example, if you take the address of function f<int> in two different files, you get the same address. A more useful example involves class templates with static member variables: given
1 2 3 4 | template <typename T>>
struct X {
static T x;
};
|
there should only be one copy of X<int>::x in the entire program (Modo and plugins), so if there is an assignment statement X<int>::x = 17 in one file you should see the new value when you examine X<int>::x in a different file.
This is the default behavior in clang and gcc UNLESS you specify “-fvisibility=hidden” in the linking flags. ‘’’All plugins built for modo should have this flag set in link line flags’’’
How do I create a new Visual Studio project for a modo plugin?
VS Express 2010
These instructions are based on Visual Studio Express 2010 running on Windows XP 32-bit. For 64-bit the relevant project type will need to be chosen, but otherwise all steps will be equivalent. Much like the XCode instructions above, the basic idea is to create a static library project for the common.lib and set that as a dependency for your main plugin project. Let’s see how this works in practice.
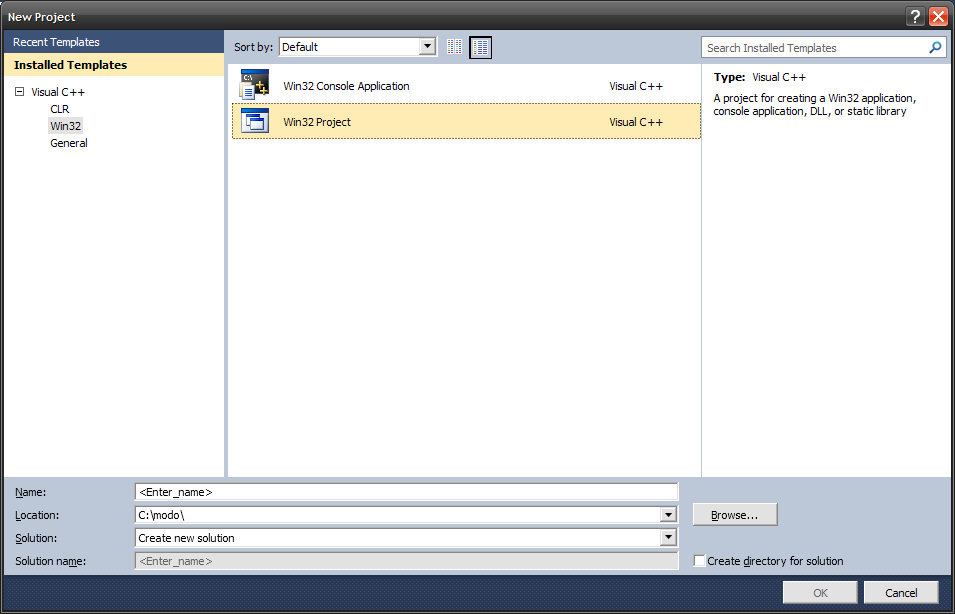
modo plugins are regular DLL files, easily created using the standard ‘new project’ wizard. You can create the plugin project before or after the common project.
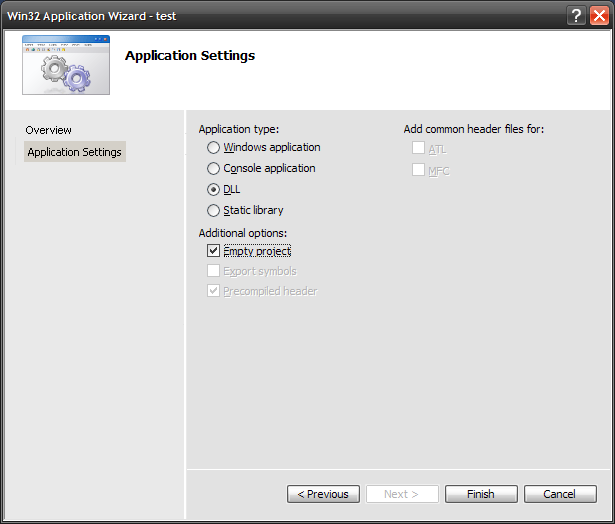
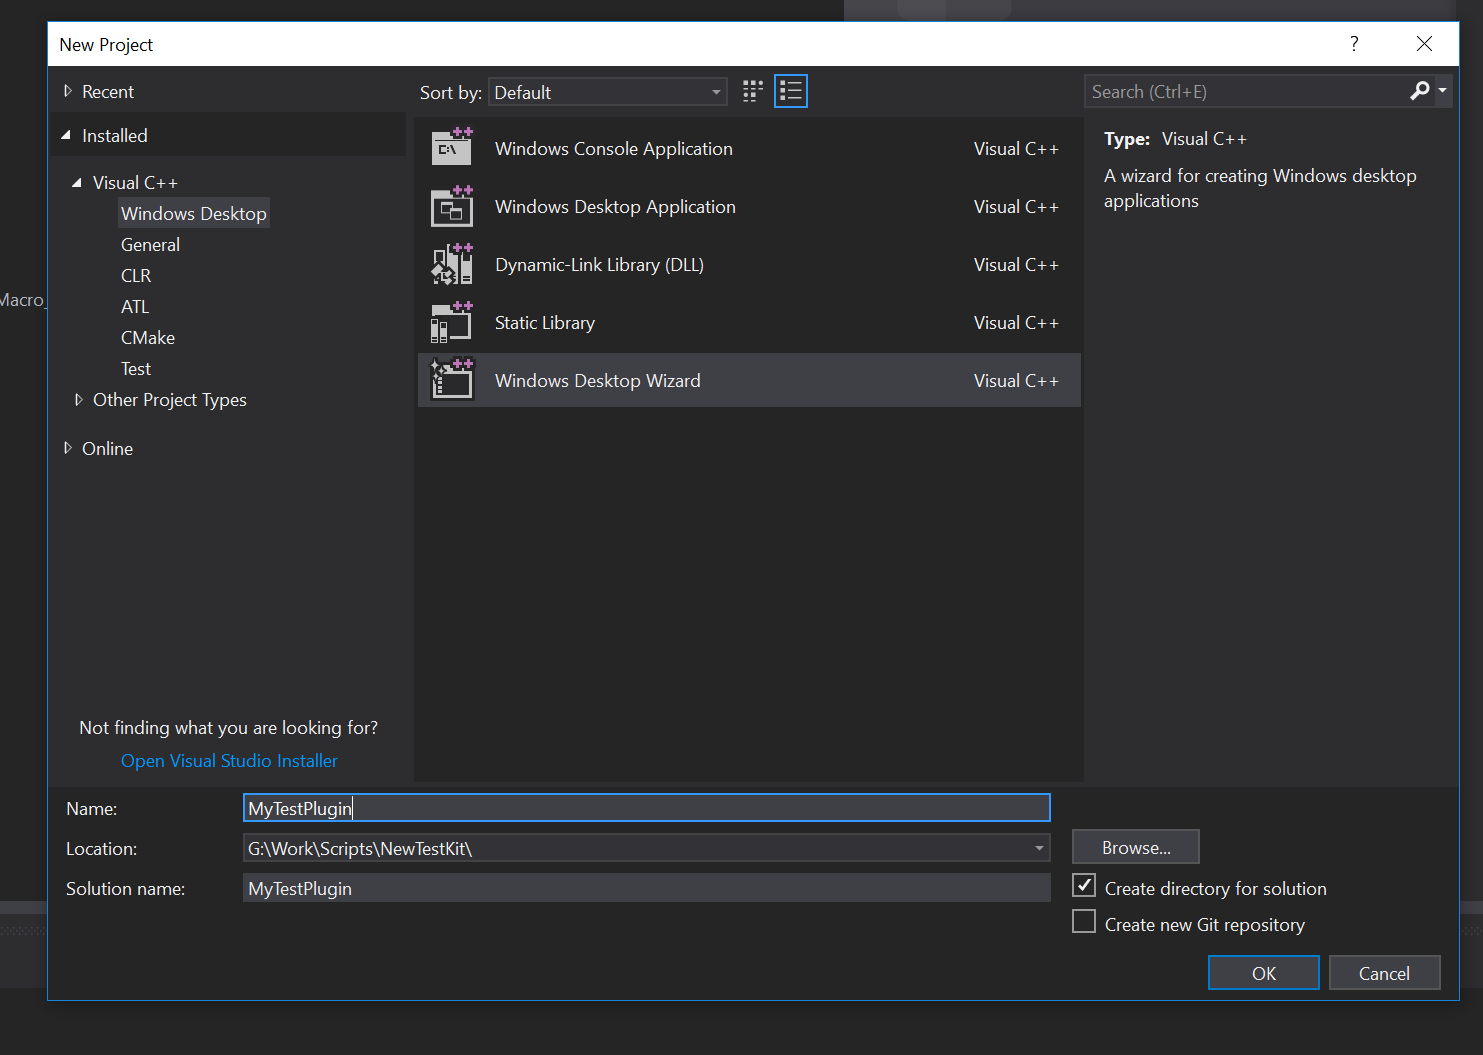
Start the new project wizard. Find the template for a new DLL, and create a blank project. The project should have the name of the plugin that you want to create (e.g. test for test.dll).
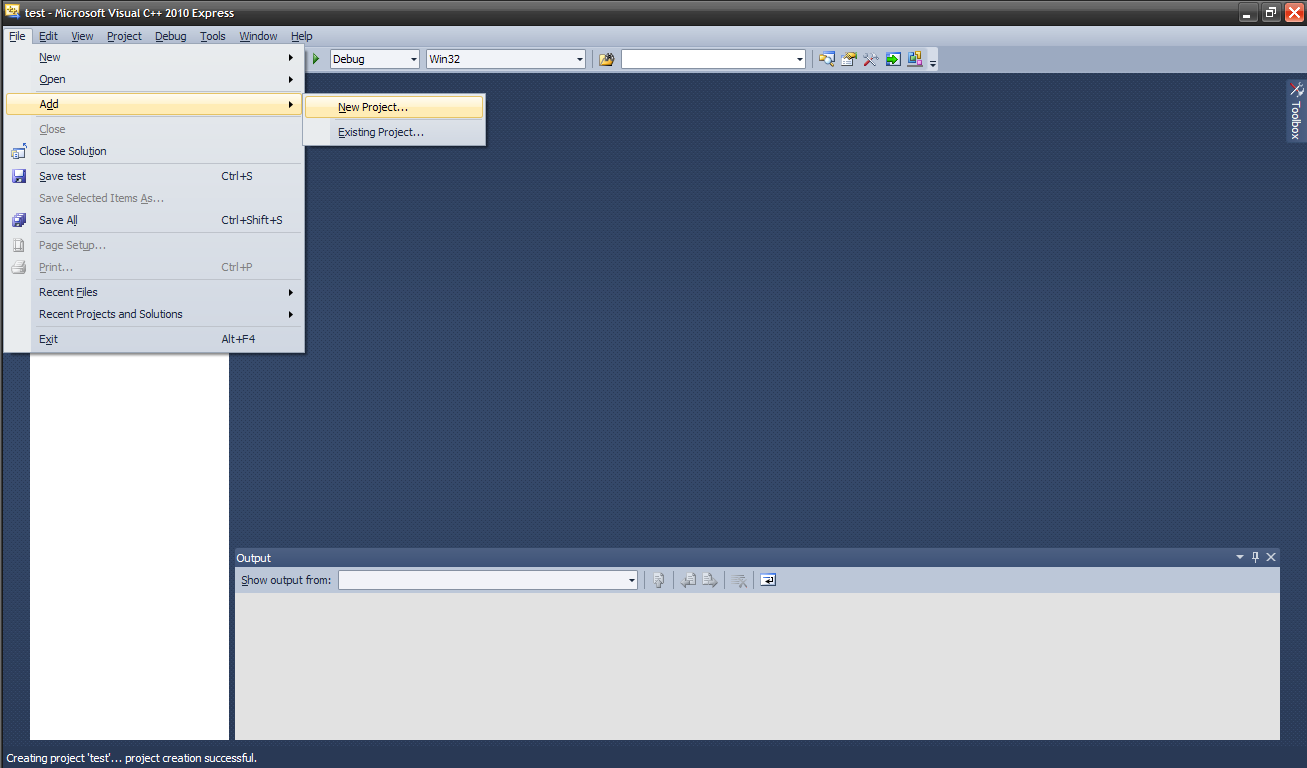
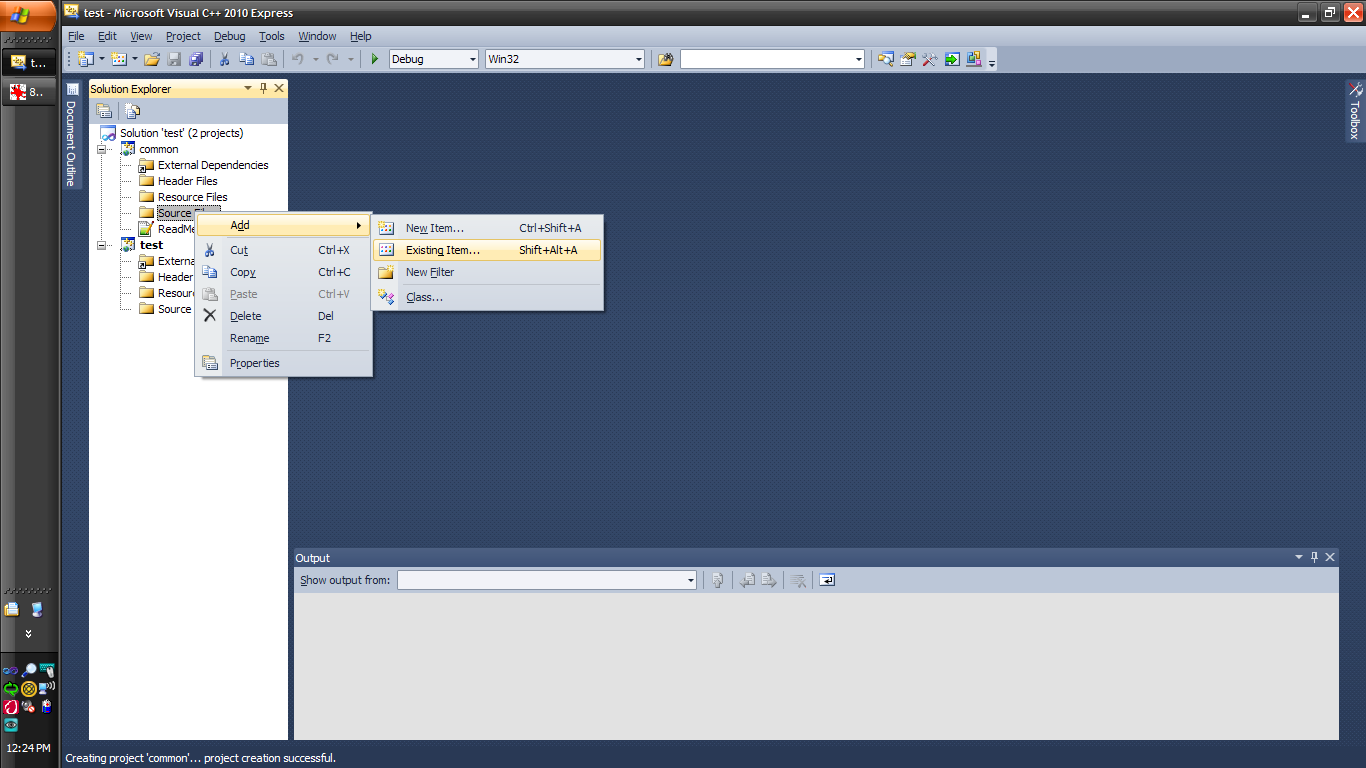
Now, let’s get the common static library sorted out. If you already have a other modo plugin source code around, you’ll likely have a common project in place. You can add it to this new project easily by simplying adding the common project as shown below :

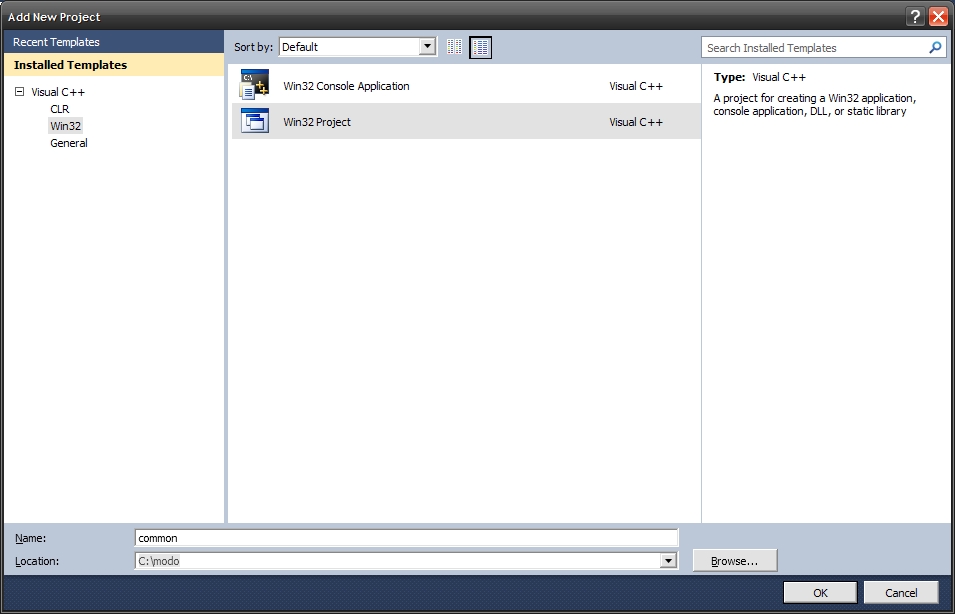
Otherwise, let’s create a new common project. This is done easily :
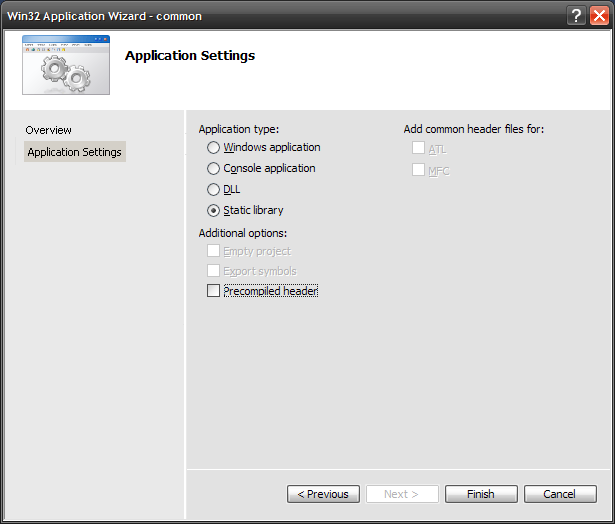
Just as before, choose the relevant project type
However, instead of choosing ‘DLL’, you need to choose the static library option. I also deselected precompiled header, but that may not be required :
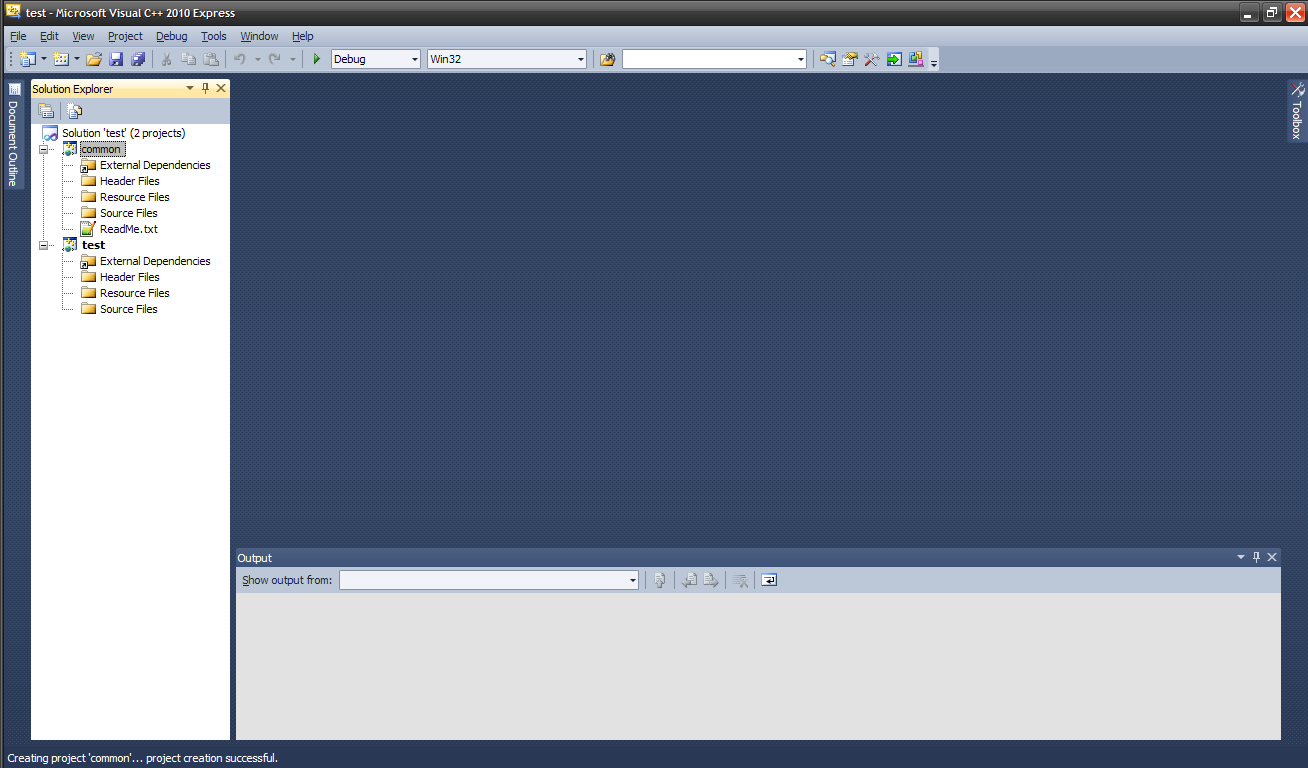
At this point, you’ll now have a single solution with two projects - the plugin and the common project.
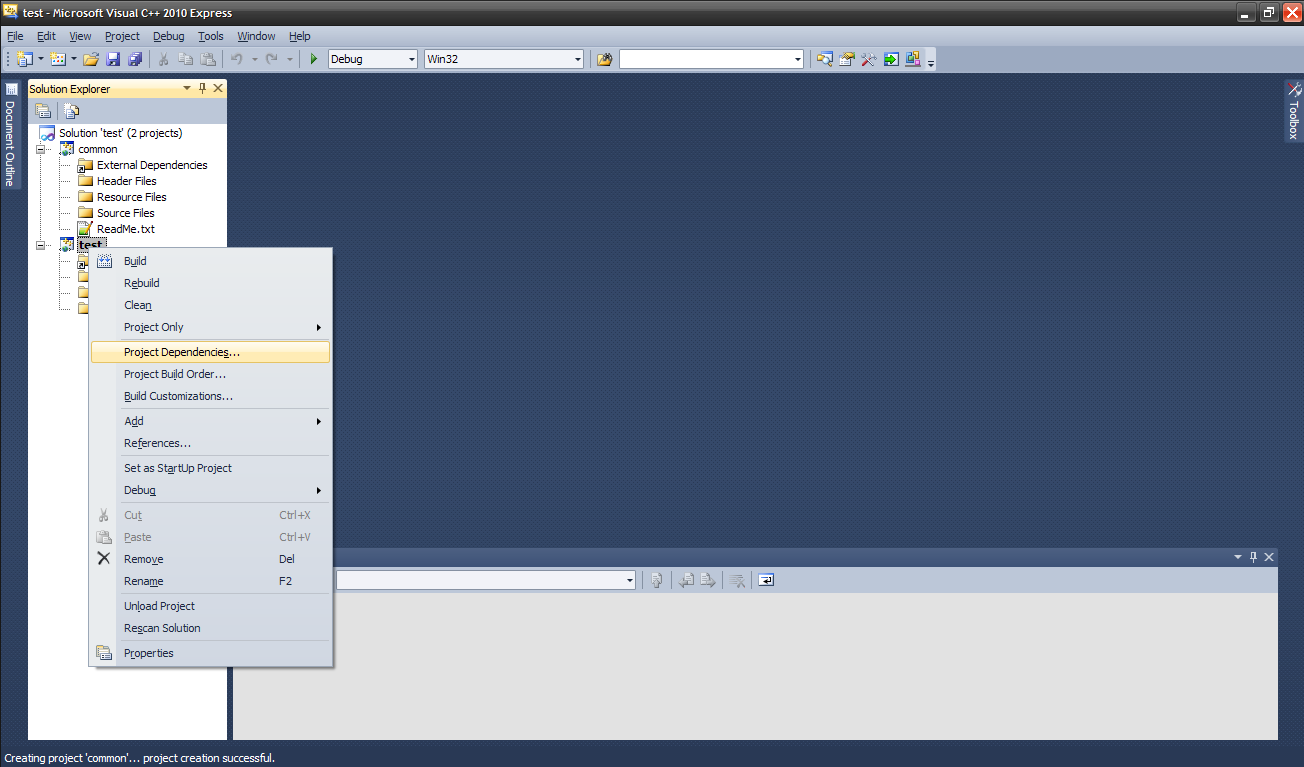
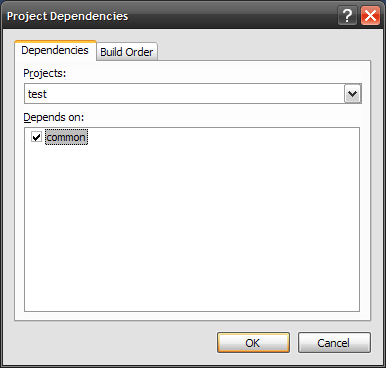
We now need to ensure that the common library is built before the plugin, by making the plugin project dependent on the common library. You do this through the project dependencies menu for the plugin project.
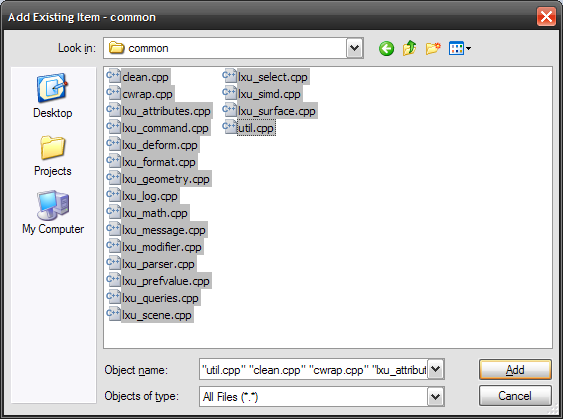
Now we need to add the source files to the common project. These are all included in the ‘common’ folder within modo’s SDK. These files are easily added to the common project.
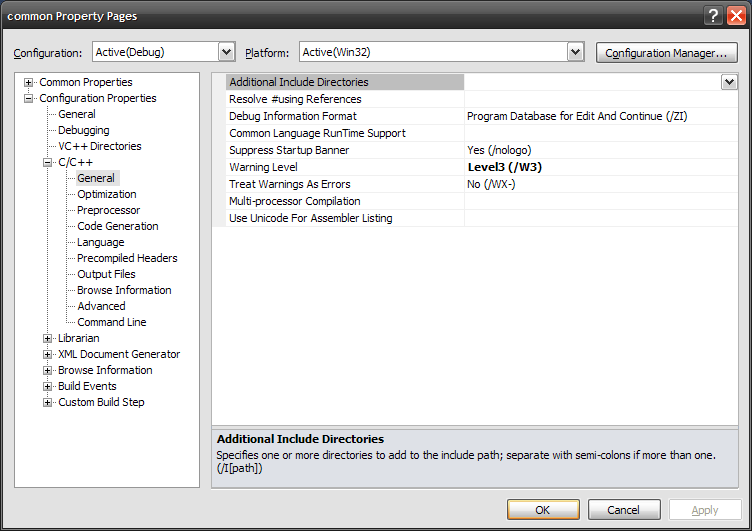
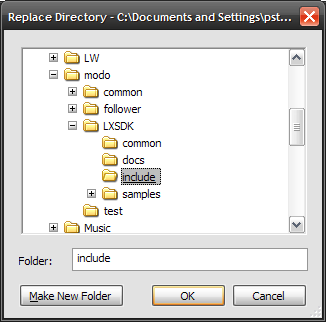
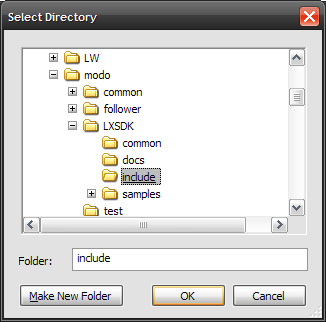
In order for the common library to build, we also need to make sure it can find the SDK itself. To do this, we need to add modo SDK’s include folder to the project. This is achieved with the following steps. Note that the images below are for the default debug build configuration. You’ll need to take these steps to get the release build configuration working as well.
If everything has been done correctly, you’ll be able to successfully build the common library using the build option below.
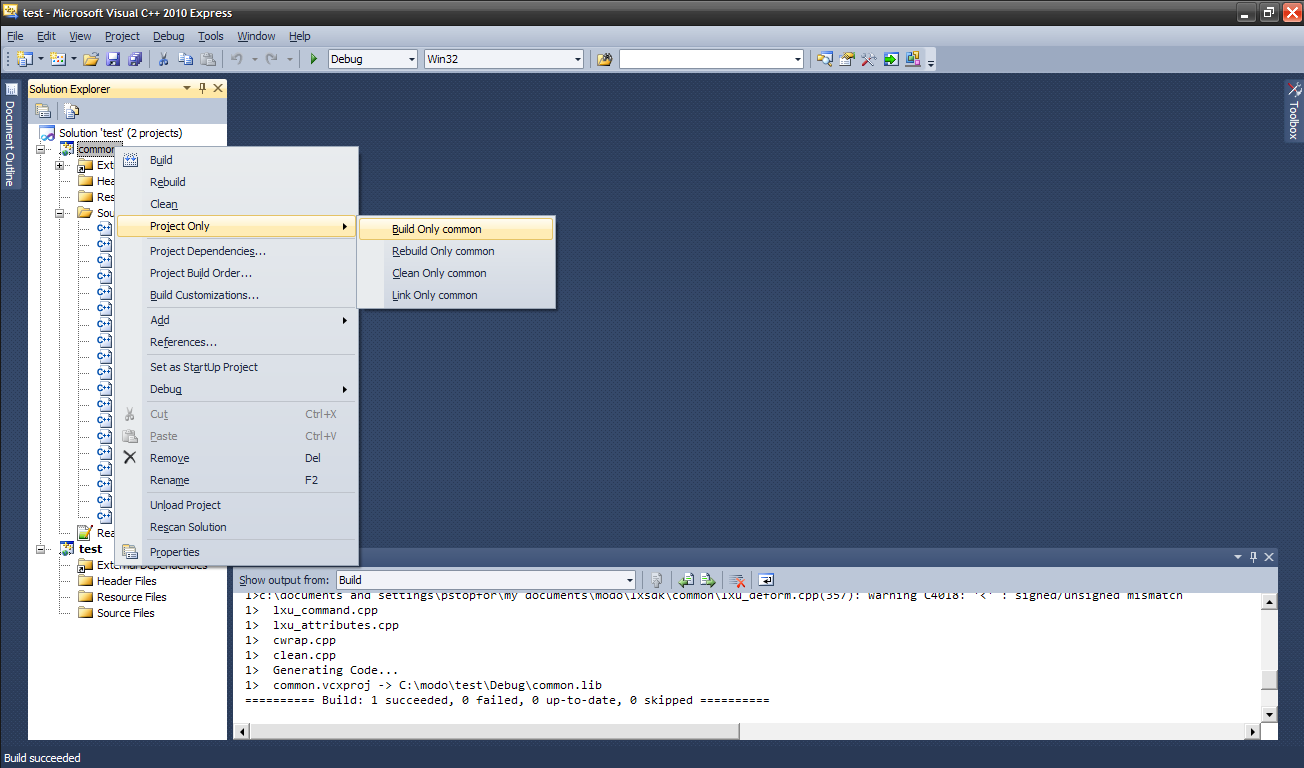
*Note: If you recieve an LNK2019 error, ensure you have writing access to the SDK file directory and there are no conflicts between project, and solution names.
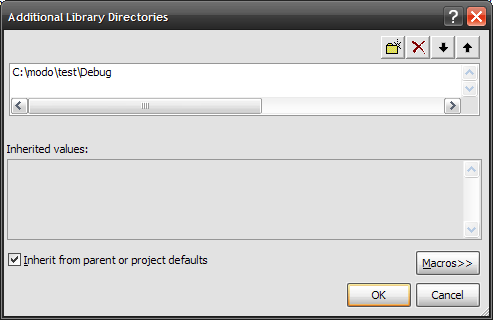
Normally, you’d expect to find the library generated within the common project’s hierarchy, but as we have it configured as a dependency for our plugin project, the library is generated within that plugin project:
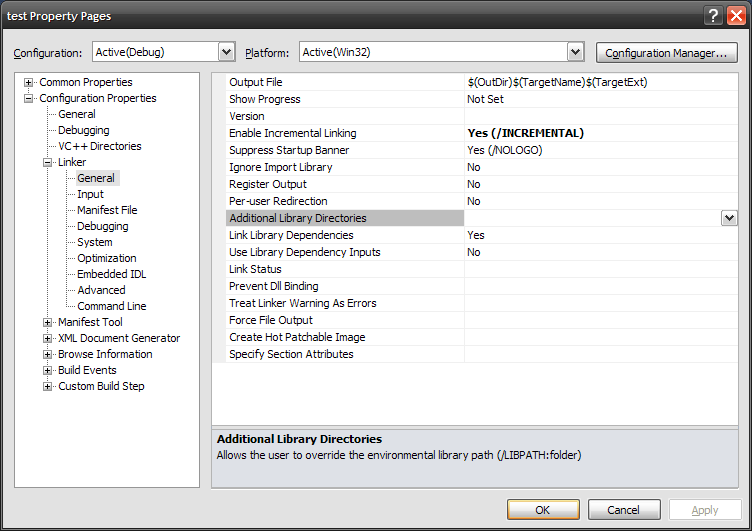
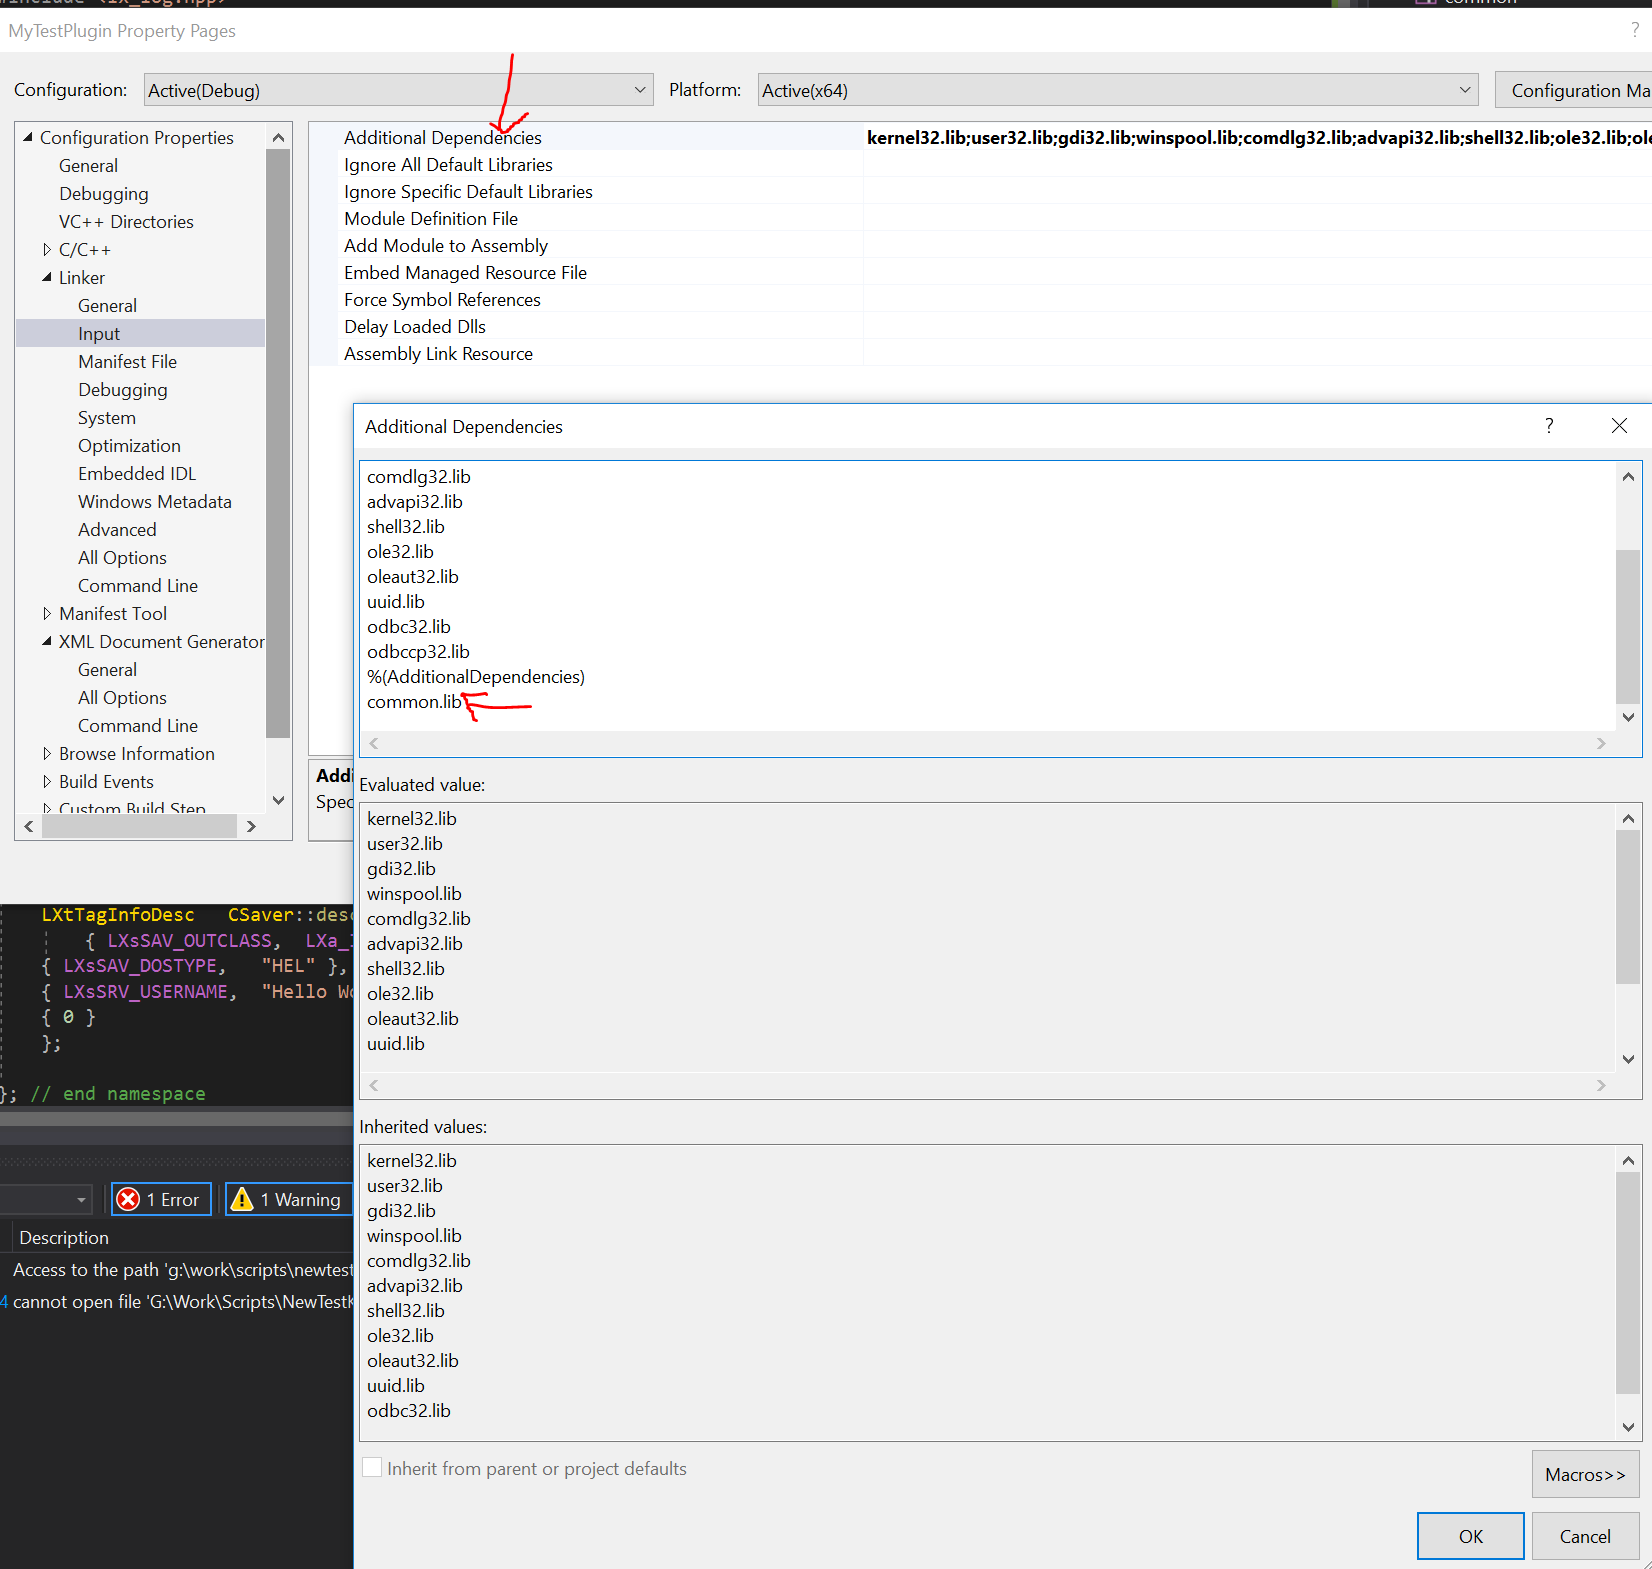
Finally, we need to make the linker aware of the library file that contains the exported symbols that the plugin needs in order to build successfully. This is done by adding ‘common.lib’ to the ‘Additional Dependencies’ field of the Linker input settings, as below.

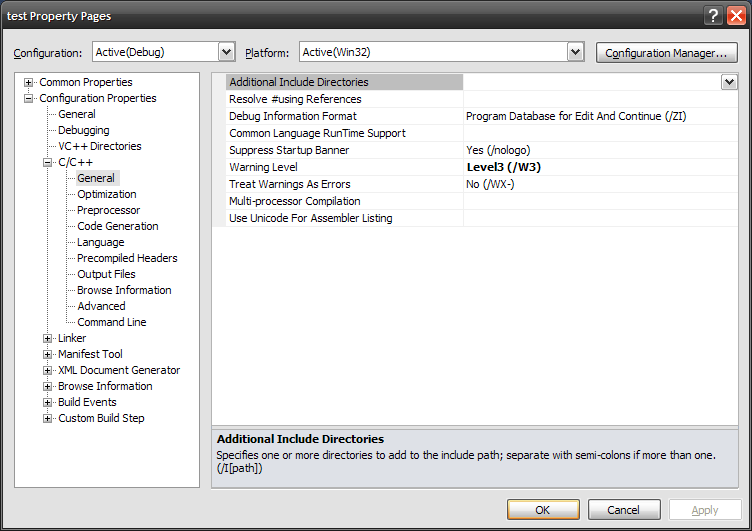
Finally, once you have some C++ source files within your project, you’ll be able to configure the C++ compiler include folder as below, just like was done for the common library project earlier :
VS Community 2017
Ensure you have C++ installed with your visual studio. It is not enabled by default.
Make a folder for the plugin to live in.
Extract the SDK
Open VS
File > New > Project
Choose Windows Desktop Wizard
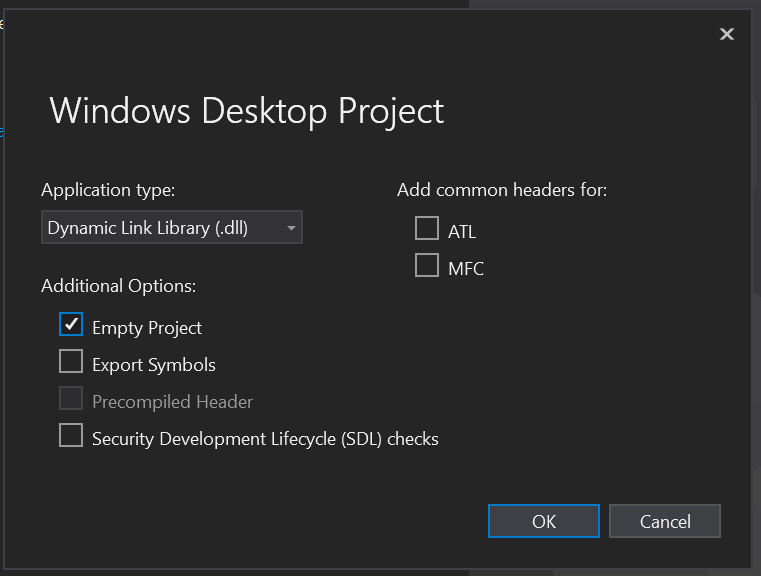
Then Choose DLL, Empty Project, and everything else off:
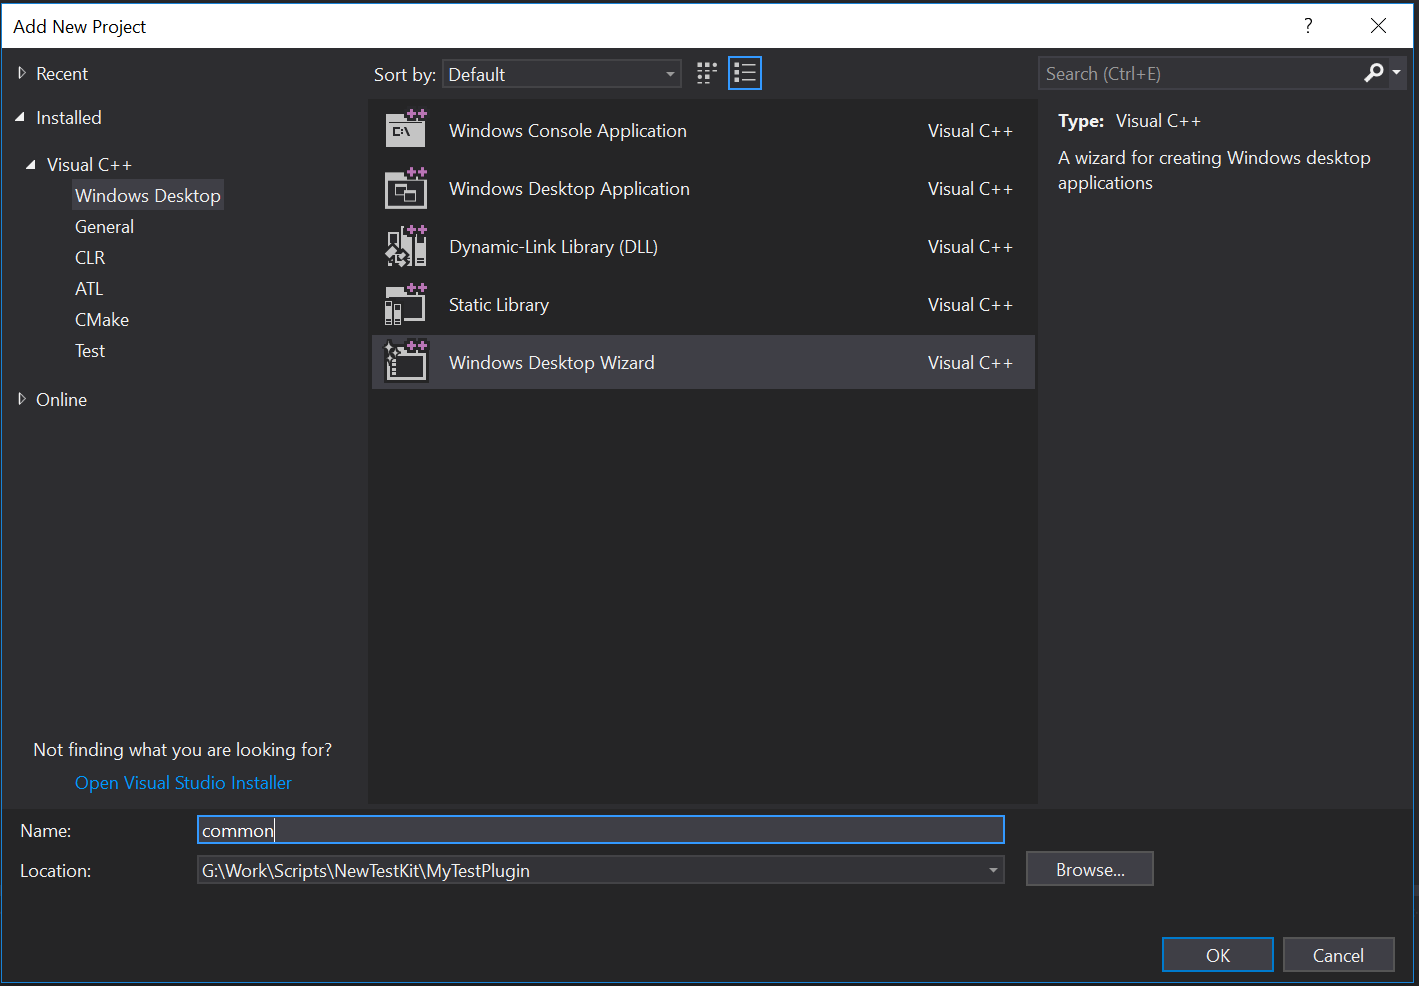
File > Add > New Project
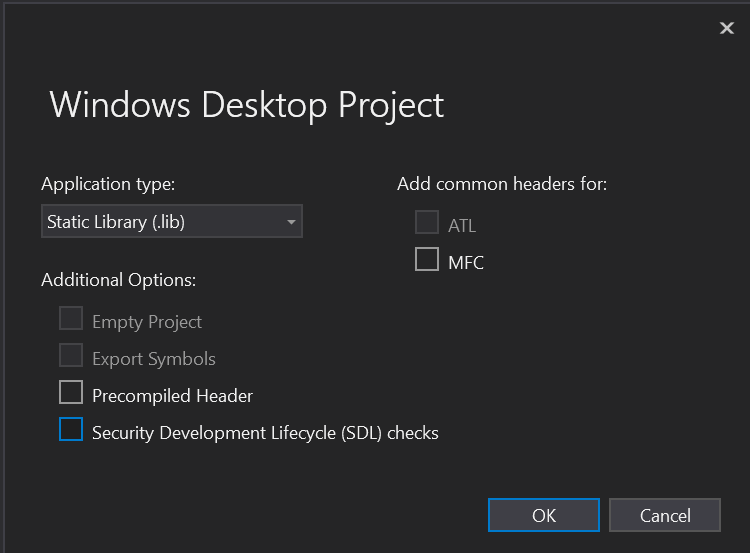
Choose Windows Desktop Wizard, Call it common
Set it to Static Library (.lib). Turn everything else off
Open the Configuration manager by clicking on the Platform drop down > configuration manager

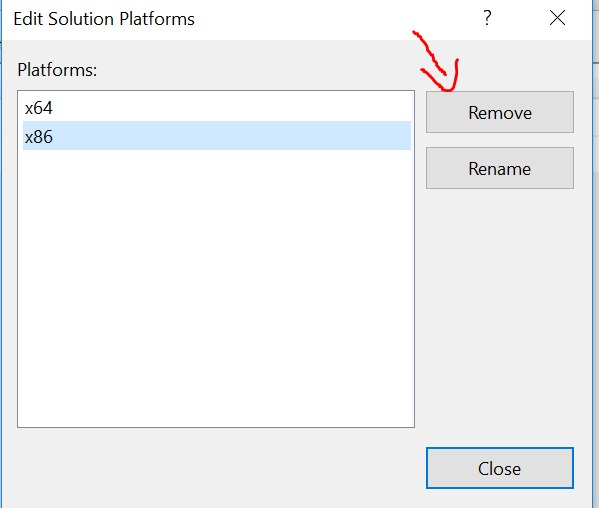
Edit the platforms
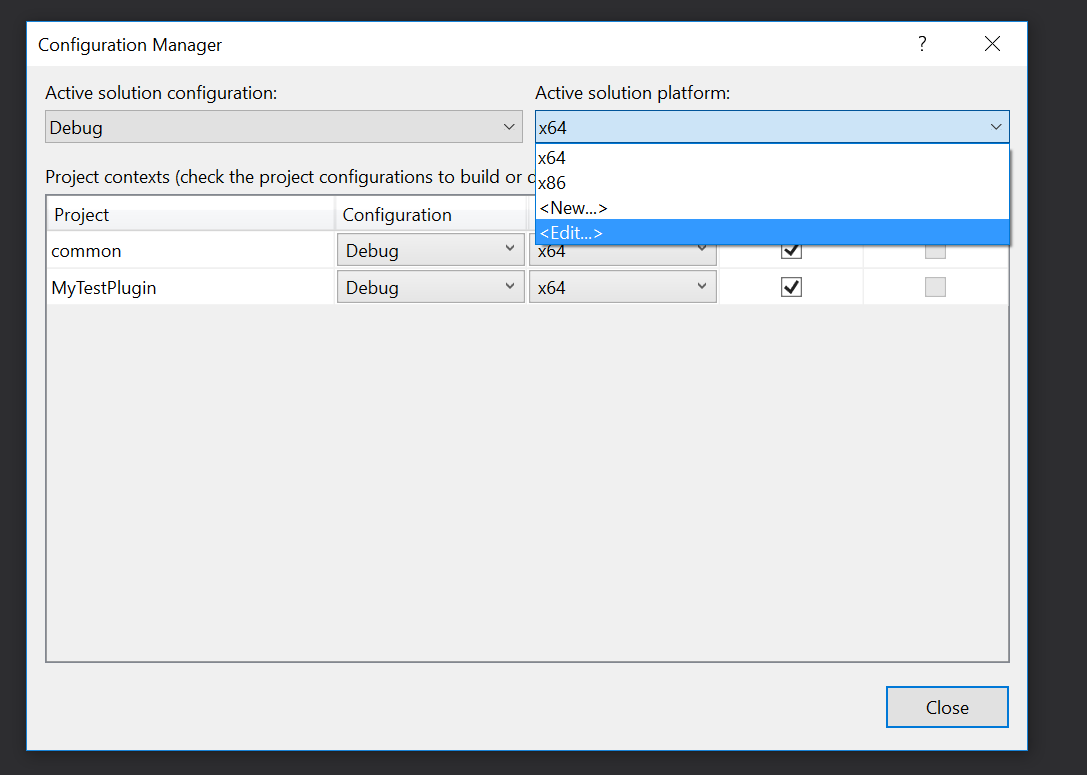
Remove x86
Add the source files to the common project by right clicking the Source files folder > add > existing item and then navigating to the lxsdk/common folder. Include all of the files.
Open the project properties for common
Change the additional includes, to include the lxsdk/includes folder, and the warning level to W1:
Add a source file to your main project source (right click source files Add > New Item > cpp file)
Add some code, for example, the Hello World example
Open the Project properties for the project
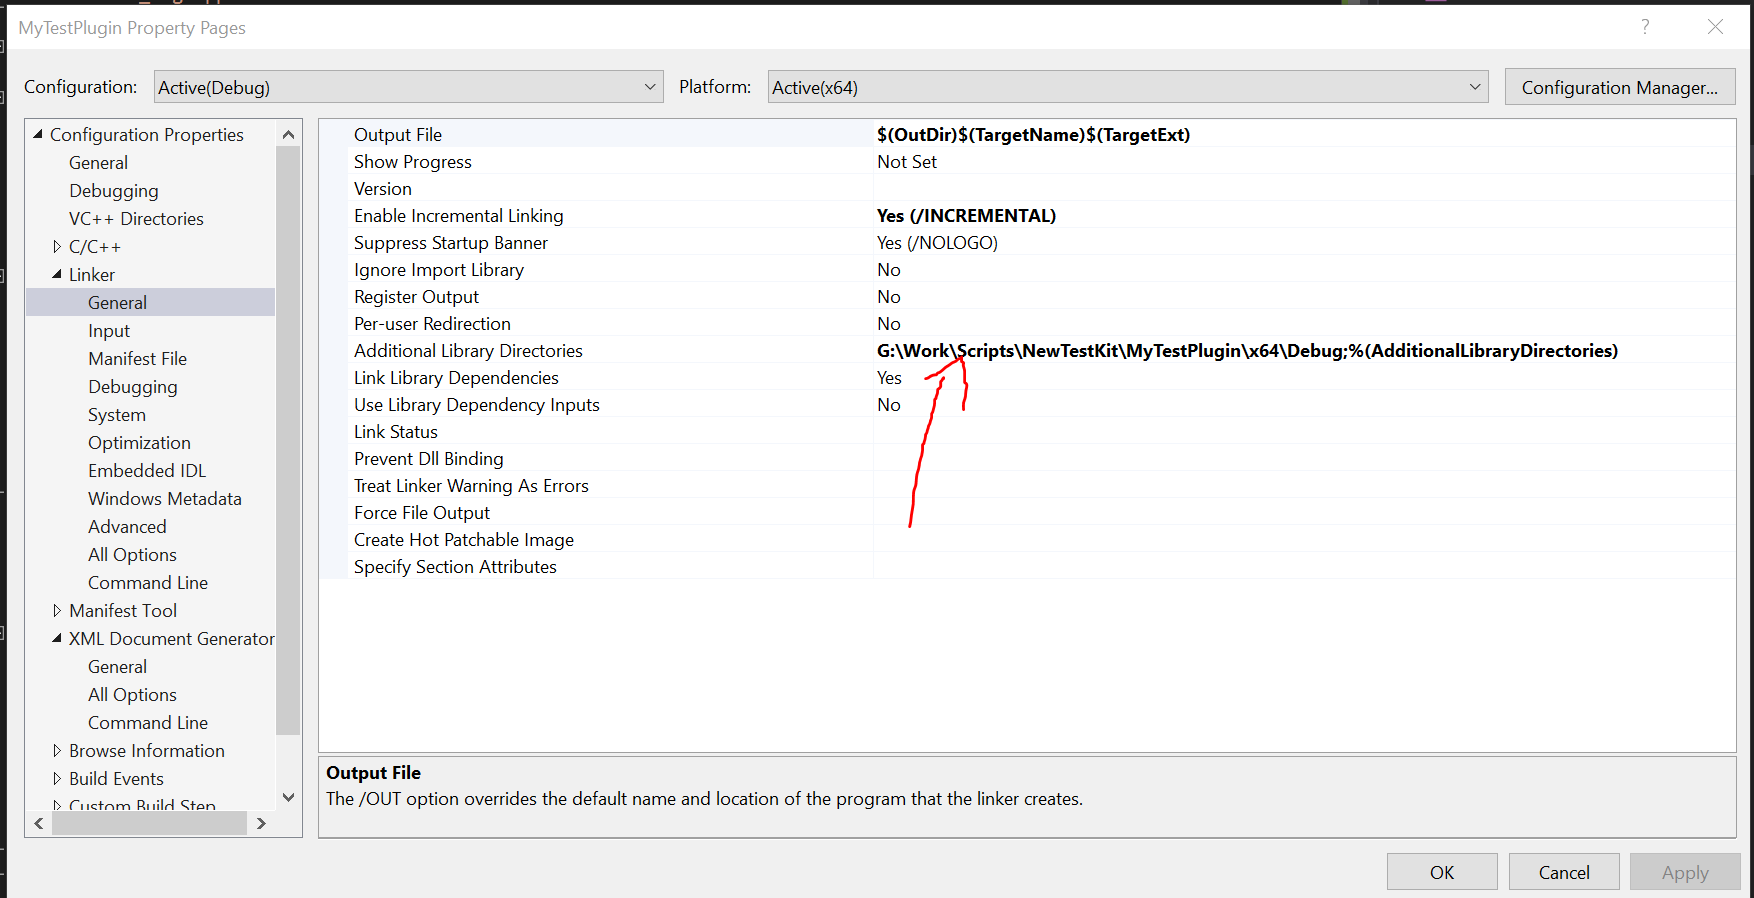
In Linker > General, point the Additional Library Directories to the place your common lib builds to. By default it is the root of the Project folder:
In General > Input, add ;common.lib to the end of Additional Dependencies:
- In C/C++ > General, point the Additional Include Directories to the SDK/include folder as done previously.

You would need to repeat the process for release.