Retopologizing in Modo
When discussing 3D models, topology refers to the geometric surface characteristics of a 3D mesh. Topology is often referred to as Polygon Flow, but the layout of the vertices and edges of a mesh also play an important role in whether a mesh is considered to have good or bad topology.
While many aspects of what defines good topology are universally agreed upon, there is no true industry standard or set of guidelines. The guidelines that I follow when arranging the topology of a mesh are based on years of production experience and are very much self-imposed.
There are times that you may wish to rebuild a mesh that has poor topology but keep the same volume and shape. This is a common practice often called Retopologizing.
This video takes a quick look at working with the Topology Pen in Modo.
Retopology can be a time-saving modeling technique for optimizing 3D sculpted meshes, 3D scanned data, or simply reworking meshes created with traditional modeling tools.
In this topic I’ll introduce you to the basic workflow of retopology in Modo, which has an amazing toolset that makes retopologizing a mesh incredibly easy. I’ve included a scene file of a 3D scanned shoe for you to use if you’d like to follow along.
Download the MODO Essentials.zip from the Course Files tab here: https://learn.foundry.com/course/3128/view/modo-essentials
Open (File/Open) the source file Modo_Essentials/Source/S6/Scenes/ShoeScan_Vaughan. lxo
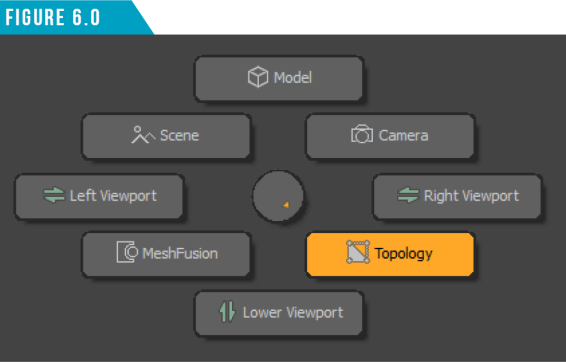
With the scanned mesh loaded, let’s prepare the workspace. Using the Viewport Switcher Pie Menu (Alt+Spacebar) (Figure 6.0) change the center viewport to the Topology Viewport and switch to the Topology Toolbar using the third icon from the left in the Toolbar Menu.
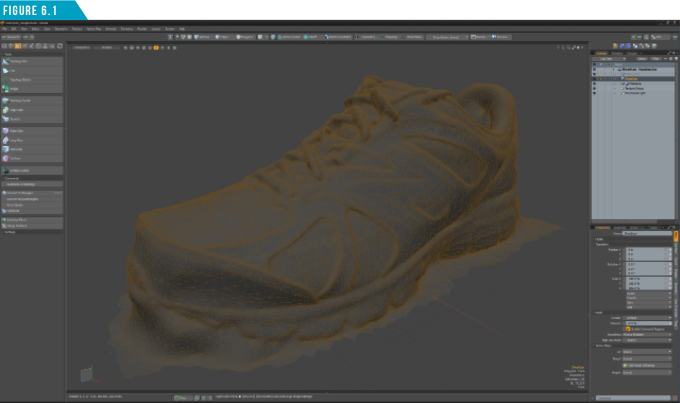
There are two mesh items in the scene. Select the mesh item named ShoeScan. Your workspace should now look like (Figure 6.1).
The Topology Viewport is designed to be ideal for retopologizing meshes. It uses a special OpenGL drawing mode to make it easier to see what is being drawn in the foreground over what is in the background.
The Topology Toolbar gives you access to tools that automatically conform to any item in the background. As you can see, there are quite a few tools at your disposal, but I find that I primarily use a single tool for 98% of my retopology work, so that is the tool we’ll focus on in this guide.
Before we start creating new geometry, I want to take advantage of a feature that speeds up working with dense scanned meshes. Right-click on the ShoeScan item in the Items List, and then choose (ChangeType/Static Mesh). Static Mesh Items can streamline workflows where extremely dense meshes are used.
Static meshes are non-editable, but the trade-off is they remove the overhead associated with editing a mesh, increasing overall performance and minimizing file size.
While this shoe scan is not overly dense, I’ve made it a habit of converting any sculpted or scanned data I plan to retopologize into static meshes to take advantage of any performance boost I can get.
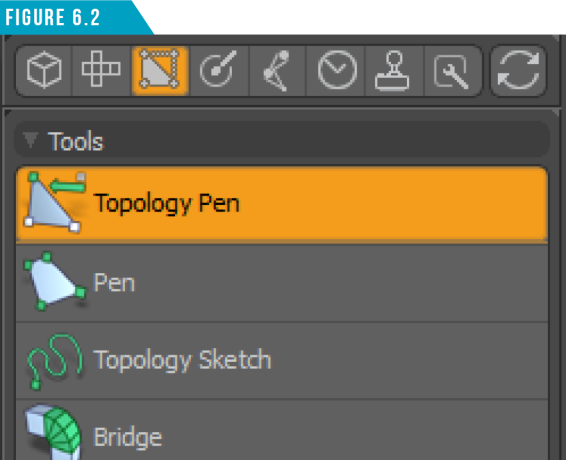
Select the Clean_Shoe mesh item, and then activate the Topology Pen Tool (Figure 6.2).
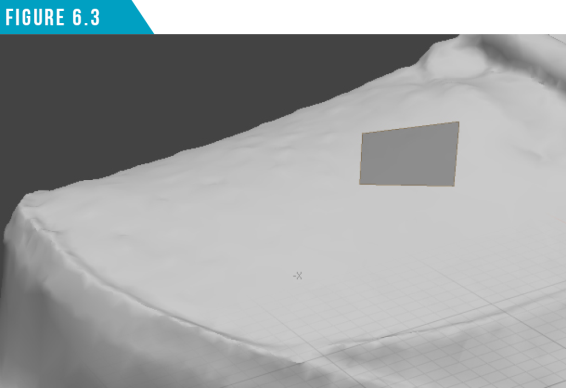
The Topology Pen Tool is a Tool Preset that automatically enables the Background Mesh Constraint and Snapping features. This will enable us to create new geometry that conforms to the background (Inactive) mesh. To start using the tool, hold down the (Ctrl) key and left-click and drag over the surface of the ShoeScan mesh which should be inactive. A new four-point polygon (Quad) will be created that will conform to the background mesh item. (Figure 6.3).
Warning: A common mistake artists make when retopologizing is attempting to create new geometry on the same mesh item as the mesh they are wanting to rebuild. Make sure you are working in a new/empty mesh when you start the retopology process.
The Topology Pen Tool does so much more than allow you to draw out single quadpolygons. One look at the Topology Pen Tool Properties Panel (Figure 6.4) should give you an idea that this tool is packed with goodies.
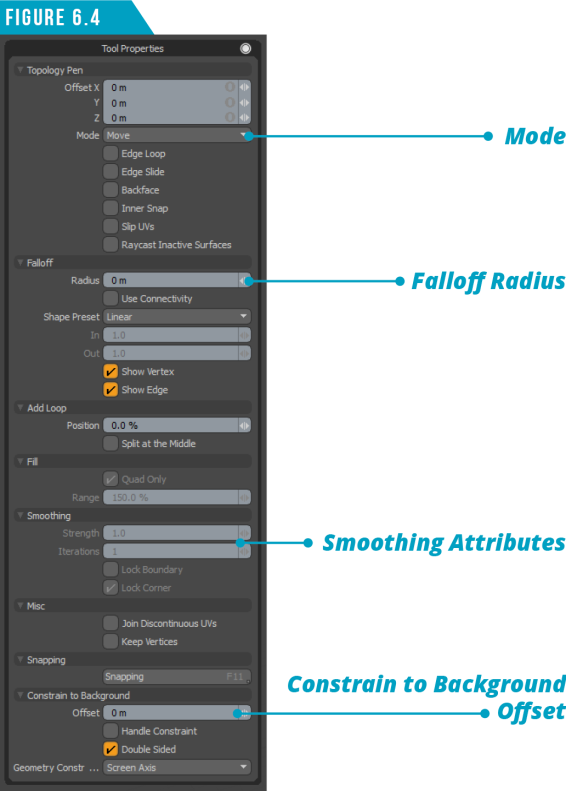
The tool provides several Modes that directly relate to the process of retopologizing geometry such as removing, duplicating and smoothing. There are also attributes you can toggle on and off. I’ve created some call-outs for some of the key attributes you’ll want to take note of, but with that said, I rarely use the Tool Properties Panel when working with the Topology Pen Tool.
Instead, I take advantage of the mouse actions and keyboard shortcuts shown in (Figure 6.5).
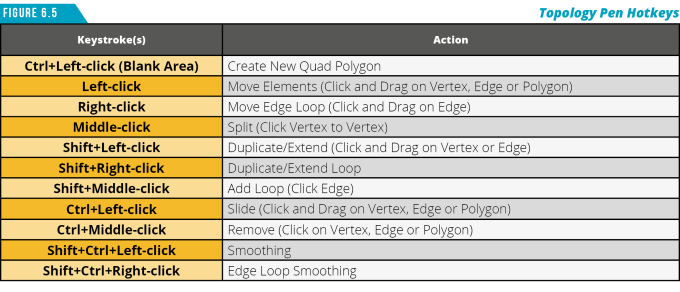
Let’s put a few of these to work. First, start by left-clicking and dragging the vertices and edges to change the location and shape of the first polygon we created.
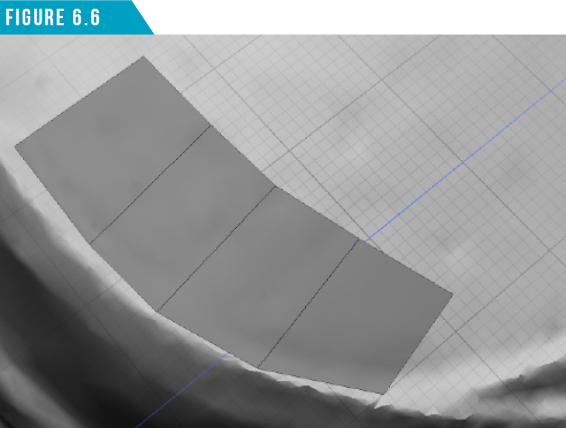
Next, hold down the (Shift) key and click and drag one of the edges to extend (duplicate) the edge and create another quad-polygon. Repeat this step a few times to generate a strip of quad-polygons as seen in (Figure 6.6).
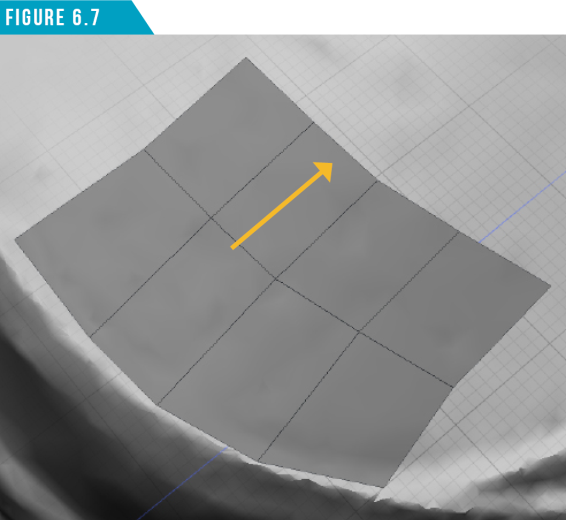
Hold down the (Shift) key and right-click and drag on one of the edges to extend the entire polygon loop, as seen in (Figure 6.7).
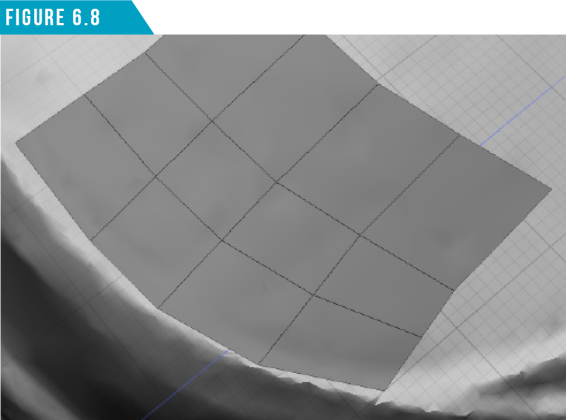
Hold down the (Shift) key and middle-mouse click on one of the edges to add a new edge loop to the original quad-strip. The results are shown in (Figure 6.8).
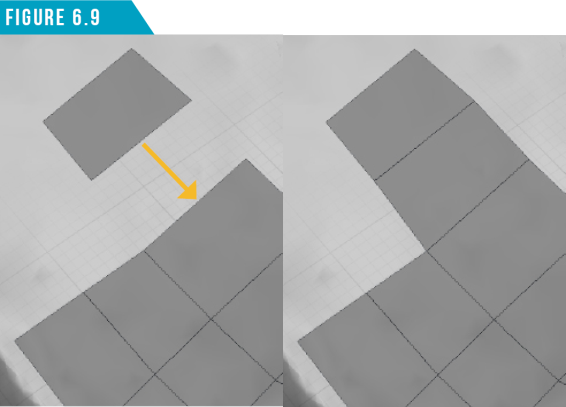
Create a new quad-polygon by hold down the (Ctrl) key and left-clicking and dragging away from the existing polygons.
Next, hold down the (Shift) key and left-click and drag one of the new edges toward one of the existing edges. The two edges will snap together, forming a single polygon island (Figure 6.9). Repeat this process to complete the new shoe topology.
|
||
|
If you took some time and retopologized the entire scanned shoe mesh, you’d master using the Topology Pen Tool. You might not have time to do it over this weekend crash-course, but come back and revisit it at some point to get the experience. |