Lighting
I’m not all that excited about the lighting in the scene. While the default Directional Light has its uses, I usually prefer to work with Area Lights, which are similar to studio soft-box lights, often used in professional photography because of the soft shadows they produce.
Select the Directional Light in the Scene Viewport, then choose (Item/Change Type/ Area Light) from the Application Menu. This keeps the position and rotation values of the light but changes it to a different type of light.
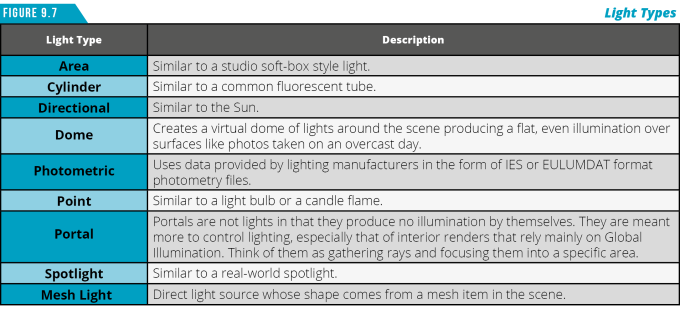
Modo has nine unique light types (Figure 9.7) that simulate real world sources of illumination. When you have time to experiment, you should explore the different light types so that you are aware of what is available for future projects. For this scene we’ll stick with Area Lights.
With the Light still selected, press (R) to activate the Scale Tool. Click on the cyan circle handle in the center and scale the light up to a larger size. When you’re happy with the size, drop the Scale Tool (Q).
The intensity of the Area Light is also increased as the volume (size) of the light increases. Increasing the size of the light relative to the model it affects also increases the amount of shadow spread.
Press (Ctrl+D) to Duplicate the light, and then Move (W), Rotate (E) and Scale (R) it to create a back light.
Don’t forget that all items in Modo have properties. You’ll also want to explore the Properties Viewport when you have your light selected to gain access to its attributes. You can change settings such as Radiance (intensity of the light), Shadow Type and more.
As you make adjustments in the Scene Viewport, you can see the Preview Viewport update, giving you real-time feedback of the changes you’re making. This speeds up lighting and texturing and takes the guesswork out of refining your renders.
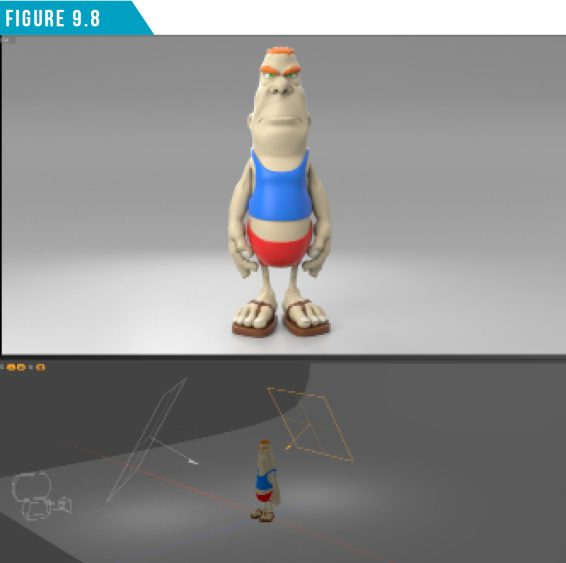
Lighting and Texturing play off each other, so I like to get my lighting 90% in place before moving on to texturing. Everyone has his or her own workflow when it comes to lighting, but this method has served me well over the years. When you’re happy with the lighting of your scene, we will move on to texturing. I settled on the simple setup in (Figure 9.8).