Assigning Materials
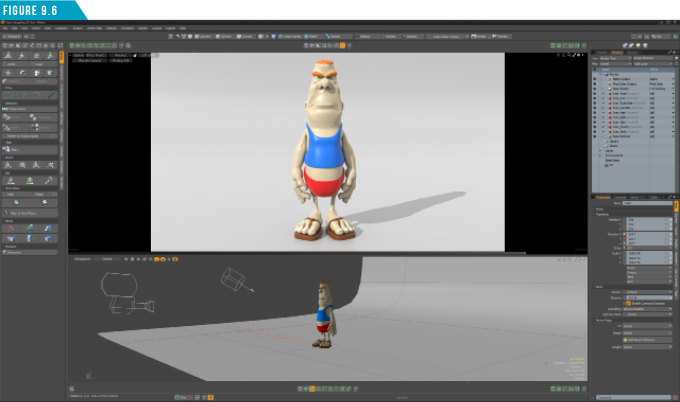
For us to be able to change the surface attributes of the various parts of this mesh, we need to assign material tags. The process is quite simple. For this session we’ll assign a few material tags to break up this character’s surface and to give you some hands-on experience. Start by selecting all the polygons that make up Ivan’s shirt (Figure 9.1).
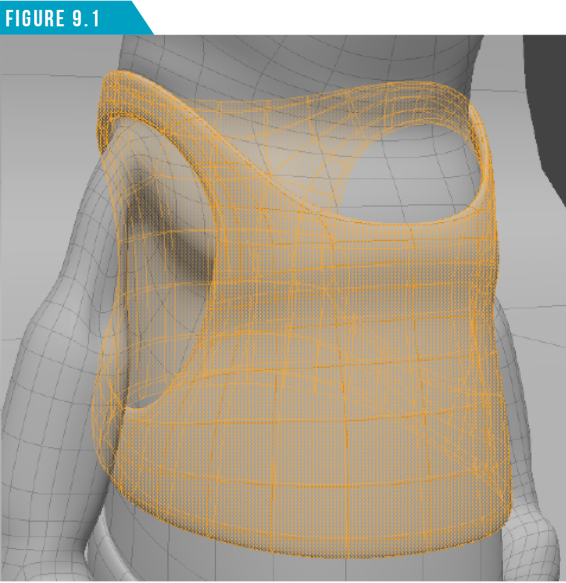
Next, use the keyboard shortcut (M), to bring up the Polygon Set Material Dialog (Figure 9.2).
Give the Material Tag a unique name. I’ll use (Ivan_Shirt). Next, click the Color Bar, and from the Color Dialog choose a color, such as the blue (0.0,0.5,1.0) color I went with in (Figure 9.3).

There are additional material attributes that could be adjusted, but for now, let’s keep the default values for those settings. When you’re happy with the name and color, click OK.
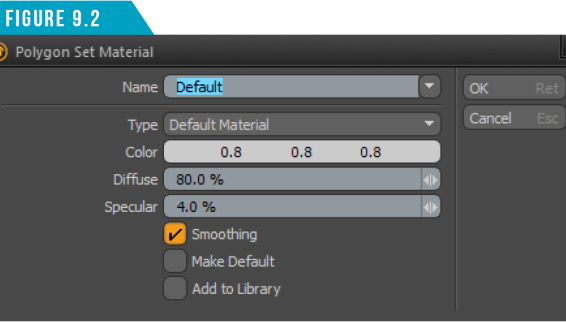
The polygons that make up Ivan’s shirt should now display color in the 3D Viewport (Figure 9.4).
Rinse and repeat. Break up the rest of Ivan’s mesh so that we have some material tags to work with. Create material tags with the following eight material tag names:
• Ivan_Shorts
• Ivan_Skin
• Ivan_Nails
• Ivan_Hair
• Ivan_Sandals
• Ivan_ EyeWhite
• Ivan_Iris
• Ivan_Pupil
Remember the steps. Make a polygon selection, press (M), assign a name and color and then click OK. When you’re done, Ivan should look something like (Figure 9.5).

With all of our material tags created, let’s set up our workspace to take full advantage of the features available, and to make shading and rendering an enjoyable experience.
Switch to the Setup Toolbar using the fifth icon from the left in the Toolbar Menu.
Next, use the Viewport Switcher Pie Menu (Alt+Spacebar) to open the Lower Viewport, and then switch the Lower Viewport to the Scene Viewport.
Change the Center Viewport to the Progressive Render Viewport (Preview Viewport) and click on the Shading Tab in the Lists Viewport to display the Shader Tree.
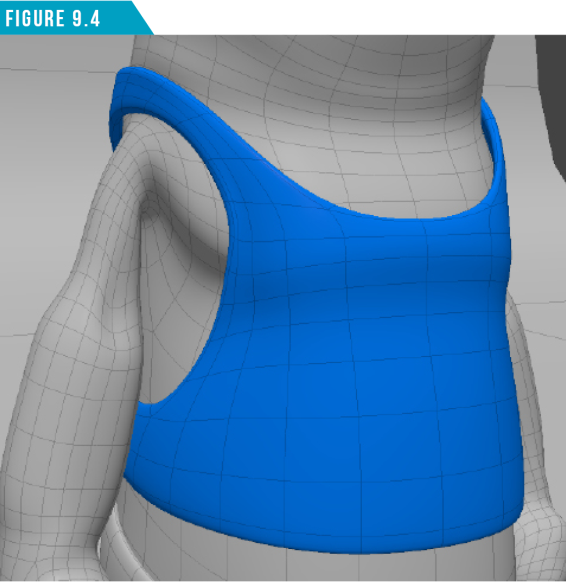
Click the large white arrow (►) in the center of the Preview Viewport to activate the progressive renderer. Your workspace should look like (Figure 9.6).