Shader Tree
Click on the shirt in the Preview Viewport to select the Material Item for the shirts’ Material Group. Selecting Materials by clicking on surfaces in the Preview Viewport is an efficient way of quickly selecting items in the Shader Tree.
This video takes a quick look at working with the Shader Tree in Modo.
Let’s Take a brief look at what we have in the Shader Tree (Figure 9.9).
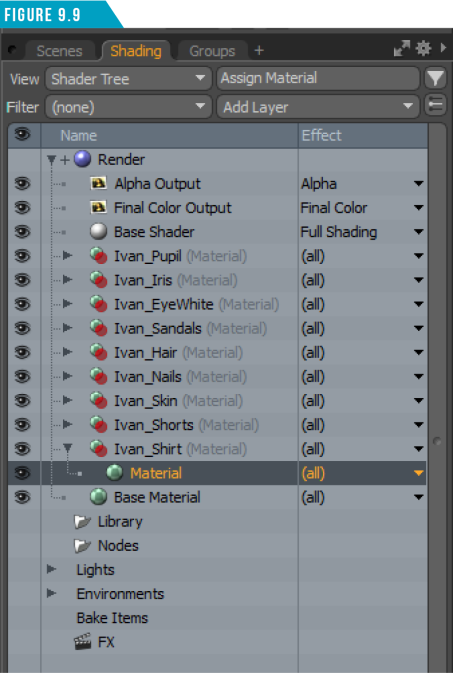
Every Material Tag we assigned earlier created a Material Group (Green Ball with a Red Ball in front of it) in the Shader Tree. Material Groups can be thought of as containers that hold any of the various Shader Tree items, such as shaders, materials, textures, and even render outputs.
Each Material Group that was created also contains a Material Item, which controls all the standard shading attributes for a surface’s final rendered look. The Material item contains channels to control Diffuse, Specular Amount, Bump Amplitude, and Transparency, as well as other surfacing attributes.
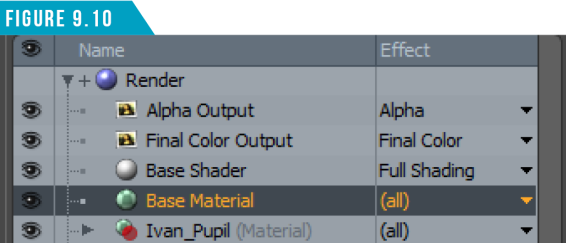
By default, every new scene contains a Base Material that sits in the root of the Shader Tree. If no Material Tags are assigned, this material shades everything. To get a better understanding of the stacking order of the Shader Tree, left-click and drag the Base Material, and place it under the Base Shader (Figure 9.10).
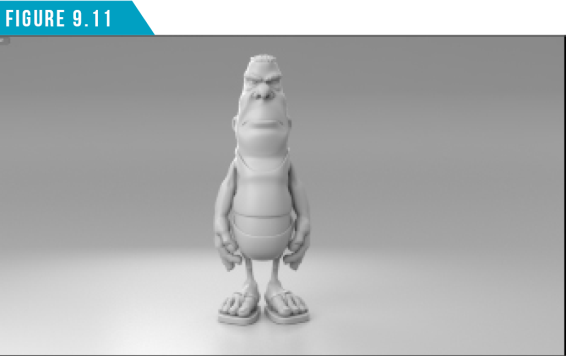
Everything in the scene now receives the shading attributes of the Base Material (Figure 9.11).
Move the Base Material back to the bottom of the stack, and with it still selected, change its Diffuse Color attribute (Figure 9.12). The Cyclorama (Cyc) changes color in the Preview Viewport (Figure 9.13).
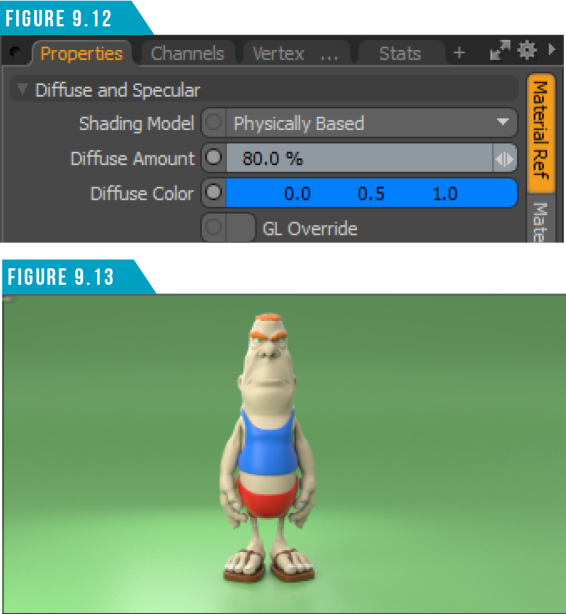
This is because we never assigned a Material Tag to the Cyc’s surface. If no Material Tags are assigned, the Base Material gets applied. It’s kind of like a catch all that ensures everything in your scene gets some shading attributes.
Select the Ivan_Shirt Material Item again. Lower the Specular Amount to (1.0%) and the Fresnel to (20%).
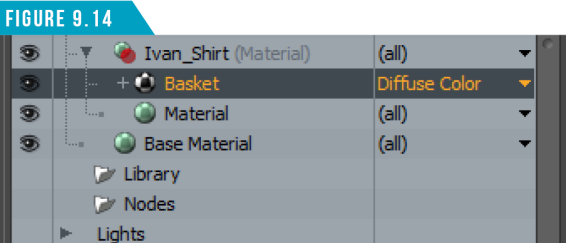
Click (Add Layer) at the top of the Shader Tree and choose (Enhance:Modo Textures/ Tiles/Basket). A new item will be added to the Ivan_Shirt Material Group (Figure 9.14).
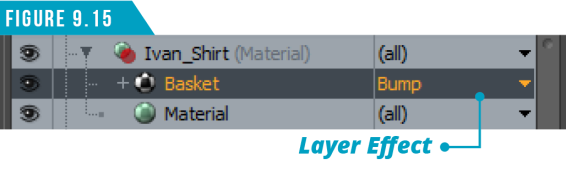
Change the layer’s effect to (Bump) by choosing (Surface Shading/Bump) in the Effects Column (Figure 9.15).
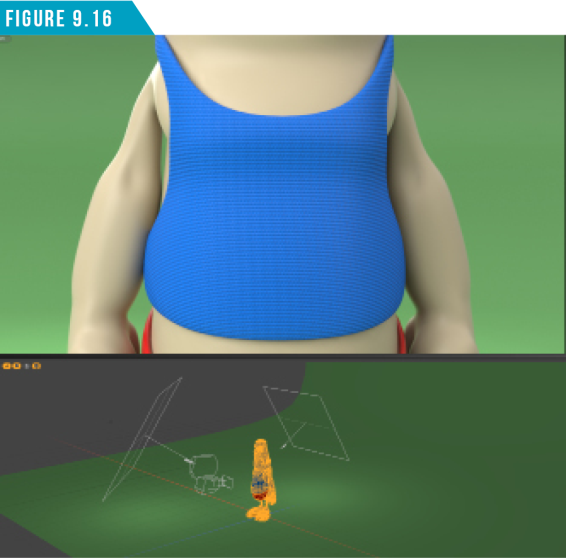
Zoom into the shirt using the Mouse Wheel in the Preview Viewport. Take note that the Camera, seen in the Lower Viewport, moves closer to Ivan. With the Basket Layer’s Effect set to (Bump), we’ve produced a nice “material” feel to the shirt’s surface (Figure 9.16).
By default, any new texture layer added to the Shader Tree will have its Layer Effect set to the Diffuse Color channel, meaning the layer affects the visual color of the surface. You can change the Effect, as we did, to affect other channels such as Displacement, Specular Amount, and others.
This is often overlooked, so keep it in mind when building up your material stack. Without a doubt, you’ll want to work with images when texturing your assets. Let’s add an image layer to the shirt.
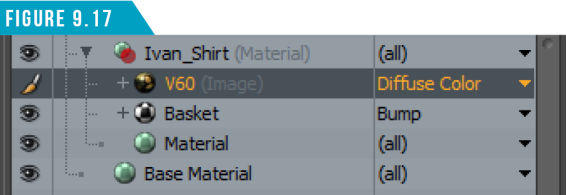
Click (Add Layer) again, but this time, choose (Image Map/ (load image)), and then choose the V60.png image file. <Course Files Link> (Modo_Essentials/Source/S9/Scenes/Images) A new layer will be created in the Shader Tree (Figure 9.17).
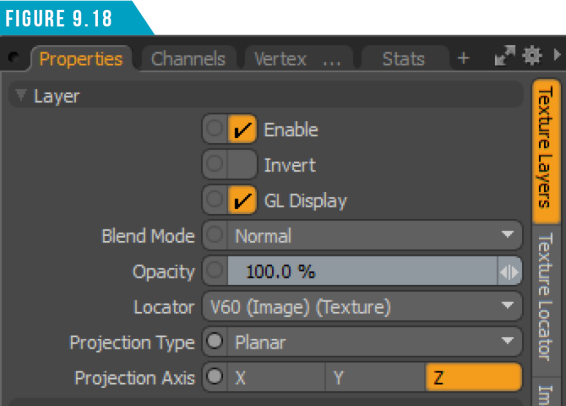
Unlike the Basket layer, the default values aren’t going to work well for us in this case. Start by changing the Projection Type from Cubic to (Planar) (Figure 9.18).
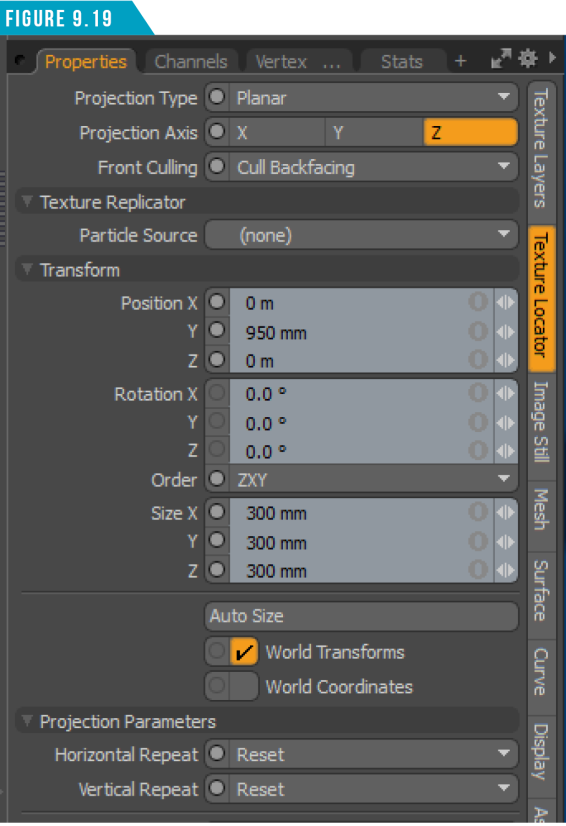
Next, switch to the Texture Locator SubTab. Change Front Culling to (Cull Backfacing) so the image doesn’t project onto the back of the shirt’s surface.
Change the Horizontal and Vertical Repeat attributes to (Reset) so the image doesn’t tile (repeat). Position the image (950 mm) in the Y Axis, and change the Scale to 300 mm in all three axes.
Your Texture Locator settings should look like (Figure 9.19).
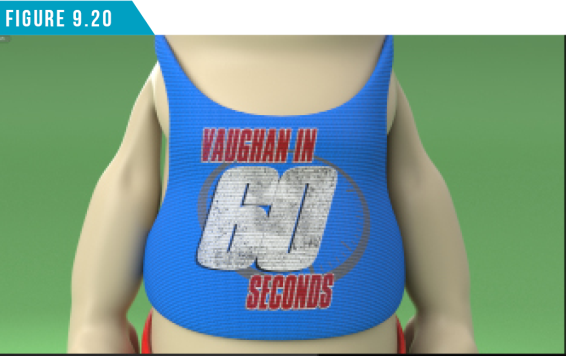
Your shirt should now be sporting a Vaughan in 60 Seconds logo (Figure 9.20).
You can add as many layers as you’d like to the Shader Tree, which offers an endless amount of possibilities. Feel free to play with the other Material Groups, and experiment with your own images and the other Enhance:Modo Procedural Textures.