Search is based on keyword.
Ex: "Procedures"
Do not search with natural language
Ex: "How do I write a new procedure?"
Contact Support
Using the Move/Trim Tool
The Move/Trim tool allows you to manipulate the position of a shot or its output by adding or removing handles. Activate the Move/Trim tool by clicking the tool or pressing Q twice.
Moving Shots
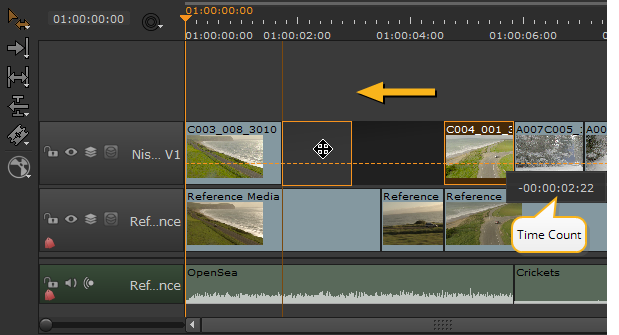
Click and drag the selected shot(s) to the required position on the timeline. A time count popup, in conjunction with the snap to edit function, helps you to reposition the shot(s) accurately.
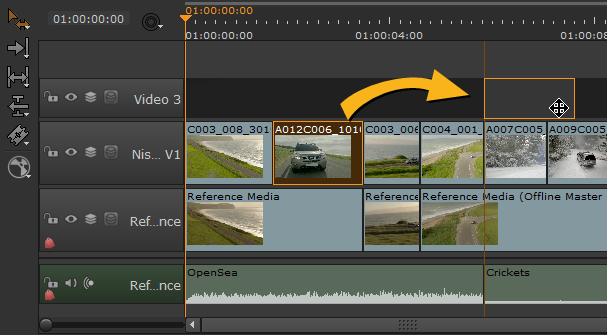
You can also move shots up and down the track hierarchy using drag-and-drop or the Alt+, (comma) and Alt+. (period) keyboard shortcuts.
The following table describes the Move/Trim tool’s modifiers and actions:
|
Mode |
Method |
Description |
|
Overwrite |
drag-and-drop |
The default move mode. The dragged shot overwrites any items that are present in the move location. |
|
Ripple |
drag then hold Alt and drop |
Drag-and-drop shots on top of other items without overwriting content - items are pushed down the timeline to accommodate the move. |
|
Duplicate |
hold Alt and drag then release Alt and drop |
Copy the shot, then drag-and-drop on top of other items overwriting existing content - items are not pushed down the timeline to accommodate the move. |
|
Ripple and Duplicate |
hold Alt then drag and drop while holding Alt |
Copy the shot, then drag-and-drop items on top of others without overwriting content - items are pushed down the timeline to accommodate the move. |
|
Note: On Linux, hold Ctrl+Alt for Duplicate and RippleDuplicate modifiers. |
||
|
Action |
Keyboard Shortcut |
Description |
|
Delete |
Backspace |
Delete the selected shot(s) or gap(s). |
|
Ripple Delete |
Shift + Backspace |
Remove the selected shot(s) and ripple items down stream to close gaps in the timeline. Note: The ripple effect may not close gaps entirely, because Nuke Studio does not allow linked tracks to become desynchronized during rippling. |
If you need to nudge shots horizontally by just a frame or two, you can select the items on the timeline and press , (comma) to nudge it left or . (period) to nudge it right. Press Shift+, (comma) or . (period) to nudge the shot horizontally by the FrameIncrement set under the Viewer.
Note: You cannot overwrite other shots on the timeline horizontally using the nudge keys. However, vertical nudging (Alt+, and Alt+.) overwrites other tracks.
To Move Shots Using the Spreadsheet View:
| 1. | Select the required events in the spreadsheet view. |
| 2. | Click the cog icon and select the required Time Edit Behaviors: |
|
Modify |
Using |
Result |
|
Dst In |
Move |
Adjusts the event’s Dst In and Out by the same amount, moving the shot’s position on the timeline by the specified amount, while maintaining Speed. Before and after a 2 second Dst In increase:
|
|
Dst Out |
Move |
Adjusts the event’s Dst Out and In by the same amount, moving the shot’s position on the timeline by the specified amount, while maintaining Speed. Before and after a 2 second Dst Out increase:
|
| 3. | Adjust the Dst In or DstOut to move the shot(s) by the specified amount. |
Trimming Shots
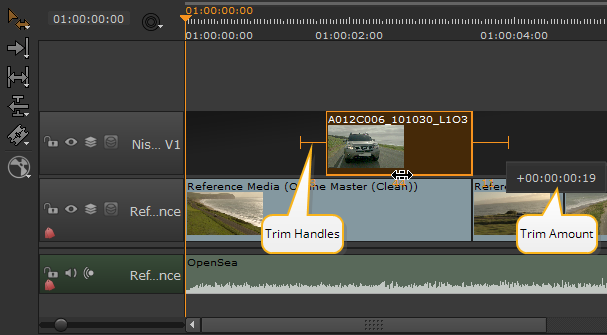
Click-and-drag the edit point to the new position and release the mouse to complete the trim.
Tip: Use the Ripple Edit tool, activated by pressing R twice, to ripple downstream shots automatically.
The Viewer displays the new In or Out point (depending on whether you’re adjusting the beginning or end of the shot), allowing you to accurately gauge the new output.
Note: Trimming multiple shots simultaneously trims each item by the same amount and in the same direction.
Alternatively, click an edit point and nudge the edit using the Ctrl/Cmd+ßà (numeric pad) keys or hold Shift to nudge by the Frame Increment set under the Viewer.
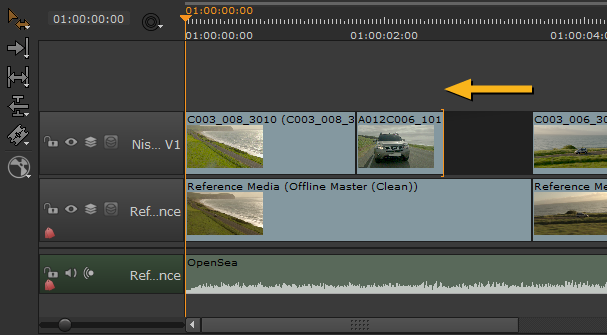
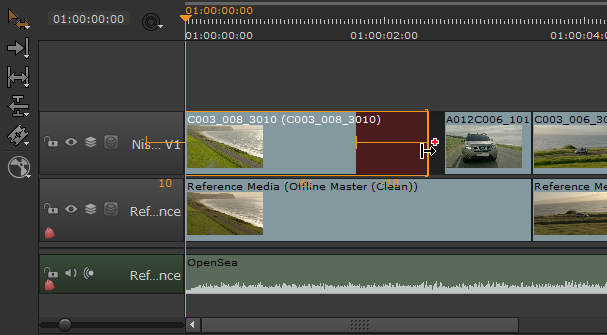
By holding Ctrl/Cmd and dragging an edit, you can add blank frames past the end of the shot’s handles. Blank frames are colored red on the timeline for clarity:
To Trim Shots Using the Spreadsheet View:
| 1. | Select the required events in the spreadsheet view. |
| 2. | Click the cog icon and select the required Time Edit Behaviors depending on whether you’re using the In or Out points or duration: |
|
Modify |
Using |
Result |
|
Src In |
Trim In |
Trims the event’s Src In, Dst In, and durations while maintaining speed. Before and after a 2 second Src In increase:
|
|
Src Out |
Trim Out |
Trims the event’s Src Out, Dst Out, and durations while maintaining speed. Before and after a 2 second Src Out increase:
|
|
Src Dur |
Trim Out |
Trims the event’s Src Dur, Dst Dur, and Src/Dst Out while maintaining speed. Before and after a 50 frame Src Dur increase:
|
|
Dst In |
Trim In |
Trims the event’s Dst In, Src In, and durations while maintaining speed. Before and after a 2 second Dst In increase:
|
|
Dst Out |
Trim Out |
Trims the event’s Dst Out, Src Out, and durations while maintaining speed. Before and after a 2 second Dst Out increase:
|
|
Dst Dur |
Trim Out |
Trims the event’s Dst Dur, Src Dur, and Dst/Src Out while maintaining speed. Before and after a 50 frame Dst Dur increase:
|
| 3. | Adjust the values as required to trim the shot(s) by the specified amount. |


