3D Compositing
Nuke’s 3D workspace allows you to set up a 3D composite for camera moves, set replacement, and other applications where you need to simulate a "real" dimensional environment.
Overview
This chapter explains how to set up a 3D scene in Nuke, and how to add objects and cameras in the 3D workspace. You’ll also see how to texture objects, transform objects and cameras, and render out scenes for use in other areas of your script.
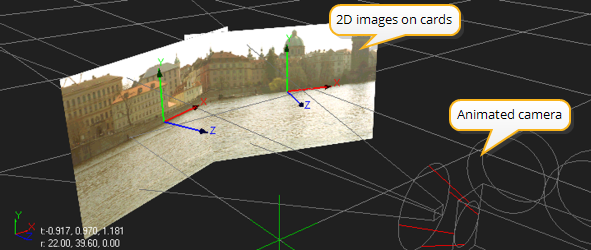
Although the 3D workspace has many potential uses, you’re most likely to use it - at least initially - to create pan-and-tile scenes. These are scenes with 2D image planes arranged into a curved shape, and then rendered out through an animated camera to give the illusion of a seamless environment.
|
|
|
Simple pan-and-tile scene. |
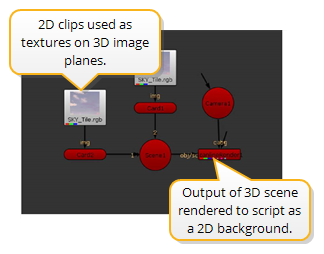
The 3D objects in Nuke appear as round shapes to differentiate them from objects that perform 2D operations. As shown above, you can mix 2D and 3D objects together in the node tree. For example, you can texture a 3D object with a 2D clip, or take the rendered output from a 3D scene and use it as a 2D background.
|
|
| Script with 2D and 3D operators |
Choosing the 3D Viewer Type
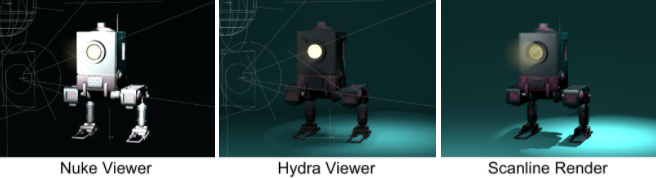
Nuke 13.0 onwards includes a new Hydra 3D viewport, which uses hdStorm as a new renderer. The Hydra Viewer is more consistent with other applications in your pipeline, such as Katana, Solaris, or USDView, as well as providing output that represents the output from ScanlineRender nodes more accurately.
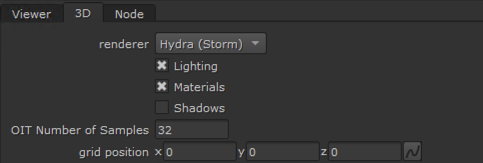
The Hydra viewer is the default 3D viewer, but you can revert to Nuke’s legacy Viewer in the Viewer node's Properties > 3D > renderer dropdown. You can also select whether or not to display lights, materials and/or shadows in the Hydra Viewer by toggling the relevant checkboxes.
OIT Number of Samples controls the render quality when you have multiple overlapping semi-transparent objects in the 3D Viewer. Increasing the number of samples improves the rendered output, but uses more OS resources and can affect performance.
The default Viewer renderer is also included in the Preferences under Panels > Viewer > default renderer. Changing the preference only affects new Viewer nodes.