Using Collections
If you want to organize your scene by placing prims in collections, you’ll need the GeoCollection node. This node is used to specify paths of prims to include, and can then be used as a mask input for future nodes down the stage.
For example, you might want to create collections for all the lights or cameras in the scene or any prims that have shadows cast on them.
In this example, we have just chosen one specific geometry prim to include in a collection.
| 1. | Add a GeoCollection node to your node graph. |
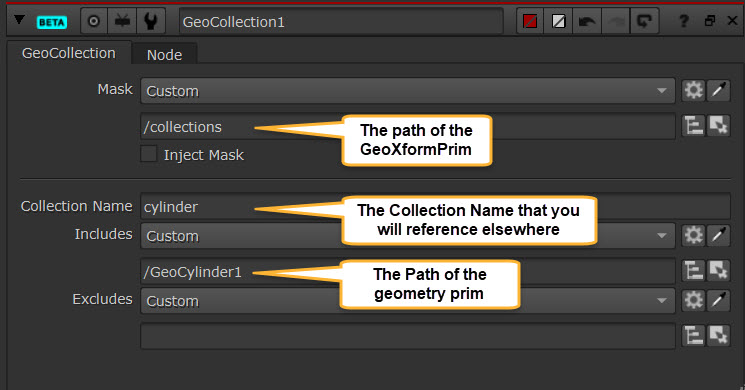
| 2. | You'll need to have created a Xform or Scope to point to (you can use GeoXform, or GeoScope node). Then on the GeoCollection node, set your Mask to this and this is where your collection will be saved to. In this case we’ve created a GeoXform and its prim path is /collections. |
Note: Learn more about Xforms and Scopes at Creating Scope and Xform Prims.
| 3. | Give the collection a name under Collection Name. It’s worth keeping this short as you’ll need to reference this elsewhere. |
| 4. | With the collection set up though you can now specify what prims you want in the collection. You can use the include knob to add prims to the collection and the exclude to remove prims from the collection. Typically you’ll just leave exclude empty, but if you are using the expression language to make complex selections across a large stage, then having the exclude can be useful. |
| 5. | Now you have set up your collection, you can reference the collection in other nodes. For example, if you wanted to transform the prims in the collection, you'll need to specify the Collection Name in the Mask knob of a GeoTransform node. This needs to include some syntax and reference the above Xform beforehand. For example, %[GeoXform]:[CollectionName] |
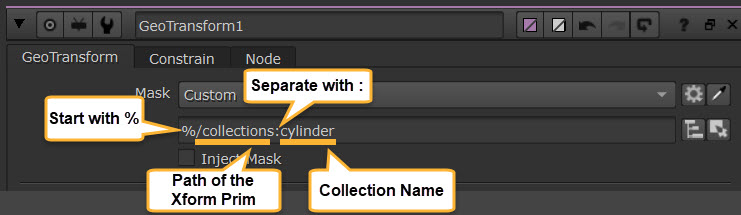
Warning: Using the GeoTransform node directly with the Scope or Xform you created in the node graph will not work with the collection set on it. You always need to reference the Collection Name.