The little scene you’ve created would be more interesting with a camera move. You can animate both cameras and objects; in each control panel, you’ll see an Animation button next to each parameter you can animate over time.
| 1. | In the Viewer, drag the time slider to frame 1 on the timeline. |
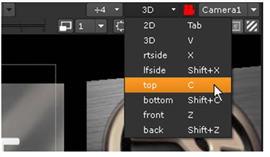
| 2. | Let’s switch to an overhead view to move the camera. Choose top from the view dropdown menu. |

| 3. | Double-click on the Camera1 object (either inside the Viewer or on the Node Graph) to open its control panel. |
| 4. | Move the camera to the right and rotate it to “look” at the center of the 3D workspace. |
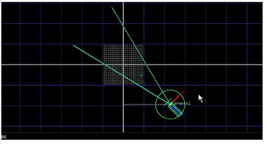
| 5. | Click on the animation button next to the camera’s translate parameters, and choose Set key. |

The background of the parameter boxes change color to show that a keyframe is now set for these values at the current frame in the timeline. Now, you need to set a keyframe for the rotation values.
| 6. | Next, click the animation button next to the camera’s rotate parameters, and choose Set key. |
| 7. | In the Viewer, scrub to the end of the timeline. Then, move the camera to the left side and rotate it to face center. This automatically sets keys for the translate and rotate parameters, for the last frame. |
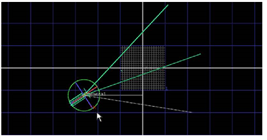
| 8. | Drag through the timeline and the camera moves between the positions recorded by key frames. |
Yawn. With only two key frames, the camera moves in a straight line, from start to finish. Let’s edit the animation curves to make this more interesting.
| 9. | Click the animation button next to the camera’s translate parameters and choose Curve editor. |

This opens the Curve Editor window in the same pane as the Node Graph. The outline at the left side of the Curve Editor displays a list of the parameters you’ve animated, and the curves show the values plotted over time. Each dot shows the value recorded for a value on a keyframe.
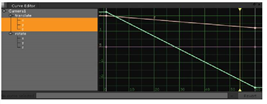
Yes, we know. They don’t look like curves - yet. You only set two key frames, remember? You can press Ctrl+Alt (Mac users press Cmd+Alt) and click on any line to add more key frames. However, let’s assume you want to create a smooth arc between the first and last recorded position of the camera. Rather than set more key frames, let’s just change the shape of the curve.
| 10. | You want to control the shape of the camera path along the z - the distance between the origin point and the camera, so click the translate / z parameter in the Curve Editor. |
Click on the first point of the translate/z curve to select it, and drag the tangent handle upward, as shown below.

From this point forward, the curve increases the distance of the camera on the z-axis, which you’ll now see in the Viewer.
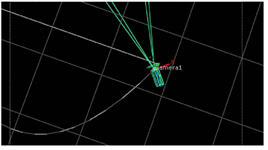
| 11. | Click on the last point of the translate/z curve to select it, and drag it upward also to finish the desired shape. This eases the distance back toward the value of the keyframe at the end of the timeline. |

Select the camera in the Viewer and you should see the gradual slopes of the curve create a more interesting arc for the camera move.
Switch to the 3D (V) perspective view and scrub through the timeline to see the new camera move.
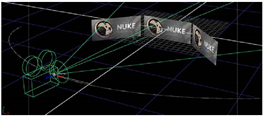
Your version may look a little different than this, depending on the positions and rotations you defined, but you get the idea.
| 12. | If you wish, you can set additional key frames to refine the camera path. Hold down Ctrl+Alt or Command+Option and click on the z-axis curve in the Curve Editor, to add new points to the curve, and then adjust their positions. |
| 13. | Before you continue, click the Node Graph tab to hide the Curve Editor and return to the node trees. |
| 14. | Close all the control panels that are currently open. |