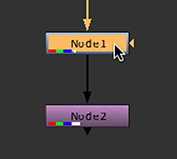
You add nodes using the Toolbar, the Tab menu, or the right-click menu. When you add a node, Nuke automatically connects it to the last selected node.
| 1. | To select the existing node that you want the new node to follow, click on the node once. |
| 2. | Click an icon on the Toolbar and select a node from the menu that appears. For example, if you want to add a Blur node, click the Filter icon and select Blur. |
NOTE: You can press the middle mouse button on a menu icon to repeat the last item used from that menu. For example, if you first select a Blur node from the Filter menu, you can then add another Blur node by simply pressing the middle mouse button on the Filter icon.
| 1. | To select the existing node that you want the new node to follow, click on the node once. |
| 2. | Press the Tab key and start typing the name of the node you want to create. |
This opens a prompt displaying a list of matches.
| 3. | To select the node you want to add from the list, either: |
• click on it, or
• scroll to it with the Up and Down arrow keys and press Return.
To add the last node created using this method, simply press Tab and then Return.
| 1. | Right-click on the existing node that you want the new node to follow. |
| 2. | From the menu that opens, select the node you want to add. |
NOTE: You can also add nodes using keyboard shortcuts. Most menus in the Toolbar include a note of the relevant hotkey next to the item in question.
| 1. | To select the existing node that you want the new node to follow, click on the node once. |

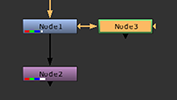
| 2. | Hold down Shift and create the node using the Toolbar, Tab menu, or right-click menu. To add a node in a new branch with the Tab menu, press the Tab key first, then hold down Shift when selecting the new node. |

The node is added after the selected node in a new branch of the node tree.