You edit curves by moving the points on the curve to new locations. If necessary, you can add more points to the curve. You can also sketch curves freely, use the usual editing functions such as copy and paste, smooth curves with filtering, interpolate curves, loop, reverse or negate curves, and use expressions to modify curves.
| 1. | Click on the curve you want to edit. The curve turns yellow to indicate it’s selected. |
| 2. | Ctrl+Alt+click (Mac users Cmd+Alt+click) on the part of the Curve Editor you want to add a point to. You can add points both on the curve and outside the curve, |
OR
| 1. | Right-click on the Editor and select Edit > Generate. The Generate keys dialog opens. |
| 2. | In the Start at field, enter the first frame you want to use as a keyframe. |
| 3. | In the End at field, enter the last frame you want to use as a keyframe. |
| 4. | In the Increment field, enter the frame increment you want to use between the first and the last keyframe. For example, if you want every tenth frame to be a keyframe, enter 10. |
| 5. | In the last field, enter the value you want to use for y. If you do not enter a value here, the key frames are added to the current curve without modifying the curve shape. |
| 6. | Click OK. |
• To select individual points, click on the point you want to select.
• To select multiple points, Shift+click on the points, or drag a marquee around them.
A box is drawn around the points, and the points turn white to indicate they have been selected.
• To select all points, press Ctrl+A (Mac users press Cmd+A).
A box is drawn around the points, and the points turn white to indicate they have been selected.
• To move a point along either the x or y axis only, drag the point to a new location.
• To move a point in any direction, Ctrl+drag (Mac users Cmd+drag) the point to a new location. You can also nudge points using the numeric keypad arrows.
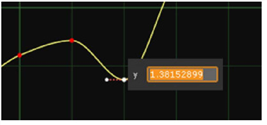
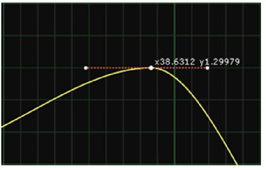
• To adjust the values of a point numerically, select the point and double-click on the x or y value that appears next to it.
• By default, when you move a point, its position on the x axis is rounded to the nearest integer. To disable this, you can right-click on the Curve Editor and select Edit > Frame Snap. You can also momentarily disable the snapping by pressing Shift while moving a point.
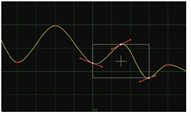
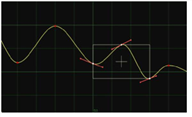
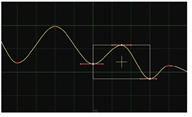
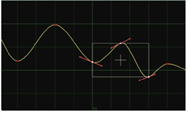
• To move several points at the same time, select them and drag the selection box to a new location.
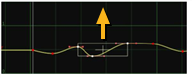
To add or remove points to or from the selection box, Shift+click on the points.
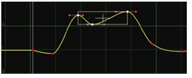
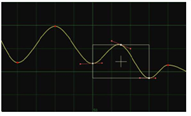
To resize and scale the selection box, drag its edges. If the selection box is very narrow, you can press Ctrl/Cmd when resizing it. This allows you to resize the box in one dimension only. For example, if you have a box that’s wide on the x axis but flat on the y axis, you can resize it in this way along the x axis.
To avoid accidentally moving a point inside the selection box, press Ctrl/Cmd+Shift when dragging the box to hide the points inside the box.
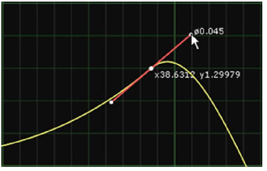
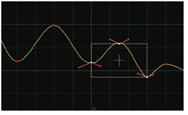
| 1. | Select a point on the curve. Red tangent handles appear on both sides of the point. |
| 2. | Drag the tangent handles to a new location. The curve follows the handles. |
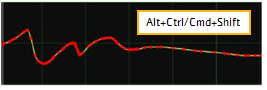
Press Alt+Ctrl+Shift (Mac users press Alt+Cmd+Shift) while drawing a curve on the editor. Nuke sketches a curve that follows your mouse movements.
| 1. | Right-click on the Curve Editor. |
| 2. | From the menu that opens, select Edit and the editing function you want to use on the entire curve, for example: |
• Edit > Copy > Copy Selected Keys to only copy the points you have currently selected.
• Edit > Copy > Copy Curves to copy an entire curve.
• Edit > Copy > Copy Expressions to copy the expression that creates the curve.
• Edit > Copy > Copy Links to copy a curve and keep its values linked to the original curve, so that if you change the original, your changes also affect the copied curve.
| 1. | Select all the points you want to move. |
| 2. | Right-click on the editor and select Edit > Move. The Move Animation Keys dialog opens. |
| 3. | In the x and y fields, define how you want to move the points along the x and y axes. For example, to shift the selected points to the right by a value of 10, enter x+10 in the x field. |
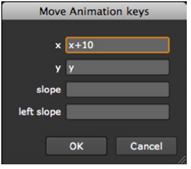
| 4. | In the slope and left slope fields, define how you want to move the points’ tangent handles. |
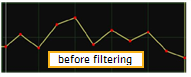
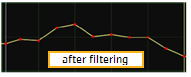
| 1. | Select the portion of the curve that needs smoothing. |
| 2. | Right-click on the editor and select Edit > Filter. The Filter Multiple dialog opens. |
| 3. | In the No. of times to filter field, specify how many times you want to filter the curve. Filtering sets new values on each point based on the average values of their neighboring points. The more filtering, the smoother the curve. |
| 1. | Select the point(s) between or around which you want to interpolate the curve. |
| 2. | Right-click on the Editor. Select Interpolation and the type of interpolation you want to use. Select |
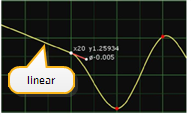
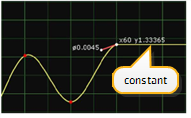
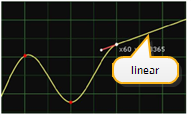
• Constant to force a constant value after each selected point.

• Linear to use linear interpolation. This produces sharp changes at key frames and straight lines between them.

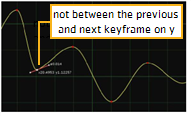
• Smooth to set the tangents’ slopes equal to the slope between the keyframe to the left and the keyframe to the right if the selected point is between these two key frames along the y axis. If the selected point is not between these key frames and has a larger or smaller value than both key frames, the tangents’ slopes are made horizontal. This ensures the resulting curve never exceeds the keyframe value.

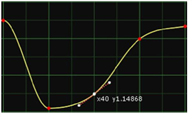
• Catmull-Rom to set the tangents’ slope equal to the slope between the keyframe to the left and the keyframe to the right regardless of where the selected point is located. The resulting curve can exceed the keyframe values.

• Cubic to set the slope so that the second derivative is continuous. This smooths the curve.

• Horizontal to make the tangents horizontal, setting the slope around the selected points to zero.
• Break to adjust the two tangents of a selected point independent of each other.
• Before > Constant or Linear to interpolate the parts of the curve that are on the left side of the first point. This option only works if you have selected the first point on the curve.

• After > Constant or Linear to only interpolate the parts of the curve that are on the right side of the last point. This option only works if you have selected the last point on the curve.
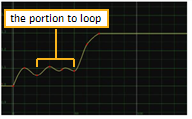
| 1. | Right-click on the editor and select Predefined > Loop. The Loop dialogue opens. |
| 2. | In the First frame of loop field, enter first frame of the portion you want to repeat throughout the curve. |
| 3. | In the Last frame of loop field, enter the last frame of the portion you want to repeat. |
| 4. | Click OK. |
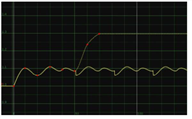
The shape of the curve between these frames is repeated throughout the rest of the curve. The solid line represents the actual curve, and the dotted line the original curve with the key frames.
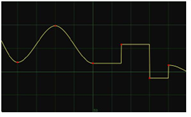
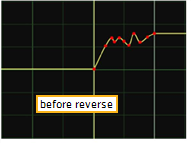
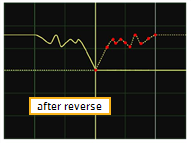
Right-click on the editor and select Predefined > Reverse.
This makes the curve go backward in time. Both the new curve and the original curve are displayed. The solid line represents the actual curve, and the dotted line contains the key frames that you can modify.
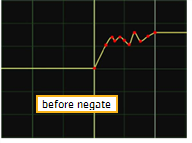
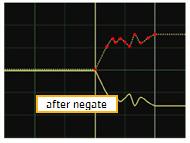
Right-click on the editor and select Predefined > Negate.
The curve becomes the negative of the key frames. For example, a value of 5 turns into -5. Both the new curve and the original curve are displayed. The solid line represents the actual curve, and the dotted line contains the key frames that you can modify.
Enter the expression in the expression field at the bottom of the Curve Editor,

OR
| 1. | Right-click on the Editor, and select Edit > Edit expression. |
| 2. | In the dialog that opens, type the expression you want to use for the curve, for example, sin(x)/x. |
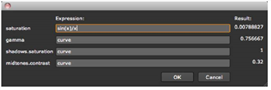
| 3. | Click OK. |