Open topic with navigation
Displaying, Adding, Editing, and Deleting LUTs
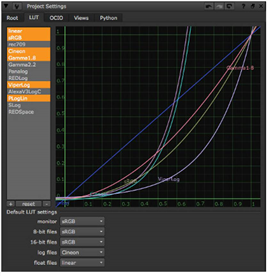
The LUT tab in the Nuke Project Settings allows you to view, add, edit, and delete LUTs.
To Display LUT Curves
|
1.
|
Select Edit > Project Settings to open the settings for the script. |
|
3.
|
From the list on the left, select the LUT you want to display in the curve editor. To select several LUTs, press Ctrl (Mac users press Cmd) while selecting the LUTs. All the selected LUTs are shown in the curve editor at the same time. |
To Create a New LUT
|
1.
|
Select Edit > Project Settings to open the settings for the script. |
|
3.
|
Click the plus button (+). A dialog opens. |
|
4.
|
Enter a name for the new LUT and click OK. |
|
5.
|
Adjust the lookup curve to suit your needs. Click on the curve to select it. Ctrl/Cmd+Alt+click to add points on the curve, and drag the points to a new position. To change the shape of the curve, adjust the tangent handles. |
The new LUT is now available in the global LUT settings, and the colorspace dropdown menu of Read and Write nodes’ properties panels, the Viewer controls.
To Edit LUTs
|
1.
|
Select Edit > Project Settings to open the settings for the script. |
|
3.
|
From the list on the left, select the LUT you want to edit. |
|
4.
|
Adjust the lookup curve to suit your needs. Click on the curve to select it. Ctrl/Cmd+Alt+click to add points on the curve, and drag the points to a new position. To change the shape of the curve, adjust the tangent handles. |
To use the usual editing commands, such as copy and paste, right-click on the curve editor and select Edit. Then, select the editing command you want to use, just like you would on any curve editor.
NOTE: Renaming existing LUTs is currently not possible. If you want to rename a LUT, you need to add and name a new LUT, copy the information from the old LUT into the new one, and then remove the old LUT.
To Reset the LUT Curves Back to Their Initial Default Shapes
|
1.
|
Select Edit > Project Settings to open the settings for the script. |
|
3.
|
From the list on the left, select the LUT you want to reset. To select several LUTs, press Ctrl/Cmd while selecting the LUTs. |
To Remove LUTs
|
1.
|
Select Edit > Project Settings to open the settings for the script. |
|
3.
|
From the list on the left, select the LUT you want to remove. Only remove LUTs that you have, for example, created by accident and are not using in your script. To remove the LUT, click the minus button (-). |
The LUT is removed from the LUT settings, and the colorspace dropdown menu of Read and Write nodes’ properties panels.
NOTE: If you remove a LUT that is used in a node, the node continues to refer to the LUT by name and raises an error.