the close up view as
shown in the figure on the right.
showing unwanted (gray)
transparency in the (white)
foreground.
Once you have picked the screen color and got the screen matte, you may wish to process this matte using the parameters in the Screen Matte group. The matte can be adjusted using clipping levels; it can be eroded or grown, despotted, and softened.
Consider this example. Having applied Keylight and picked the screen color, you have good edges to your matte but the background is showing through the foreground. You could fix this by tweaking the Clip White, but in doing so it ruins your edges. One way round this is a two stage key (another way is using Clip Rollback). In the first key, you process the screen matte using the clipping levels to give a harsh black and white matte, then soften and erode it. Switch View to Intermediate Result to output the original green screen with the eroded matte as an RGBA. Then, use this as the input to another Keylight node. In this second node, pick the screen color to give good edges but with transparent foreground. Don’t process this matte, instead use the input alpha channel to fix the transparent foreground. Just set Source Alpha in the Inside Mask folder to Add To Inside Mask.
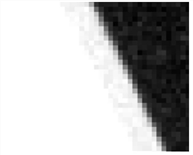
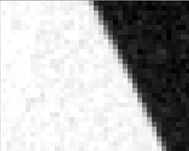
Pulling a screen matte (the figure on the left) typically produces lots of transparency (gray) in the matte at the edges. This is good since this is what you need to key hair well. You may also get transparency in the foreground as shown in the figure on the right. This is bad as your subject appear slightly see-through, and this should be corrected.
|
|
|
| Screen matte highlighting the close up view as shown in the figure on the right. |
Close up screen matte showing unwanted (gray) transparency in the (white) foreground. |
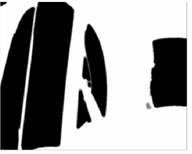
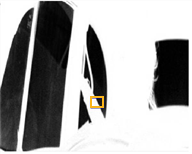
You can do this by connecting a matte into the third (InM) input, or you can use the Clip White parameter to turn these gray pixels white. This cleans up the foreground (the figure on the left) but it also destroys the edge detail you want to keep. This is where Clip Rollback comes in. This is used to put back the edges to restore the detail that was lost. A rather exaggerated clip rollback is shown in the figure on the right to illustrate the point.
|
|
|
| Clip White has been used to remove the unwanted gray pixels in the white matte. |
Clip Rollback has been used to restore the unwanted erosion of the edge. |
This control should not normally be used as eroding the edges can produce a very poor key. However, the Screen Dilate parameter allows you to grow (if greater than zero) or shrink (if less than zero) the alpha in the Screen Matte. These controls are sub-pixel accurate.
|
|
|
| Screen Matte. | Eroded Matte. |
Occasionally, it is useful to be able to blur the matte. Use Screen Softness for this. The most common example would be to pull a very harsh matte that you would use as an inside matte further down the tree. For this, you’d soften and erode the screen matte.
This controls how much to simplify the matte. It coagulates similar regions so that, for example, black specks in the white matte can be absorbed by the surrounding white areas. Increasing the Screen Despot Black removes isolated spots of black in the white matte. Increasing Screen Despot White removes isolated spots of white in the background up to that size.
|
|
|
| Eroded matte. | Despot. |