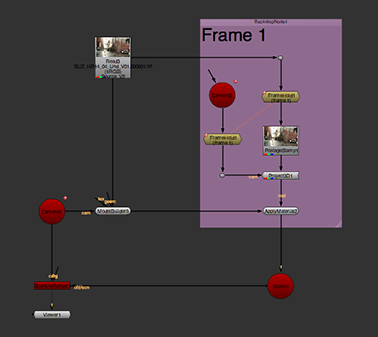
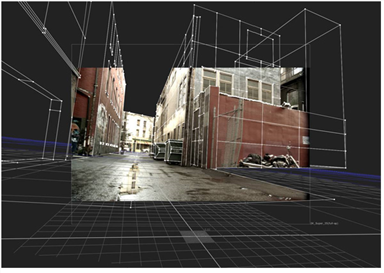
If your ModelBuilder model closely matches the original 2D footage, you can simply project the 2D footage onto the geometry. To do so:
| 1. | At the bottom of the ModelBuilder properties panel, set the bake menu to Projection and click Bake. |
This creates a projection at the current texture frame: a Project3D node with a FrameHold node set to lock the input image and camera to the texture frame. The Project3D node is also connected to the mat input of an ApplyMaterial node.
| 2. | To apply the projection to the geometry, connect the ModelBuilder node (or a geometry node created by baking Selected geometry) to the ApplyMaterial node’s unnamed input and view the result. |
TIP: To texture your geometry on more than one frame, you can bake Projection on several frames and use Roto nodes to mask things out before combining the Project3D nodes using a MergeMat node. Then, connect the MergeMat node to the ApplyMaterial node’s mat input and ModelBuilder to its unnamed input. Connect a Viewer to the output of ApplyMaterial and view the results.
TIP: The options in the bake menu are implemented in Python, and you can also use Python to add your own entries to the menu. To see how the built-in options have been implemented, have a look at the modelbuilder.py module in the nukescripts folder of your installation (for more information on the location of this file, see Viewing More Examples). Then, to create your own menu options, edit the modelbuilder.py file and use the populateBakeMenu function to add entries where it says "# Add your own entries here, if desired".