Open topic with navigation
Timeline Environment Project Settings
A good place to start work is by defining default Project Settings before importing sequences, particularly in the case of EDLs as they may not contain frame rate information. Project Settings only apply to the current project and override Preferences settings.
NOTE: You can modify Project Settings later on, for example, when you’re ingesting media.
To define Project Settings:
|
1.
|
Navigate to Project > Edit Settings. |
The Project Settings dialog displays.
|
2.
|
Click the General sub-menu to set the project Name. |
|
3.
|
Click the Sequence sub-menu to set the default timeline Output Resolution, Frame Rate, and Start Timecode. |
|
4.
|
Click the Views sub-menu to set up multi-view or stereo projects. See Stereoscopic Projects for more information. |
|
5.
|
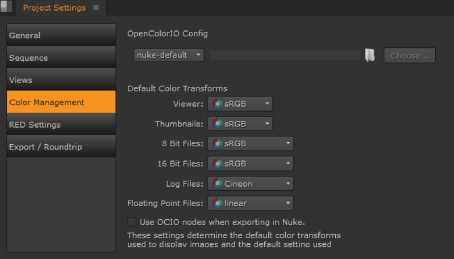
Click the Color Management sub-menu to manage the display and file colorspaces for the project. |
|
6.
|
If you're using an OCIO config file, enter the file path or click Choose to locate the config file using the browser. |
|
7.
|
Use the dropdown menus to define how clips in the Viewer, thumbnails, and so on are displayed. |
|
8.
|
Check Use OCIO nodes when exporting in Nuke to force Nuke to use the LUTs read from the OCIO config file specified, rather than the Nuke native LUTs, during exports. This adds the relevant OCIO nodes to the script on a per project basis. |
TIP: Enable this option in Preferences > Project Defaults > Color Management > Export to apply it to all new projects.
|
9.
|
Click the RED Settings sub-menu to define the Default Video Decode Mode for new R3D files in the current project. This setting overrides the Preferences > Behaviors > File Handling > default red clip video decode mode control for existing projects. SeeAppendix A: Preferences for more information. |
NOTE: Changing this setting does not change the decode setting for R3D media that has already been imported.
The dropdown contains a sliding resolution scale from FullPremium to SixteenthGood, but bear in mind that higher resolutions are slower to decode.
|
10.
|
Lastly, click the Export/Roundtrip sub-menu to select the default Shot Preset to use when you select Create Comp from the timeline. See Create Comp for more information. |