Icon
Function
Description
![]()
Layers
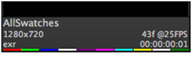
Select the layer to output to the Viewer, for example forward motion vectors or disparityL. Only layers available in the clip are displayed - check the clip’s thumbnail to see at a glance which layers are present:
 - red color layer.
 - green color layer.
 - blue color layer.
 - alpha layer.
 - depth layer.
 - forward motion vector layers.
 - backward motion vector layers.
 - all other custom layers, such as disparity.
NOTE: You can scroll through available layers using PgUp or PgDn.
![]()
Channels
Select the channel(s) to output to the Viewer, for example RGB, single channel, Alpha, or Luma.
![]()
Viewer color
transform
Set the colorspace used to display images in the Viewer, for example sRGB and rec709.
NOTE: If you have specified an OpenColorIO configuration file in the Preferences, you may have more colorspace choices available.
A/B
Viewer
Output
Click the A or B dropdown and select what you want to view. This can be selected tracks or tracks with selected tags.
When both Viewer buffers contain an image, enable wipe to compare the two images. You can also use the center drop down to set the blend mode between images in the Viewer, for example Onion Skin or Difference, and the A/B buffer configuration.
![]()
Guides
Enable or disable Viewer overlays:
• title safe - any text intended for the audience should reside within this zone.
• action safe - any visual elements intended for the audience should reside within this zone.
• format center - adds a crosshair in the center of the format currently in the Viewer.
• Format - adds a red, format-dependent box for the clip or sequence in the Viewer. Sequences support multi-format clips, see Viewing Multi-Format Timelines for more information.
![]()
Mask
Enable or disable a range of Viewer masks, for example 16:9 or 1.85:1.
![]()
Clipping
Enable or disable Viewer warnings:
• No Warnings - all clipping warnings are disabled.
• Exposure - alerts you when the image is under (blue) or over (red) exposed.
![]()
Annotations
Click to enable the Annotations tool bar. Annotations allow you draw and add text to clips in the Viewer. See Annotations for more information.
NOTE: The Annotations button also controls existing annotation visibility.
![]()
ROI
Click and drag to define a Region of Interest (ROI) in the Viewer. The scopes only display information within the ROI, when active.
![]()
Pause
playback caching
Pause or release Viewer playback caching, indicated by the green bar under the Viewer.
Scale
Set the scale applied to the clip in the Viewer, for example 25%, 75%, or Fit.
Image Quality
Set the Viewer image quality, for example 1:1, 1:4, or 1:16. The default setting, Auto, resizes the image dependent on the Viewer zoom level, which may re-cache the image at a higher resolution.
NOTE: Image quality, or proxy, for RED clips is dependent on the clip’s Decode Resolution in the Media panel.
For example, if you're viewing a 4K file and the Decode Resolution is set to Half Premium, a 1:1 proxy value is equal to 2K, 1:2 is equal to 1K, and so on.
![]()
Non RT Playback
Sets the Viewer playback mode:
• Play All Frames - the default setting, plays all frames in real-time (dependent on hardware).
• Skip Frames - plays frames in real-time skipping where necessary to maintain the frame rate.
• Play All Frames, Buffering - plays all frames by buffering and playing frames back as they become available.
See through missing media
When disabled, any offline media on a timeline is treated as a blank clip so the Viewer cannot display the track underneath. This setting also applies to missing frames within a clip.
NOTE: This control only affects the current Viewer.
View
Select the Viewer display mode, for example Audio and Video or Video Only.
Obey Alpha
Allows you to control the alpha channel independent of the Viewer Blend Mode.
• Enabled - any alpha channel present in the image is treated as premultiplied transparency.
• Disabled - the alpha channel is ignored.
Audio latency
Sets the audio latency, in milliseconds, for the current Viewer only. Audio latency allows you to correct audio and video synchronization by changing the point at which audio playback starts.
Positive values cause the audio track to start earlier in relation to the video track, and vice versa.
![]()
Gain
Adjusts the gain applied to the linear input image before viewing, but doesn’t affect your exported image.
![]()
Gamma
Adjusts the gamma applied to the image after the viewing transform, but doesn’t affect your exported image.
![]()
Mute / Audio
Click to mute audio output for the current Viewer or use the slider to control the audio output level.
TIP: You can also control volume on a per track and per track item basis. See Audio and the Timeline for more information.
![]()
Color
Sample
Enable or disable the RGBA color information bar in the Viewer.
NOTE: The Color Sample tool displays color information from the source file, not the colorspace selected in the Viewer color transform dropdown.
See Working with Colorspaces for more information.