Fine-Tuning Disparity Vectors
The Vector Generation controls fine-tune the vectors output from the C_DisparityGenerator, which can help to iron out artifacts that may be present when you use vectors in C_NewView or C_StereoColourMatcher, or when you're warping images.
Note: C_DisparityToDepth, C_NewView, C_StereoColourMatcher, and C_VerticalAligner, are not included in NukeX. For more information see the CaraVR online help.
Vector Detail
Adjusts the density of the calculated disparity vectors. Higher detail picks up finer disparity changes, but take longer to calculate.
Strength
Sets the strength applied when matching pixels between views. Higher values allow you to accurately match similar pixels in one image to another, concentrating on detail matching even if the resulting disparity map is jagged. Lower values may miss local detail, but are less likely to provide you with the odd spurious vector, producing smoother results.
Often, it is necessary to trade one of these qualities off against the other. You may want to increase Strength to force the views to match where fine details are missed, or decrease it to smooth out the disparity map.
|
|
|
|
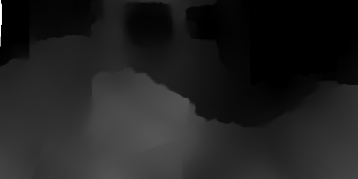
Low Strength values smooth the
disparity map, |
High Strength values add detail, but can cause |
Consistency
Sets how accurately the same points in the left and right views are mapped to each other. Increase the value to force the left and right disparity vectors to match.
Smoothness
Controls how image edges are used as clues for sharp transitions in depth in the scene. The higher the value, the smoother the transition between depths at edges in the image.
|
|
|
|
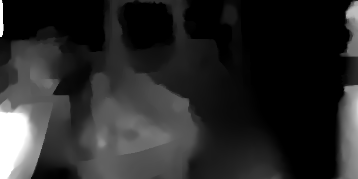
Low Smoothness can produce better
depth |
High Smoothness produces smoother
disparity |
Fine-Tuning Occlusions
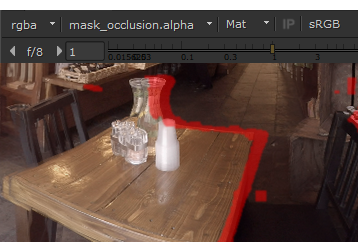
Occlusions occur when some pixels are not visible in the source view, and therefore cannot be used to correct the target view. C_DisparityGenerator creates a mask_occlusion channel at the same time as generating vectors, which can then be used by downstream nodes to improve the result.
To view occlusions between views, switch the Viewer channels alpha dropdown to mask_occlusion and set the display style to matte overlay (or press M over the Viewer).
The controls on the Occlusions tab allow you adjust how the occlusions are marked:
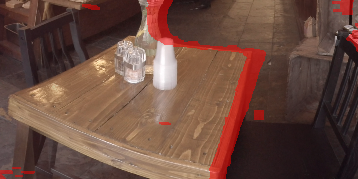
• Gradient Threshold - measures the change in depth from horizontal disparity. You can use the Gradient Threshold control to define where occlusions occur at depth changes. The lower the gradient threshold, the greater the number of occluded regions.
|
|
|
|
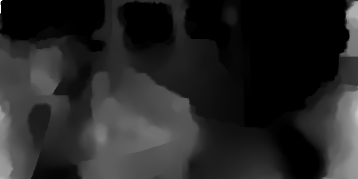
Low Gradient Threshold. |
High Gradient Threshold. |


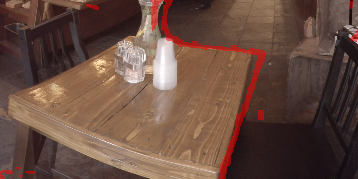
• Consistency Threshold - allows you to set occlusions where the left and right disparities are not consistent. A low Consistency Threshold value, detects more inconsistencies.
|
|
|
|
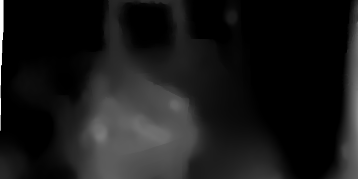
Low Consistency Threshold. |
High Consistency Threshold. |

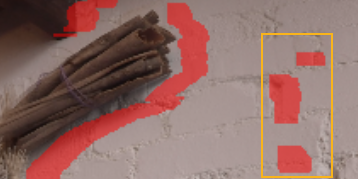
• Dilate Occlusions - expands or contracts the occluded regions by a specified number of pixels. The maximum you can dilate the occlusions by is 20 pixels.
|
|
|
|
Low Dilate Occlusions. |
High Dilate Occlusions. |

Editing Occlusion Masks
If there are occluded regions in the mask, which you know have not been marked correctly, you can manually edit the mask manually. For example, areas on flat surfaces facing the camera.
To edit and occlusion mask:
| 1. | Add a RotoPaint node after C_DisparityGenerator. |
| 2. | To add regions to the occlusion mask, set output to mask_occlusion in the RotoPaint controls, and use the paint tools to mark additional regions. |
| 3. | To remove or correct existing occluded regions, set output to mask_occlusion in the RotoPaint controls, and set the paint brush color to black to manually paint out or correct the occluded areas. |