Creating Channels and Layers
It’s important to understand that many types of nodes allow you to direct their output to a specific channel and parent layer. You have the option of processing these channels in each subsequent node, or leaving them unchanged.
Many nodes feature an output or channels setting, which lets you direct the output of the current node to a specific layer and channel. You can also use the output or channels dropdown menu to create new layers and channels.
Some nodes do not include an output or channels setting in their parameters. For these, you can connect other nodes, such as Channel Copy or Shuffle, to create and manage channel output in the node tree.
To Create a New Layer and/or Channel
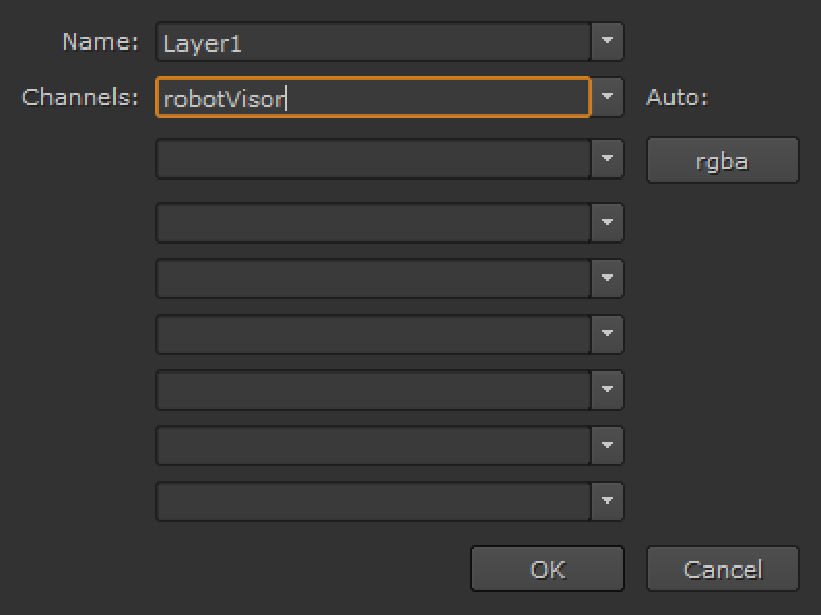
| 1. | Open the properties panel for the node whose output creates the new channel. |
| 2. | From the output or channels dropdown menu, select new. |
| 3. | Under Name, enter the name of the layer, and under Channels the new channel name. |
Note: You can either use a new layer name to create a new layer, or enter a layer you’ve created previously. You can’t create new channels into layers that are built into Nuke (such as mask).
| 4. | Click OK. |
Note: You can also create new channels with the Shuffle node. See Shuffling Channels for more information.
Reserved Channels
Nuke reserves certain channel names for internal use to ensure the smooth running of scripts under the hood. If you create a custom channel with a reserved channel name, the custom name is renamed automatically to preserve this functionality. For example, if you create a custom channel called mask.a, the channel is renamed mask_extra.
The reserved channels are:
rgba.red, rgba.green, rgba.blue, rgba.alpha
depth.Z
forward.u, forward.v
backward.u, backward.v
deep.front, deep.back
disparityL.x, disparityL.y, disparityR.x, disparityR.y
mask.a
rotopaint_mask.a
mask_planartrack.a
mask_splinewarp.a