Making Tonal Adjustments
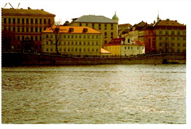
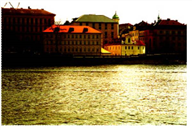
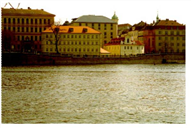
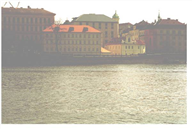
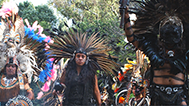
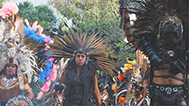
Defining tonal range (the black point, white point, and neutral value) is typically the first step in color correcting a clip. Tonal range adjustments often improve contrast, but more importantly, they set the stage for subsequent color corrections by properly dividing the colorspace into shadow, midtone, and highlight regions.

|

|
| Before tonal adjustment. | After tonal adjustment. |
Several of Nuke’s color correction effects offer tonal adjustment tools. Of these, Grade and Histogram are probably the most intuitive to operate.
Sampling White and Black Points
The Grade node lets you define white and black points by sampling pixels from a Viewer frame.
To Define Tonal Range with the Grade Node
| 1. | Click Color > Grade to insert a Grade node at the appropriate place in your script. |
| 2. | Connect a Viewer to the output of the Grade node so you can see the effect of your changes. |
| 3. | In the Grade properties panel, use the channels dropdown menu to select the channels you wish to process. |
| 4. | Click the blackpoint parameter’s color swatch. |
The eye dropper icon appears.
| 5. | In the Viewer, press Ctrl/Cmd+Shift while clicking on the pixel you want to define as the black point (typically the darkest pixel). |
| 6. | Click the whitepoint parameter’s color swatch. The eye dropper icon appears. |
| 7. | In the Viewer, press Ctrl/Cmd+Shift while clicking on the pixel you want to define as the white point (typically the lightest pixel). |
Tip: You can discard sampled pixels by Ctrl/Cmd+right-clicking in the Viewer.
Making Basic Corrections
Adjustments to contrast, gamma, gain, and offset often comprise the bulk of the work in color correction. Some artists prefer to makes these adjustments via sliders; others prefer curves (which represent the range of color values in an image.) Nuke’s ColorCorrect and ColorLookup nodes offer tools to suit either preference.
See Using ColorCorrect Sliders or Using ColorLookup Curves
|
|
|
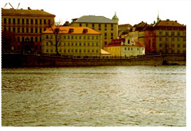
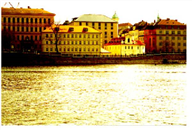
| Original. | Contrast boost. |
|
|
| Original. | Gain boost. |

|

|
| Original. | Gamma boost. |
|
|
| Original. | Offset boost. |
Using ColorCorrect Sliders
The ColorCorrect node is particularly convenient for making quick adjustments to contrast, gamma, gain, and offset. A single window houses sliders for all these basic corrections and allows you to apply these to a clip’s master (entire tonal range), shadows, midtones, or highlights.
To Adjust Contrast, Gain, Gamma or Offset with the ColorCorrect Node
| 1. | Click Color > ColorCorrect (or press C) to insert a ColorCorrect node at the appropriate place in your script. |
| 2. | Connect a Viewer to the output of the ColorCorrect node so you can see the effect of your changes. |
| 3. | In the ColorCorrect properties panel, use the channels dropdown menu to select the channels you wish to process. |
| 4. | Drag the slider appropriate to the region you want to affect an operation you want to apply. |
For example, to brighten the images highlights, you would drag on the highlights gain slider.

Remember too that you can use the color sliders to apply any of the corrections on a per channel basis.
| 5. | On the Ranges tab, enable test to show what is considered to be in the shadows, midtones, or highlights. |
This overlays the output with black (for shadows), gray (for midtones), or white (for highlights). Green and magenta indicate a mixture of ranges.
|

|
|
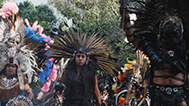
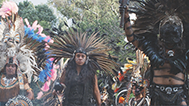
Original image. |
With test enabled. |
| 6. | Still on the Ranges tab, you can use the shadow and highlight lookup curves to edit the range of the image that is considered to be in the shadows or highlights. You can also look up color information for the current pixel in the Viewer. |
To return a curve to its default values, select it and click reset.
Warning: Do not adjust the midtone curve. Midtones are always equal to 1 minus the other two curves.
| 7. | To control how much of the original luminance is preserved after the color correction, enable and adjust mix luminance. A value of 0 means the altered luminance is used in the output image. A value of 1 produces a luminance value close to that of the original input image. |
|
|
Original image. |
|
|
|
Mix luminance set to 0. |
Mix luminance set to 1. |
Note: When mix luminance is set to 1, the resulting luminance value is close to the original luminance, but not exactly the same. The difference may vary depending on the color corrections applied to the source image.
Adjusting Black Levels with the Toe Node
Toe lifts the black level, in a similar way to gain controls, but with a roll-off so that whites are mostly not affected.
| 1. | Click Color > Toe to create a Toe node. Connect it to the image whose black levels need adjusting. |
| 2. | Adjust the lift slider to change the black values to the specified gray value, without affecting any original white values of the image. |
| 3. | If necessary, you can limit the effect to a particular channel with the channels controls. |
| 4. | If you need to, you can pick a channel in the (un)premultby dropdown to divide the image first with that channel and then multiply it again afterward. Doing this can sometimes improve your color correction results on anti-aliased egdes. |
| 5. | You can also use the mix control to dissolve between the original input (value 0) and the full effect of the Toe node (value 1). If you only want to use one channel for mixing, you can specify that using the mask control. |
Using ColorLookup Curves
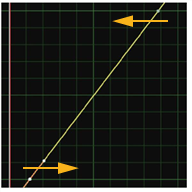
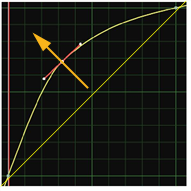
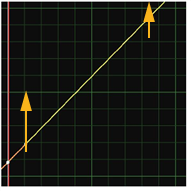
If you prefer to work with color curves, you can use the ColorLookup node to make contrast, gamma, gain, and offset adjustments (and, in fact, many others). Color curves refer to line graphs of a given color channel’s brightness. The horizontal axis represents the channel’s original, or input, values, and the vertical axis represents the channel’s new, or output values.
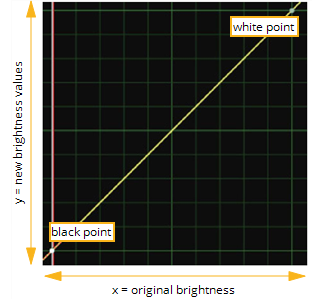
As Figure shows, you can edit the ColorLookup node’s color curves to make all of the types of corrections that are possible through the ColorCorrect node - and you can generally make these corrections with more flexibility and precision than is possible with sliders.
|

|
| Corrections through the ColorLookup node’s color curves: Contrast boost. |
Corrections through the ColorLookup node’s color curves: Gain boost. |
|
|
| Corrections through the ColorLookup node’s color curves: Gamma boost. |
Corrections through the ColorLookup node’s color curves: Offset boost. |
To Make Basic Corrections with the ColorLookup Node
| 1. | Click Color > ColorLookup to insert a ColorLookup node at the appropriate place in your script. |
| 2. | Connect a Viewer to the output of the ColorLookup node so you can see the effect of your changes. |
| 3. | In the ColorLookup properties panel, click red, green, blue, or alpha if you want to limit the subsequent operations to a particular channel. |
You can select multiple curves in order to edit one curve with reference to another. Otherwise, select the master curve (which represents all channels).
| 4. | To speed up the color calculation, the ColorLookup node uses a precomputed lookup table between 0 and the value specified in the range field. You can adjust the range value, or uncheck the use precomputed table box if necessary to tell ColorLookup to not use a precomputed table. |
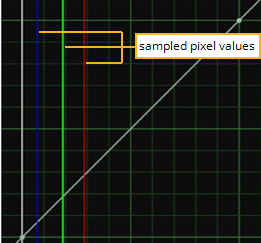
| 5. | In the Viewer, drag the cursor over the pixels you want to sample for the correction. In the ColorLookup properties panel, press Ctrl+Alt (Cmd+Alt on a Mac) while clicking on the curve to set points at the places where the red, green, and blue lines intersect with the color curve. |
|
|
| Viewing values from a sampled color. |
| 6. | Edit the position of the points and adjust the tangent handles to adjust the curve shape for the color correction. |
As an alternative to steps 4 and 5, you can use the source control to pick a source color for adding points. Then, use target to pick a destination color. Finally, do one of the following:
• Click Set RGB to add points on the red, green, and blue curves, mapping source to target.
• Click Set RGBA to add points on the red, green, blue, and alpha curves, mapping source to target.
• Click Set A to add points on the alpha curve, mapping source to target.
You can use these controls to match shadow, midtone, and highlights on two plates, for example. Set source to shadow rgb in one, target to shadow rgb in the other, then press Set RGB. Same for midtone and highlight areas.